Products
In this section, users can find product dashboards for every product. In these specific sections, users can visualize detailed information about each product's usage, control integration, and access functionalities that visually enable the creation of tools for managing each of them.
Decentralized Timestamping
The Decentralized Timestamping product ensures data integrity through a tamper-proof system to securely seal information fingerprints. This process verifies data existence by leveraging permissionless distributed ledgers. To delve deeper into this product, you can review the Decentralized Timestamping section.
In this section of BLOOCK's management, you can access general metrics regarding the usage of this product, such as the number of records generated or data transacted during this payment period, the number of validation requests (validating transacted data), and the upcoming anchor time to be transacted.
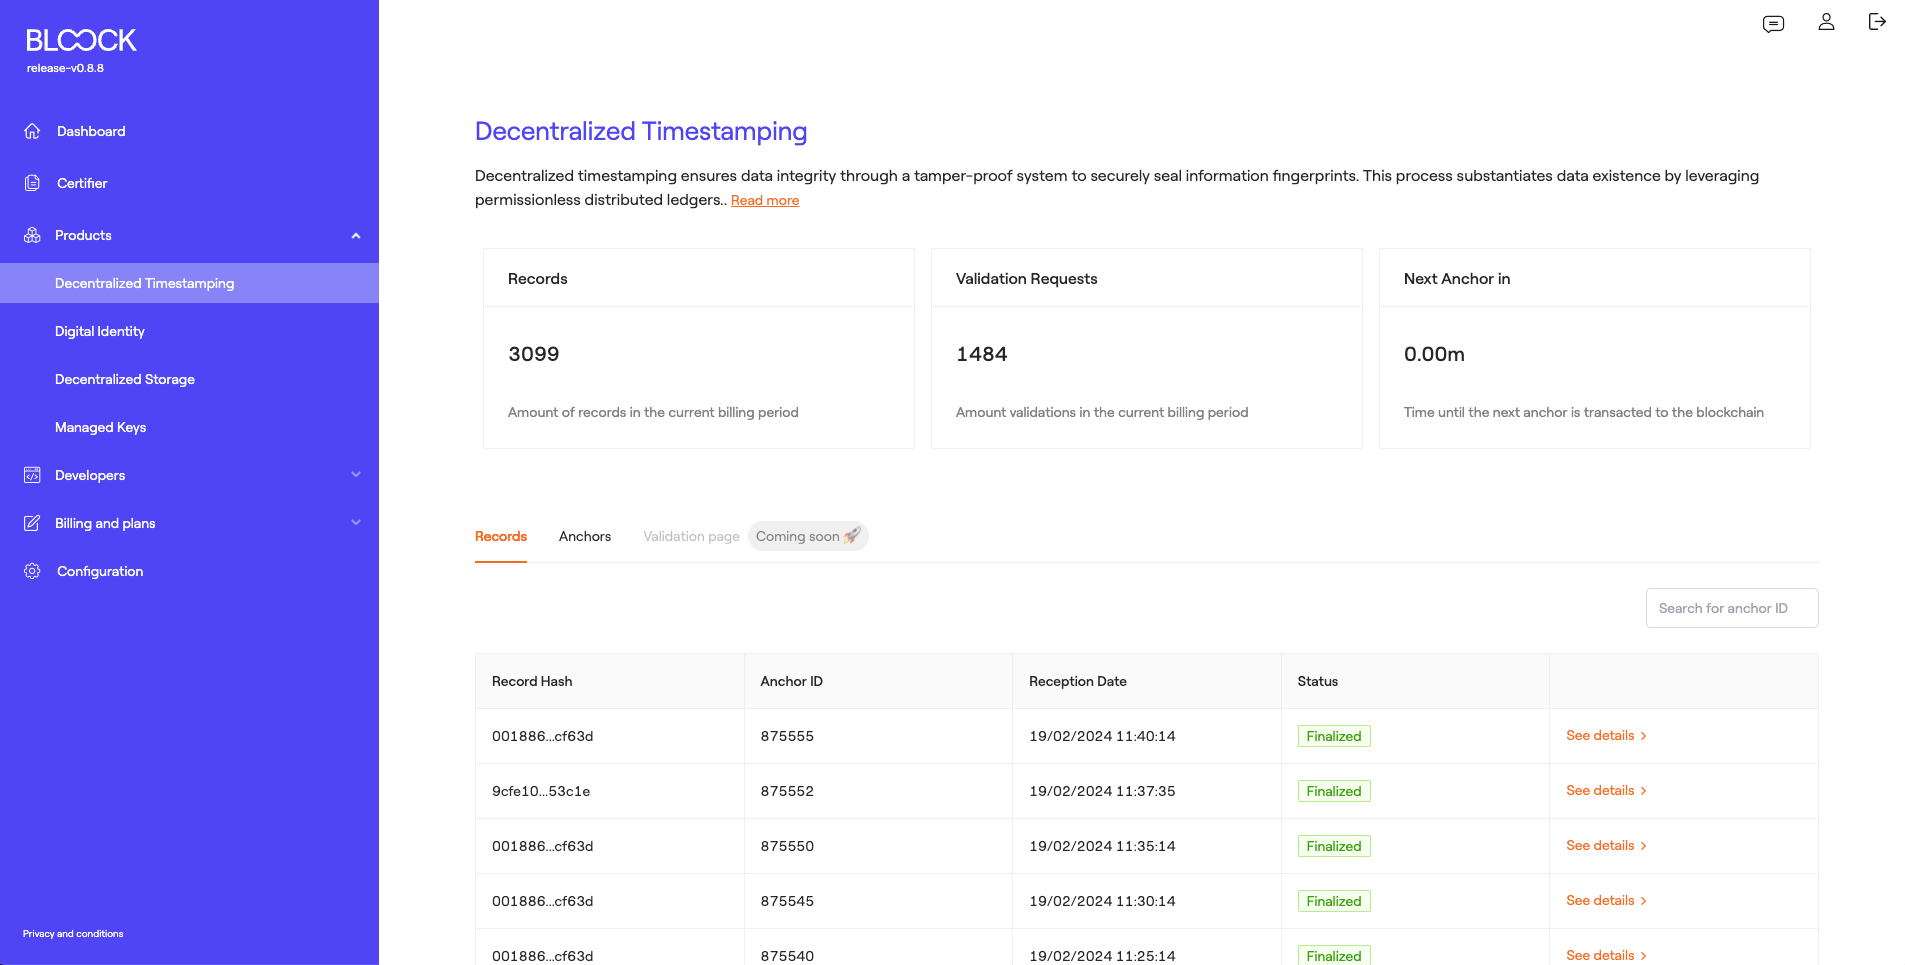
Records
At the bottom of this section, user can find each of the transacted records for the user, along with reference information: the data hash, the anchor ID on which it was transacted, the date of data reception, and its status. At this point, you can view more details about that specific record.
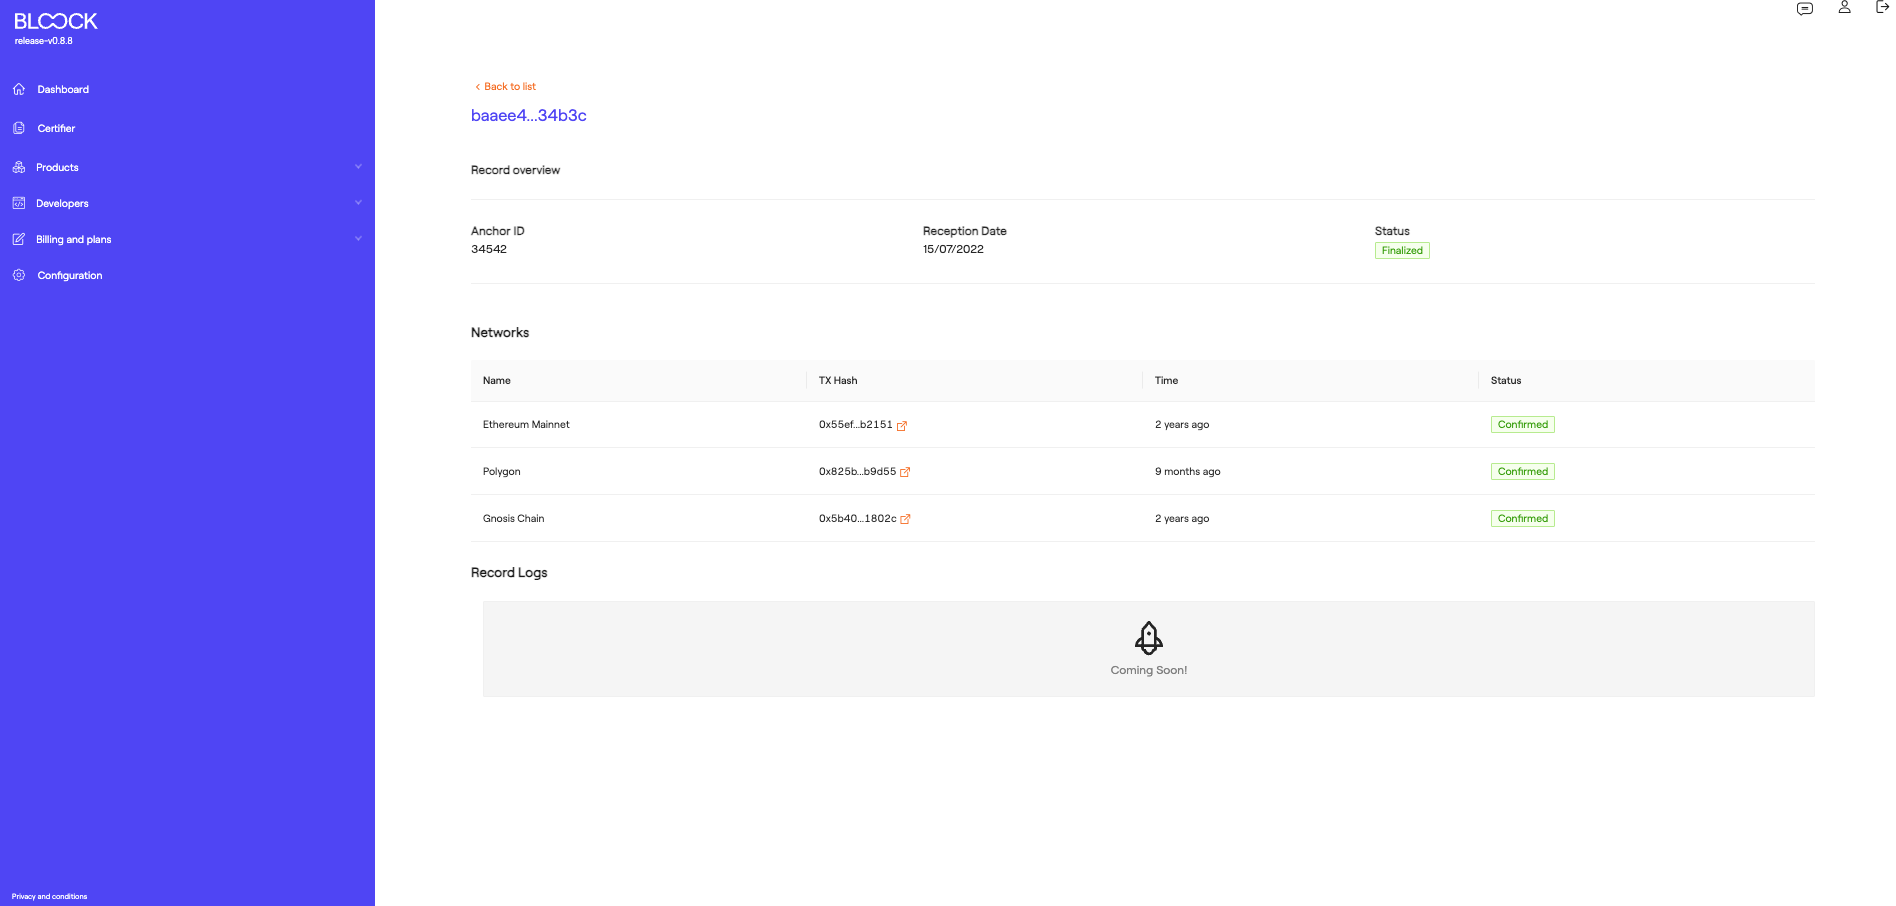
On the record detail page, you can see general information about it as well as the networks on which it has been transacted (Your data fingerprints will be sent to Polygon, Gnosis, and Ethereum simultaneously).
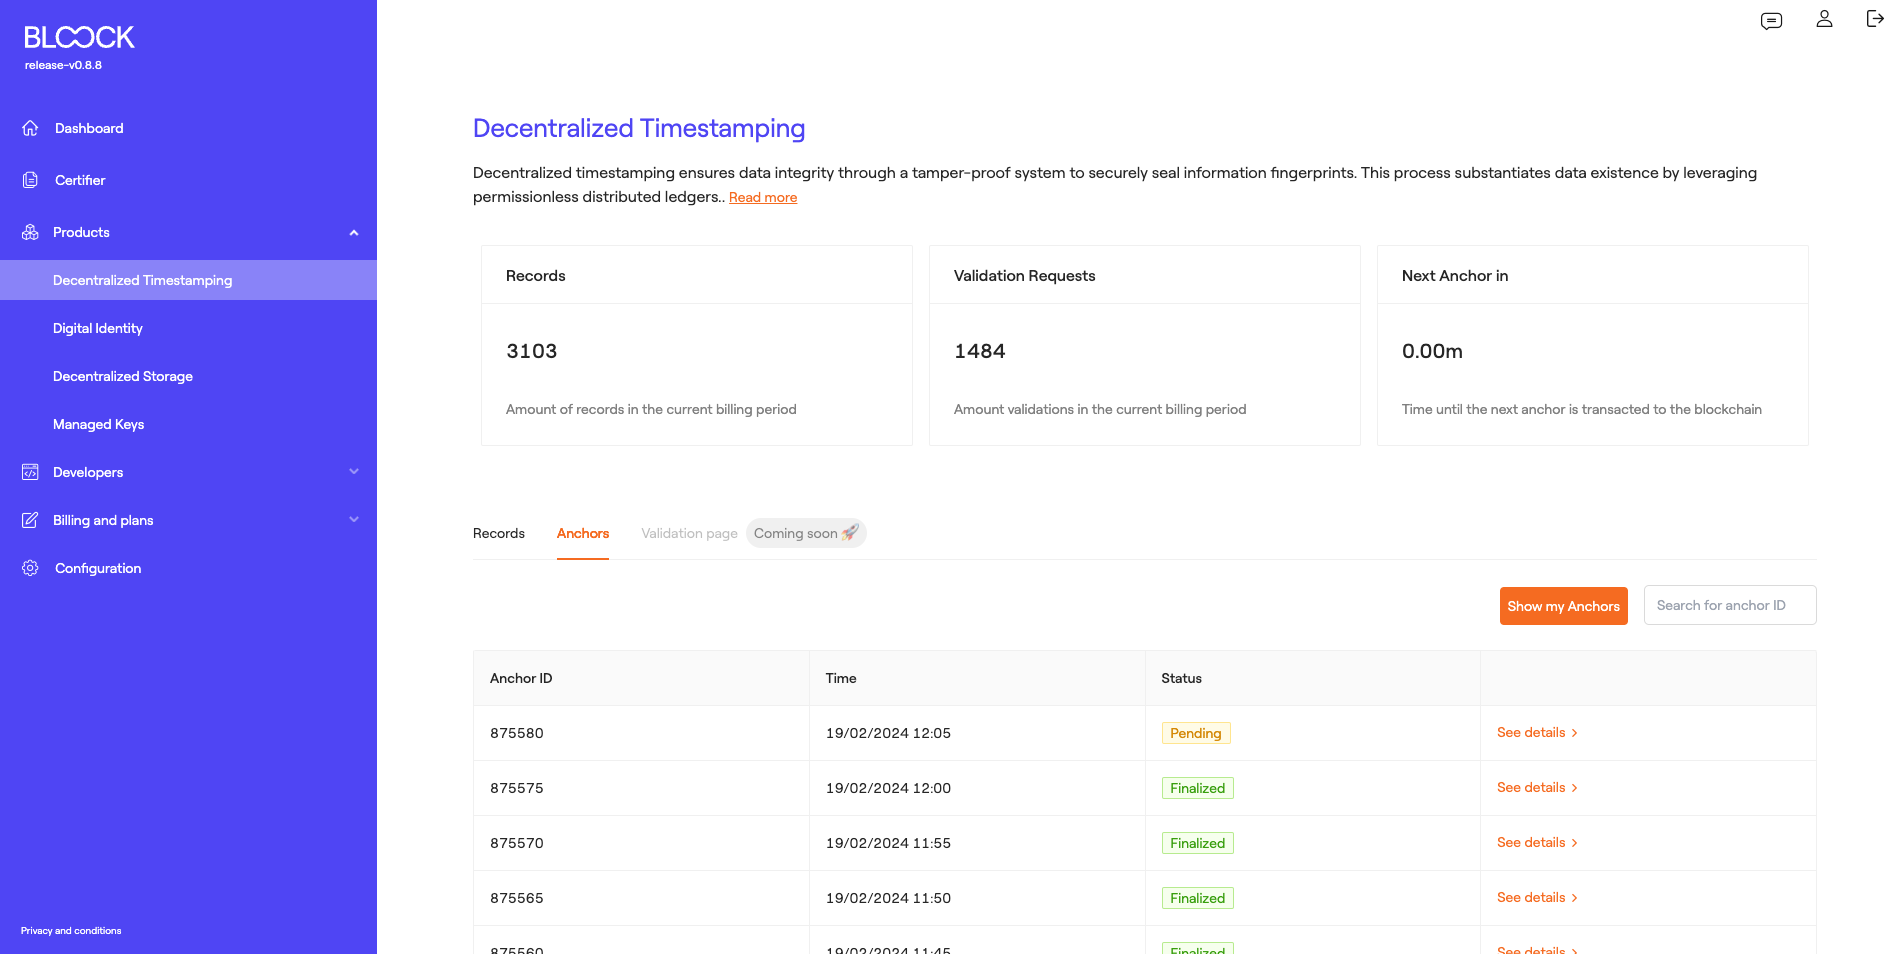
Anchor
In the following tab, we can find information about the anchors that are being transacted. It is important to note that users can specifically view the anchors in which they have transacted information. In this section, we can find the Anchor ID, the moment the transaction took place, and its status.
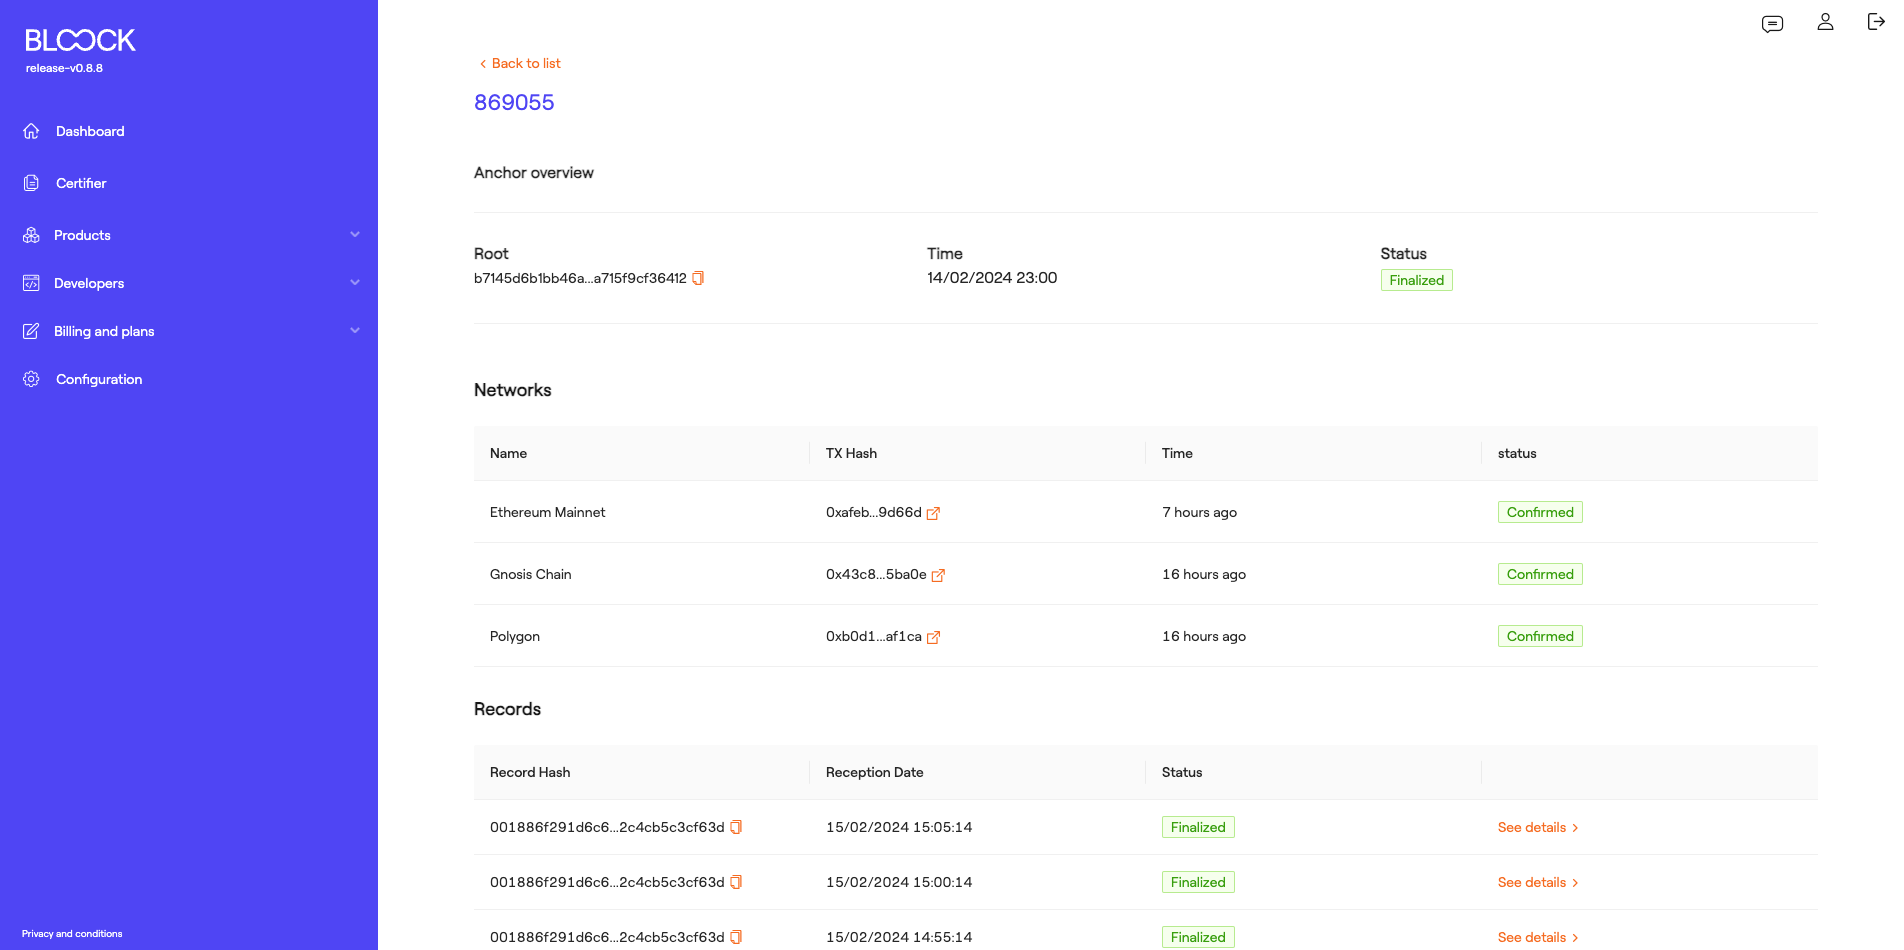
Also, users can find detailed information about each of these anchors, such as general information, networks on which it has been transacted, the time and status of the transaction, as well as the Transaction hash on this specific network and a link to the specific explorer of each network. At the bottom of the anchor detail page, we can see the records in which the user has participated within that anchor.
Digital Identity
Self-sovereign identity (SSI) capabilities enable secure, undeniable, and privacy-preserving authentications that can be reused across multiple platforms. For more information about this product and its integration, you can review the Digital Identity section.
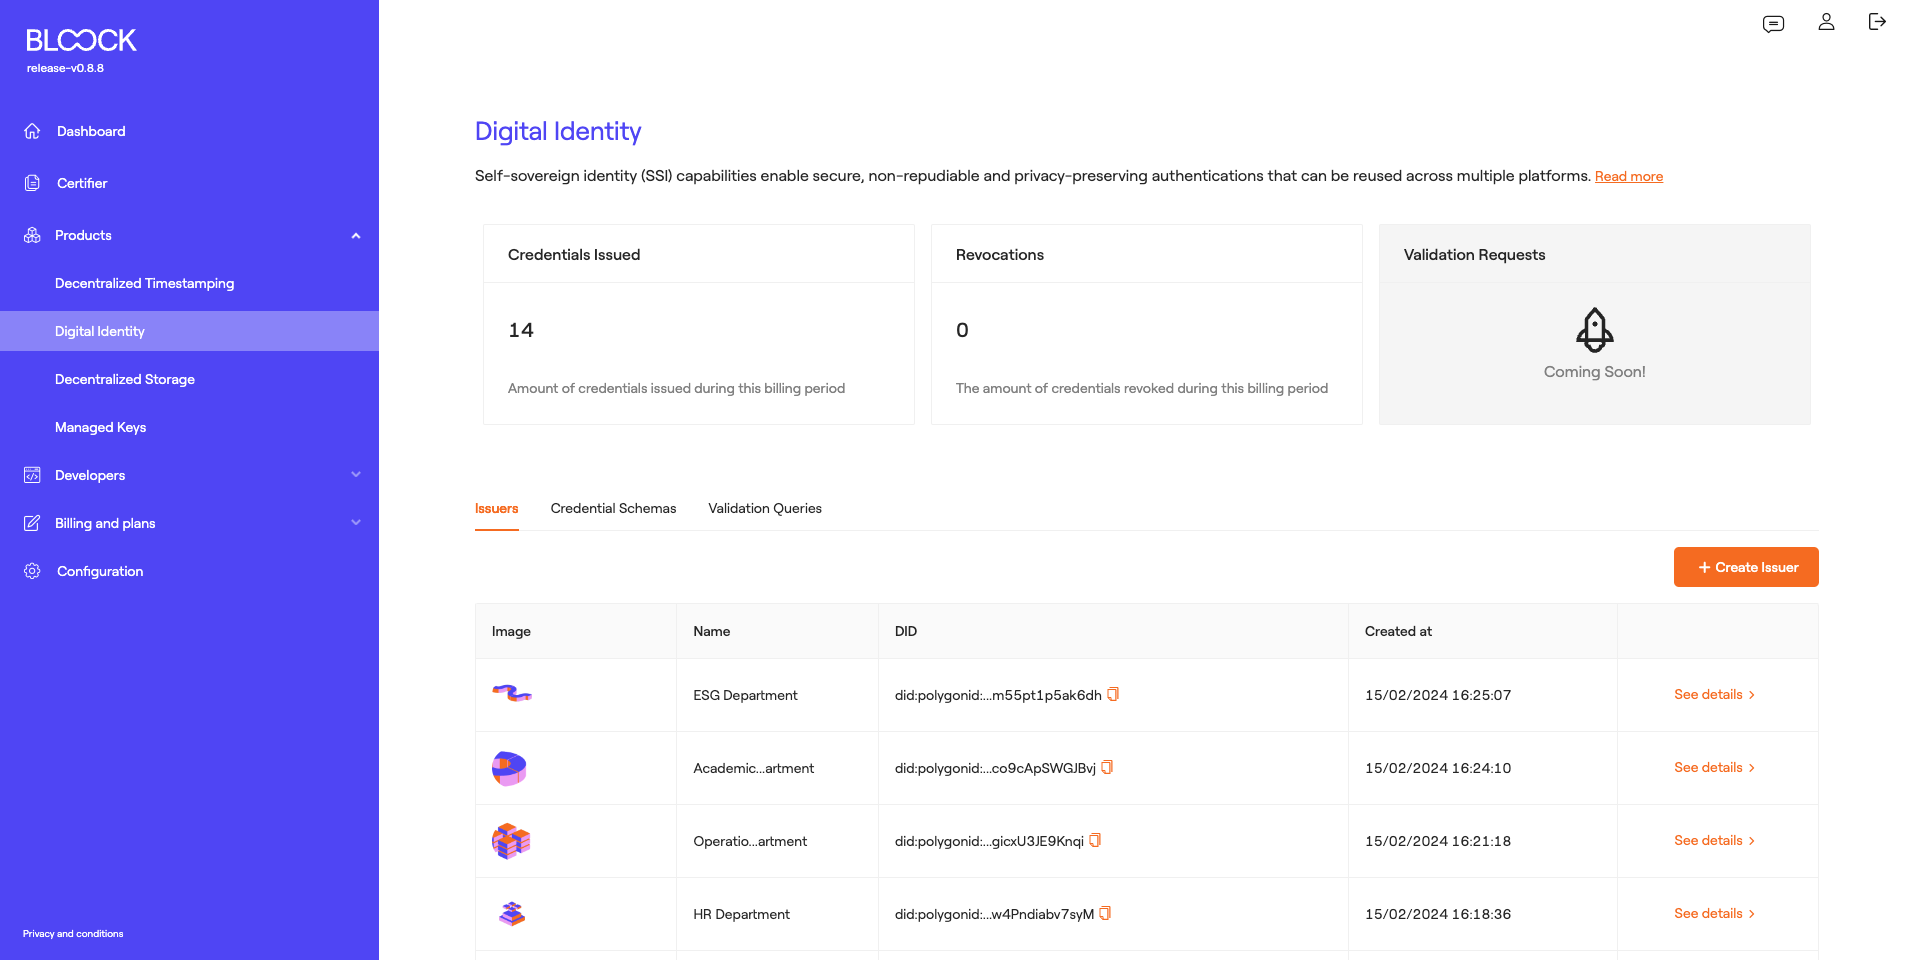
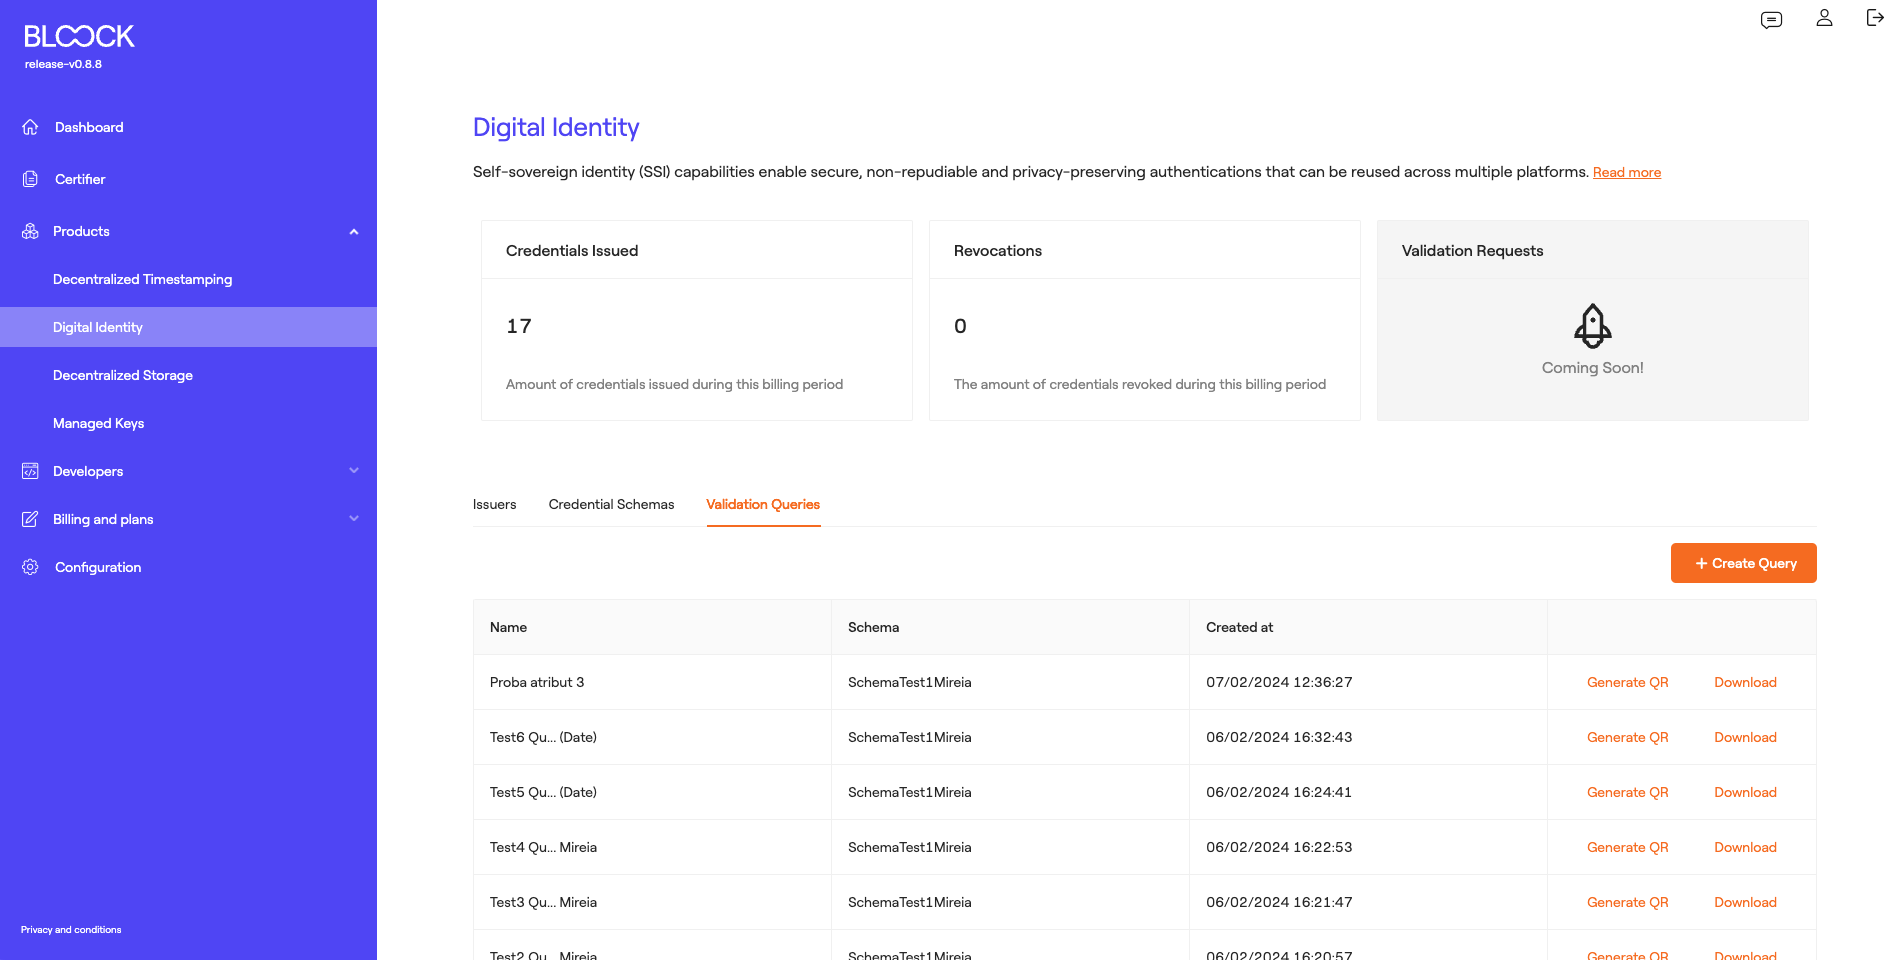
In this section of BLOOCK's management, users can access general metrics regarding the usage of this product, such as the number of credentials issued during this billing period and the number of credential revocations.
Issuers
At the bottom of the Digital Identity homepage, we can find the Issuers tab where we can review the different issuers generated and information pertaining to them, including the issuer's avatar, name, DID (Unique identifier of this issuer), and creation date.
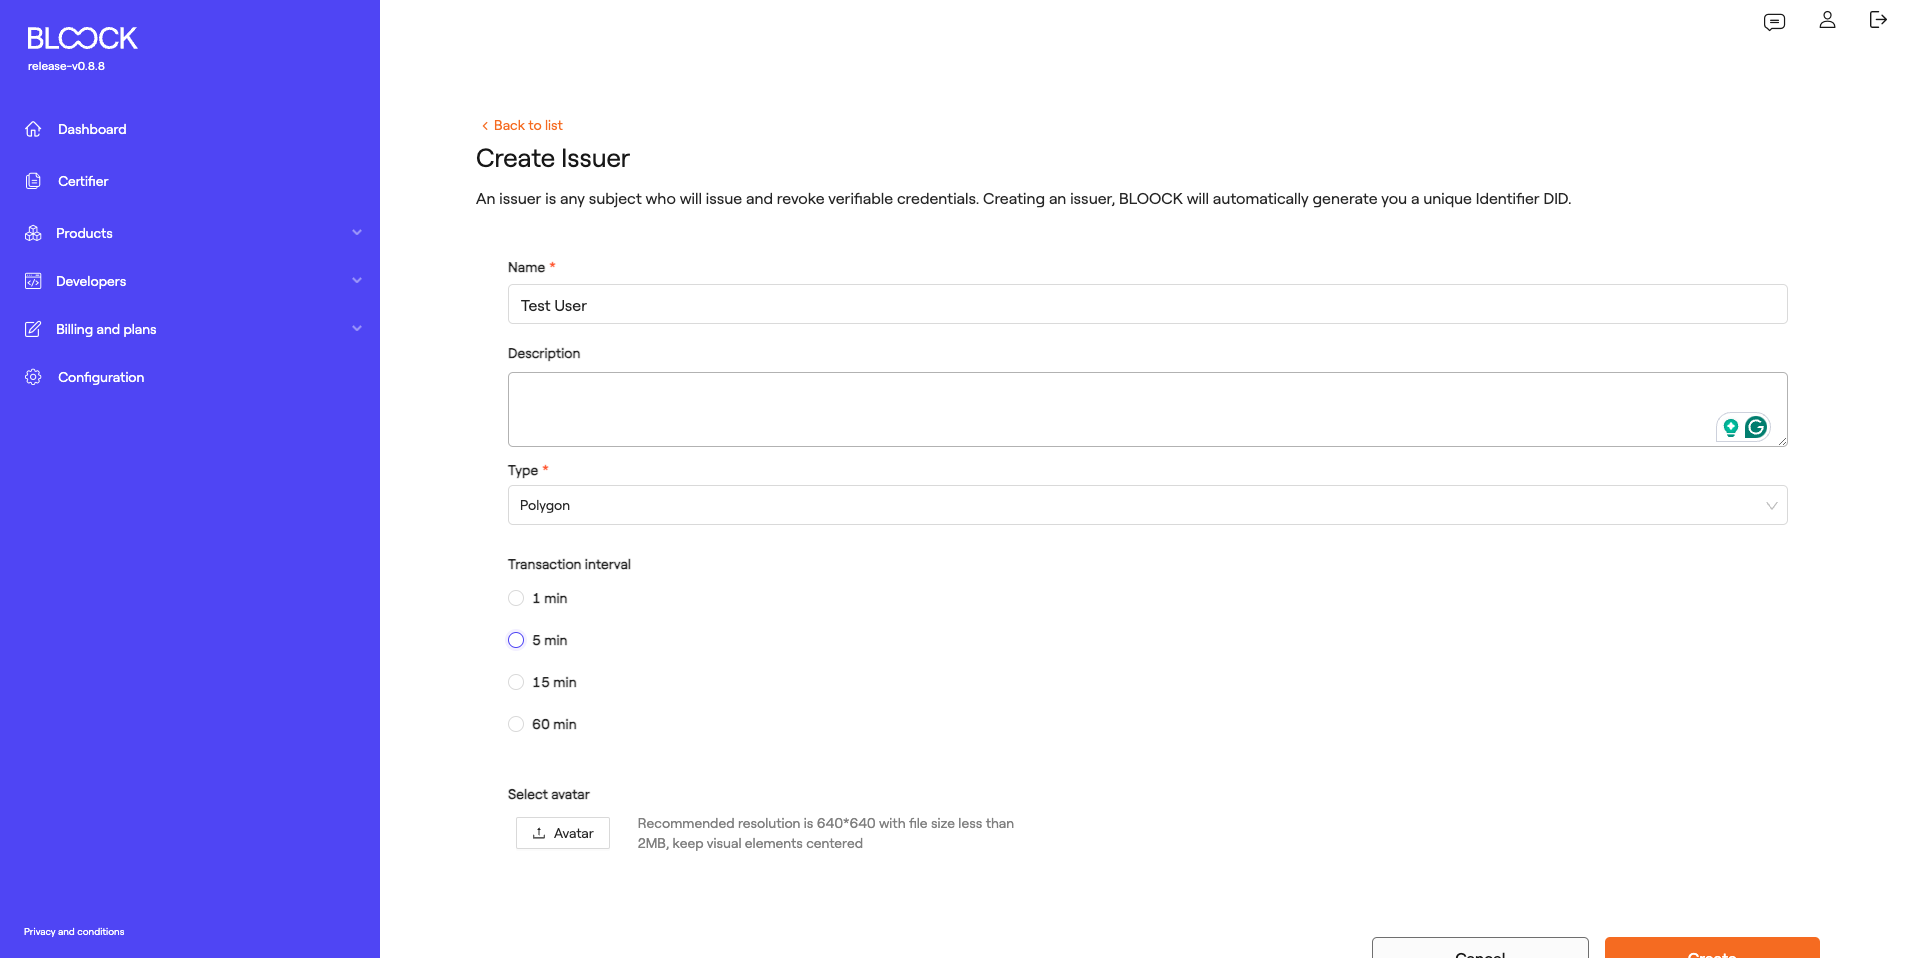
In this section, there is a button to Create new issuers. To create the issuer, users must add a Name, may include a description, specify the type of DID, and set the interval for credential issuance. Finally, an avatar for the issuer in question can be added.
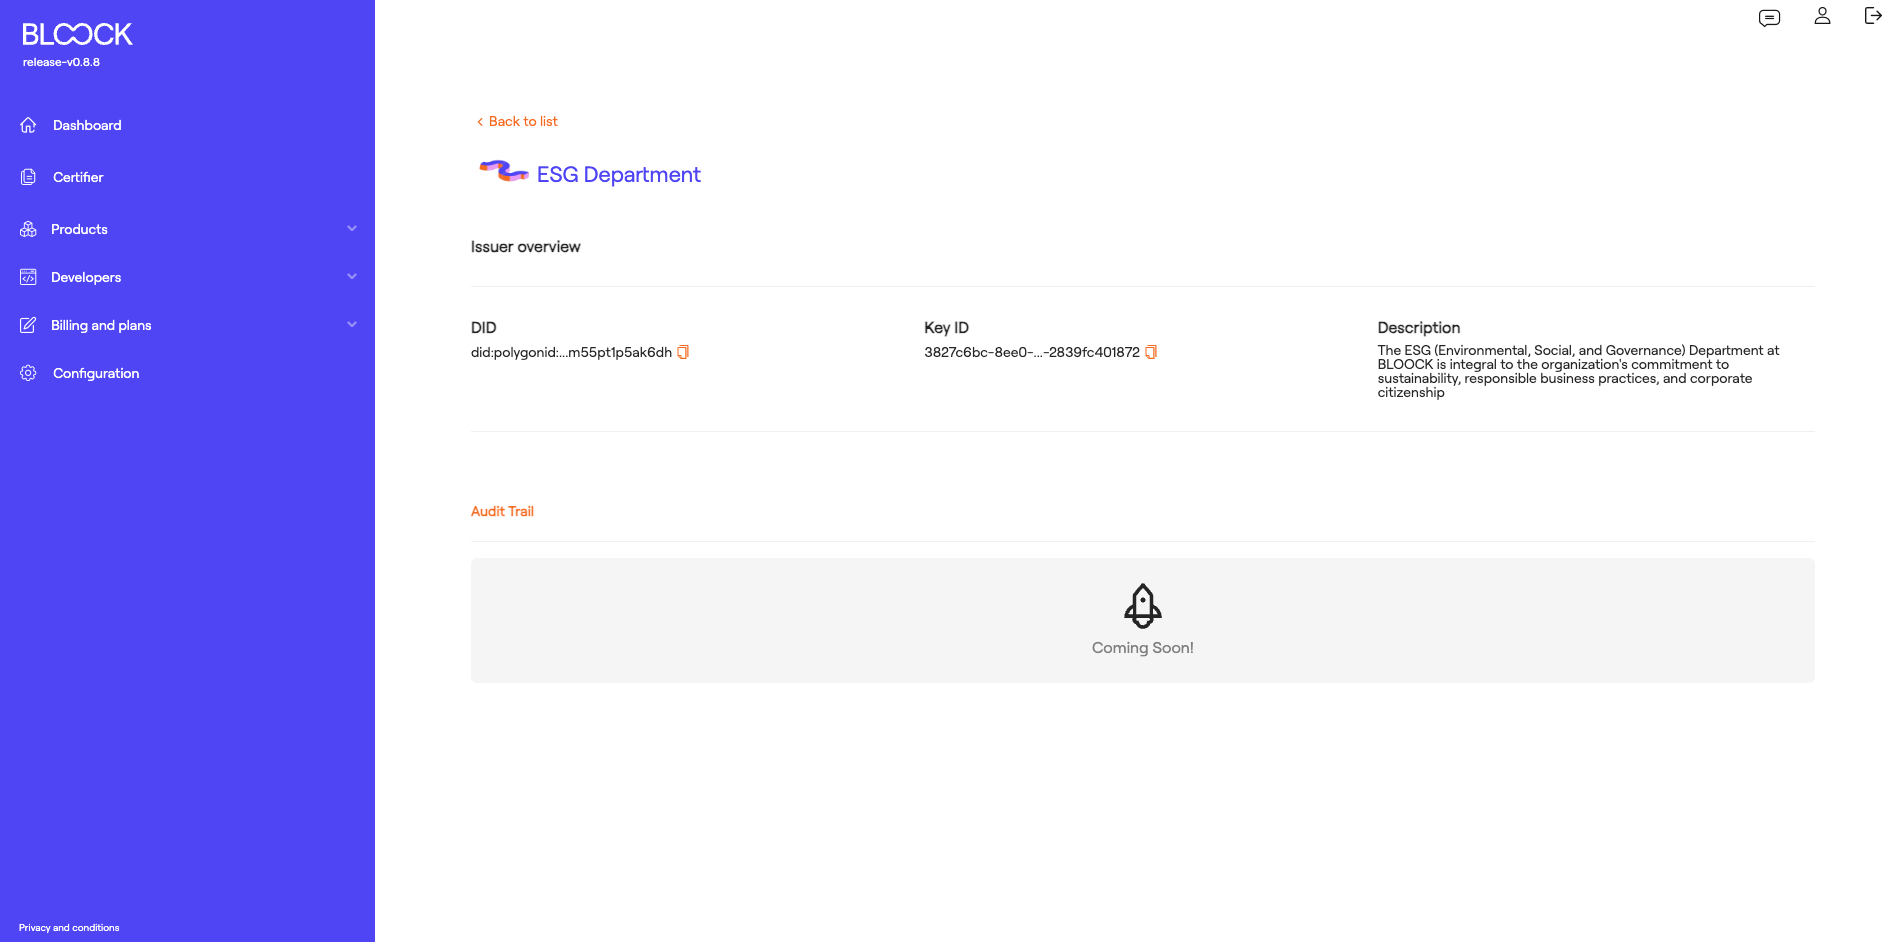
In the Issuers tab of the Digital Identity homepage, users can access more details about each of the created issuers. In this section, users can view general information about the issuer such as the DID, the ID of the associated key, and its description.
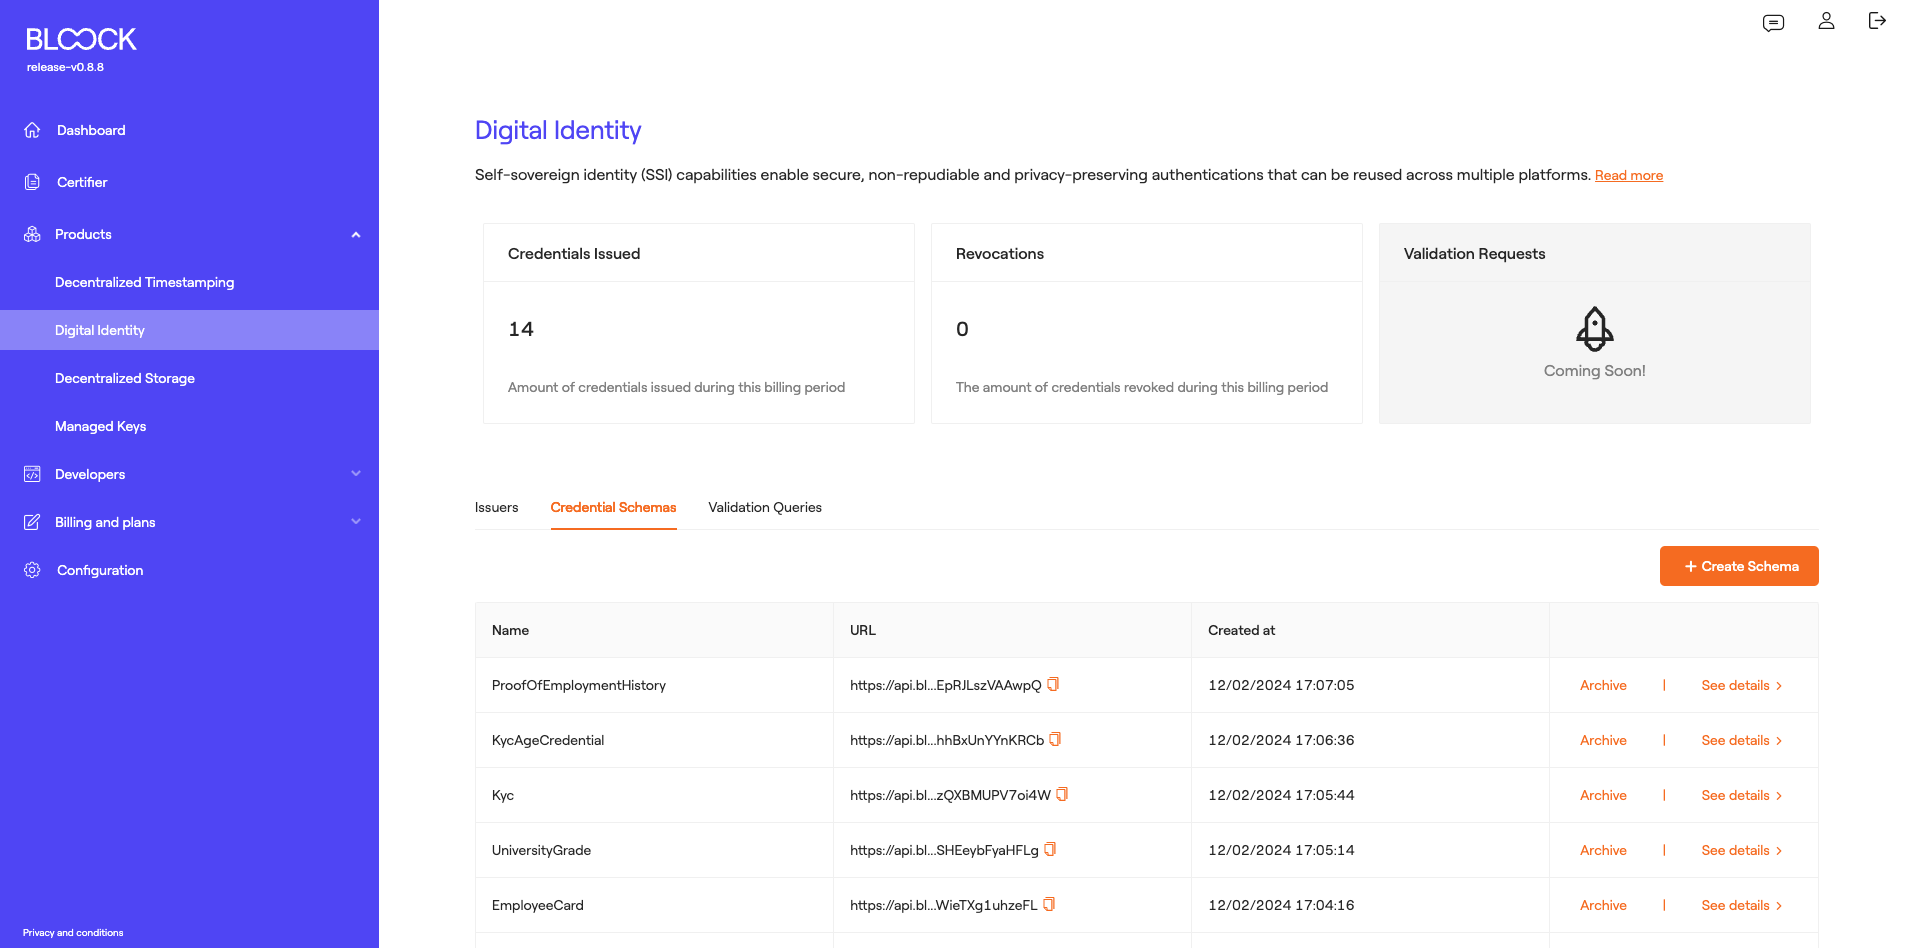
Credential Schemas
The next tab displays the Credential Schemas created by the user. These schemas serve as templates for the credentials that issuers will issue. In this section, we can see the schema name, its URL, and the creation date. Additionally, we have the option to archive these schemas once they are no longer in use.
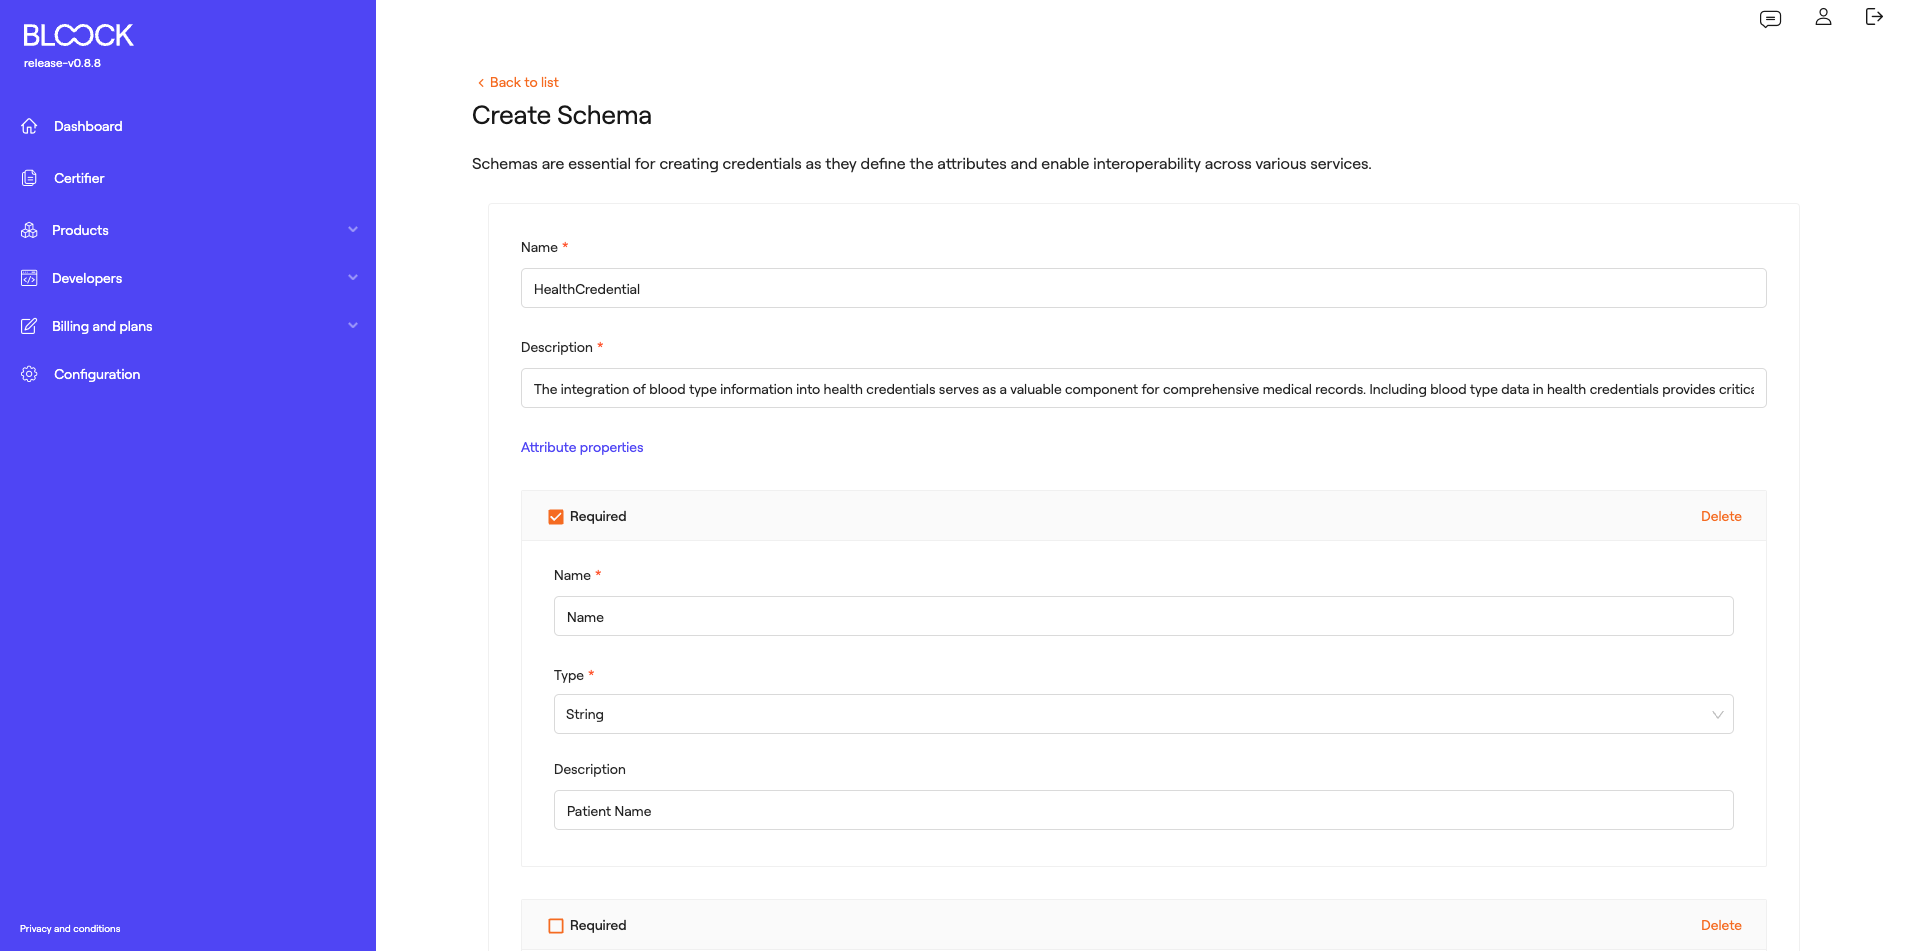
At this point, we find a button to Create New Schemas. In this dynamic form, the schema name, its description, and the attributes it will contain must be added. Each of these attributes can be customized to have required or optional values, including a name, attribute type (String, Boolean, Integer, Decimal, and Date), and a brief description. Upon publishing the schema, it will be uploaded as a JSON file on IPFS.
On the details page of each of these schemas, we can find general information about the schema, the CID of the JSON file located on IPFS, the link to the file, and the creation date.
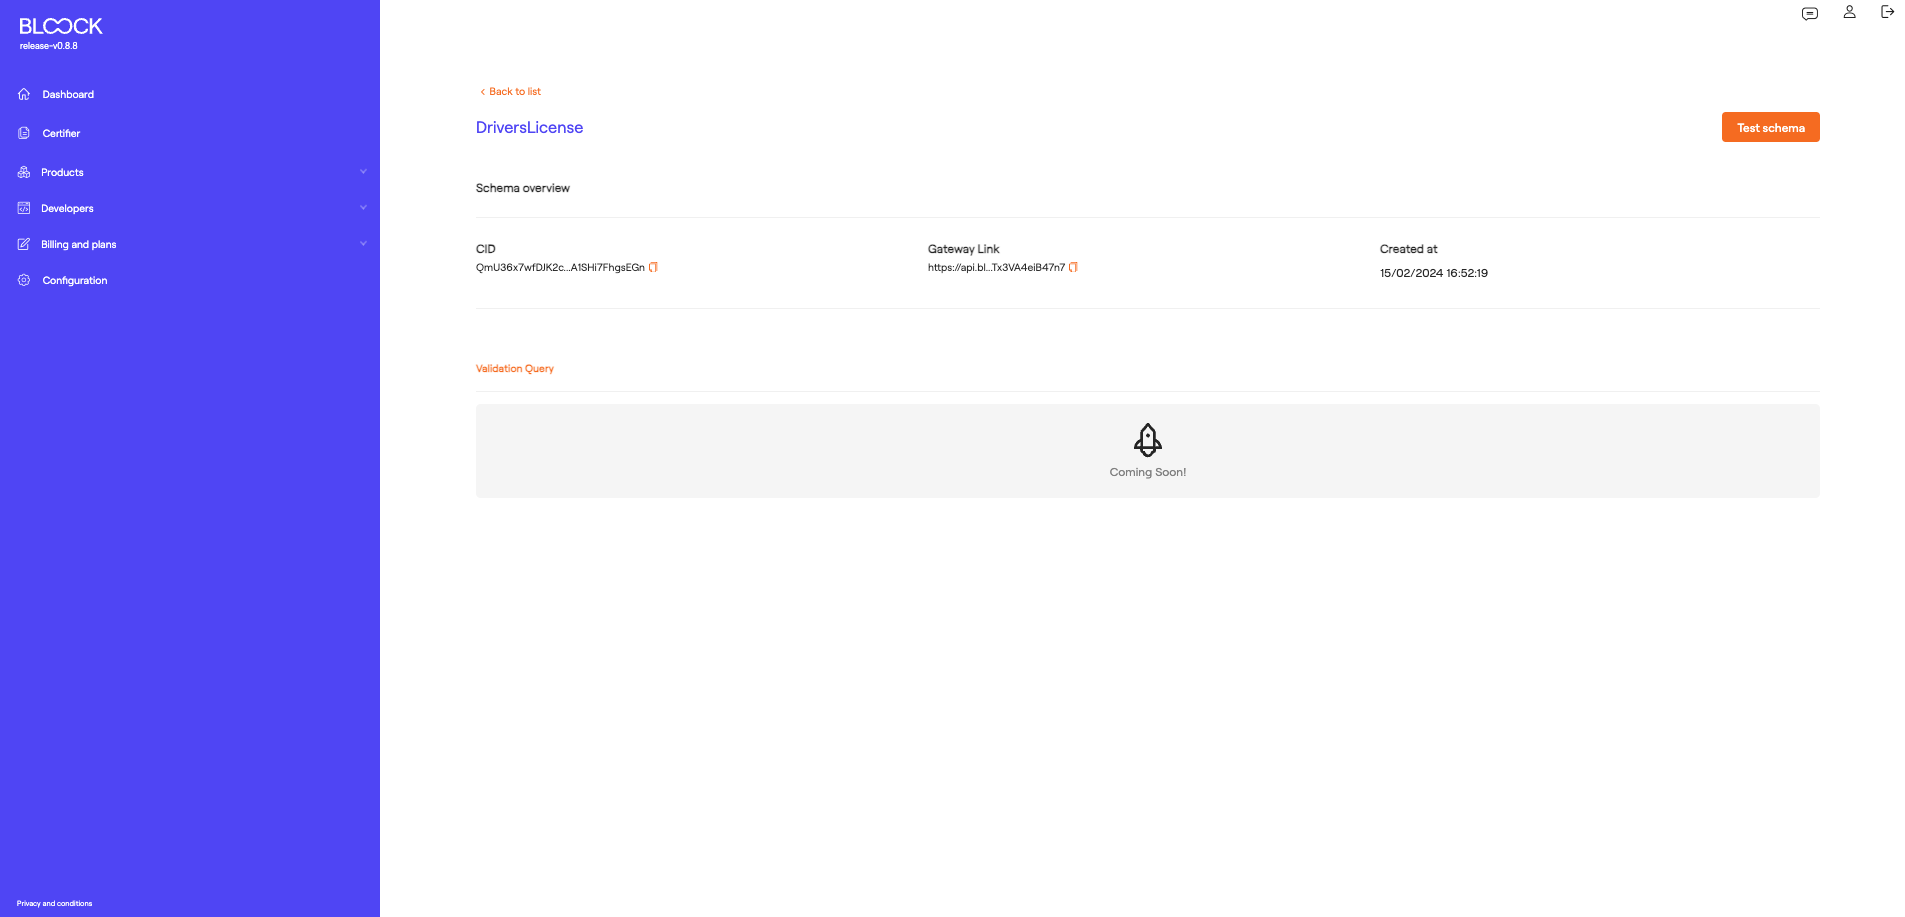
It is important to note that at this point, there is a button that allows testing of this schema, generating a credential with this structure and each desired attribute value.
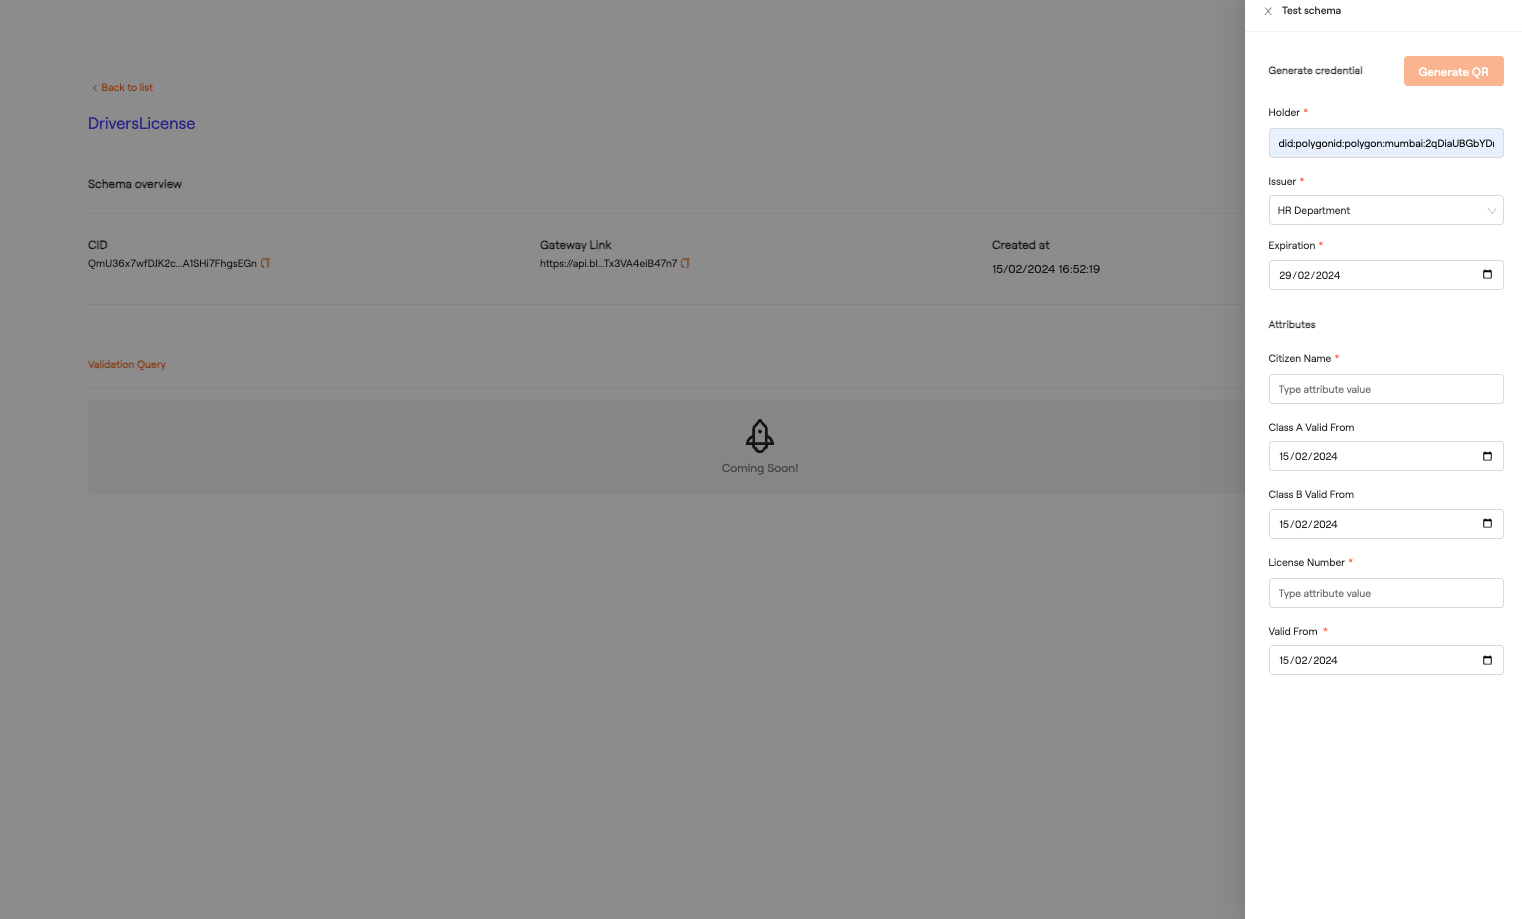
Once this credential is generated, a QR code can be scanned using the user's Wallet.
Validation Query
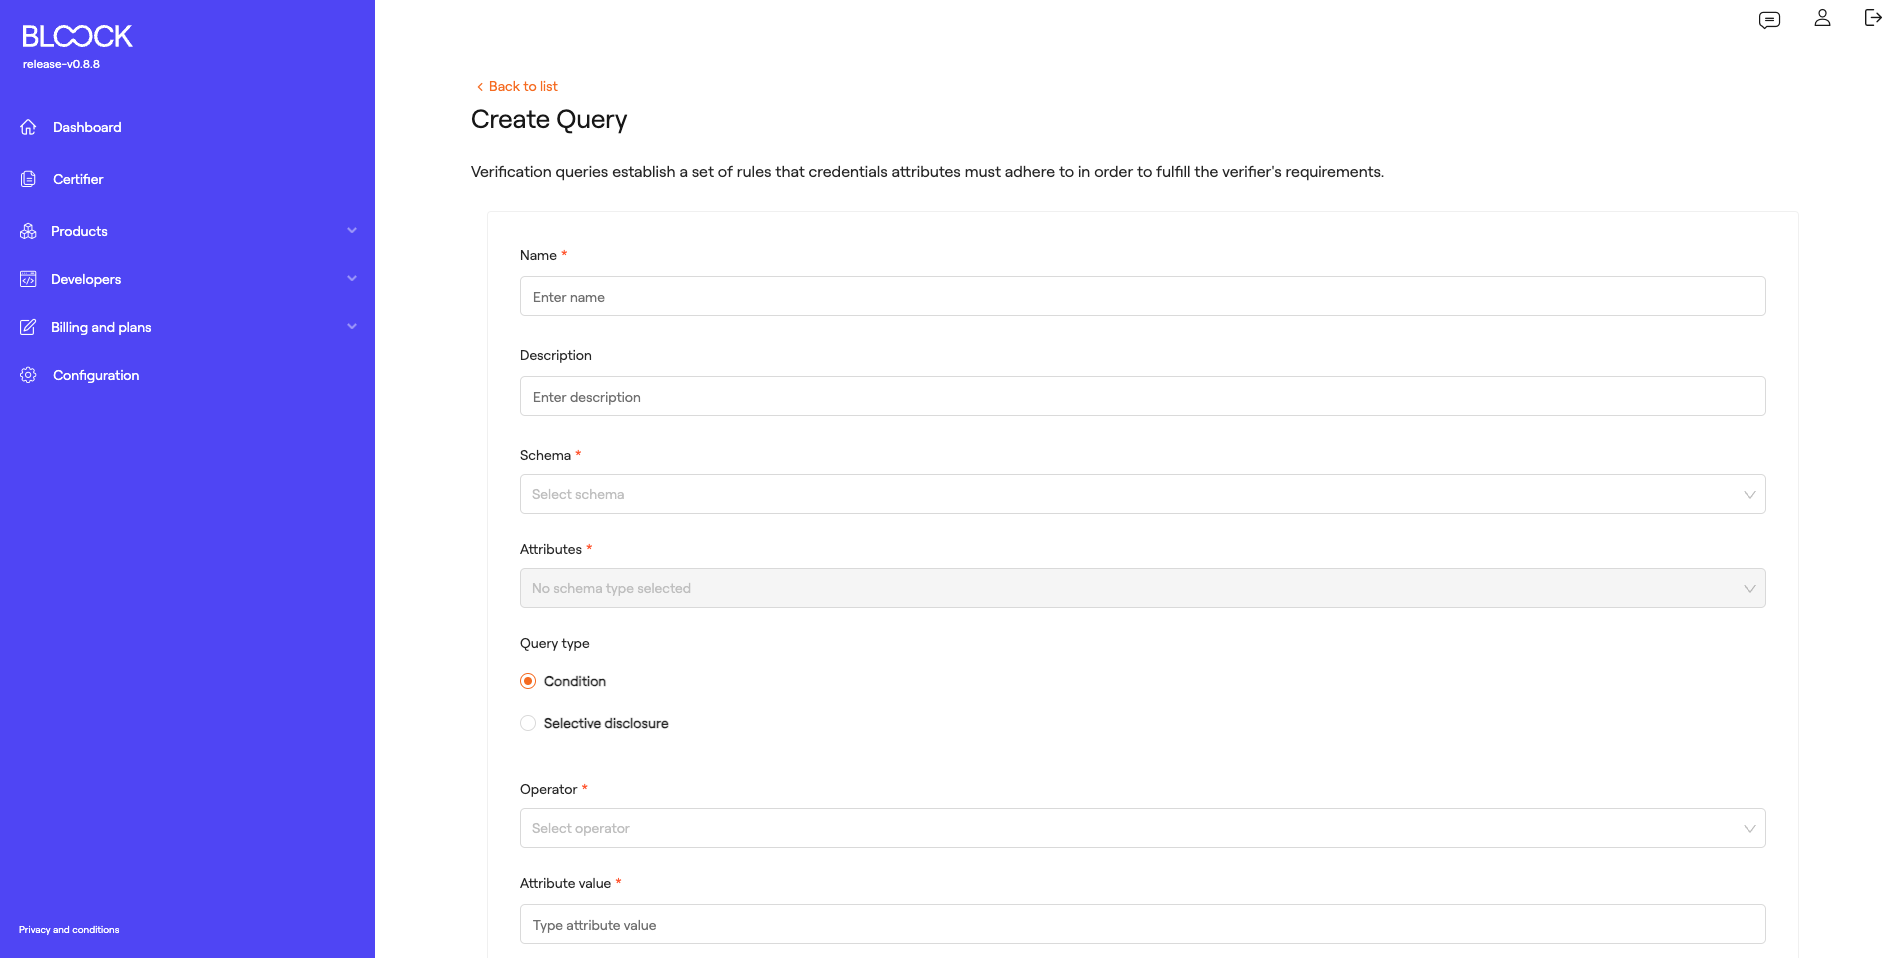
The last tab of the Digital Identity product displays Validation Queries. Verification queries establish a set of rules that credential attributes must adhere to in order to fulfill the verifier's requirements. In this tab, we can see the name of each query, the schema, and the creation date. Additionally, a QR code can be generated for validation purposes, which can be scanned through the Wallet.
In this tab, we find the button to create a query. The query creation form allows users to generate the validation of a credential attribute. Users can add a name, description, referenced schema, the attribute of the schema to be validated, query type, operator for comparison, attribute value, type of test to be performed, and whether it should be linked to a specific DID.
Decentralized Storage
Resilient data storage ensures continuous access for authorized entities. Decentralized storage service enhances robustness against disruptions and ensures availability even in challenging conditions. To delve deeper into this product, you can review the Decentralized Storage section.
In this section of BLOOCK's management, users can access general metrics regarding the usage of this product, such as the amount of GB used during this billing period and the volume of downloads in GB during the current billing period.
At the bottom of the Decentralized Storage homepage, we can find the IPFS tab where users can review the different files or folders uploaded to IPFS and information about them, such as the file name, the file ID in IPFS, the file type (mime), the file link in IPFS, and the file size. Additionally, users can download or delete the uploaded files.
IPFS
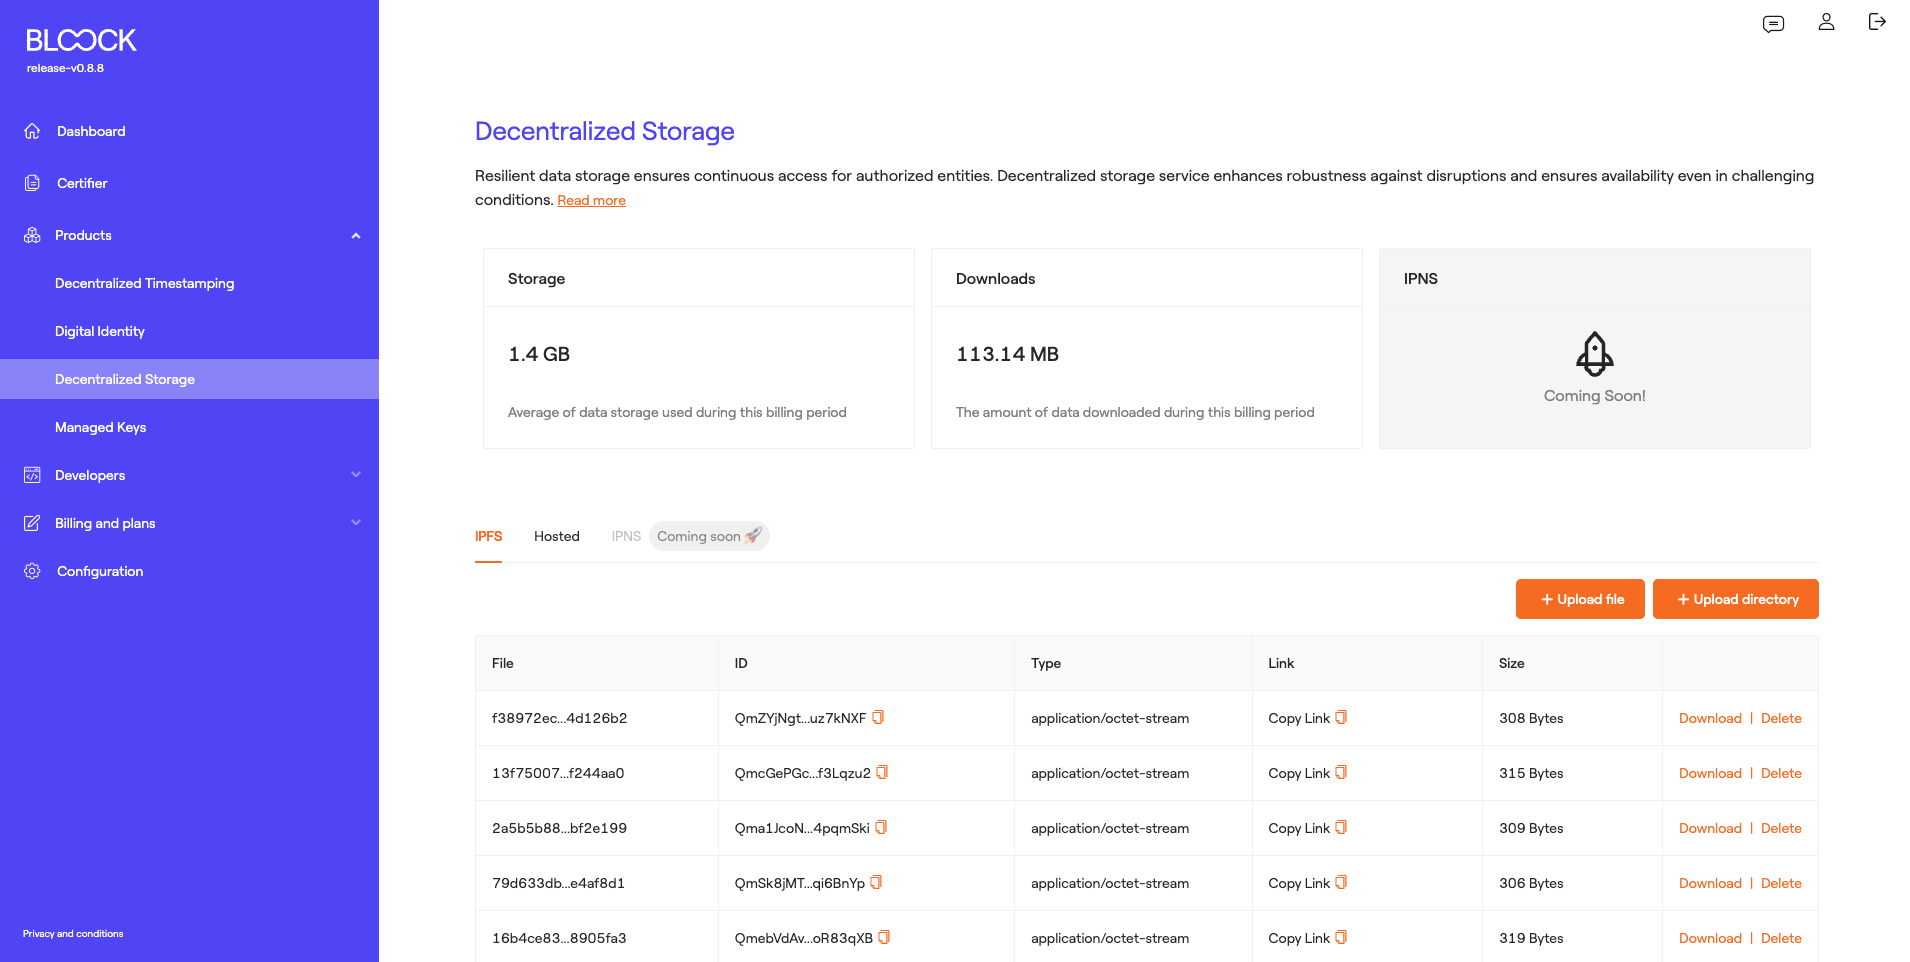
Another functionality available in this section is the ability to upload files or directories to IPFS. Through the form, users can browse their files or drag and drop files.

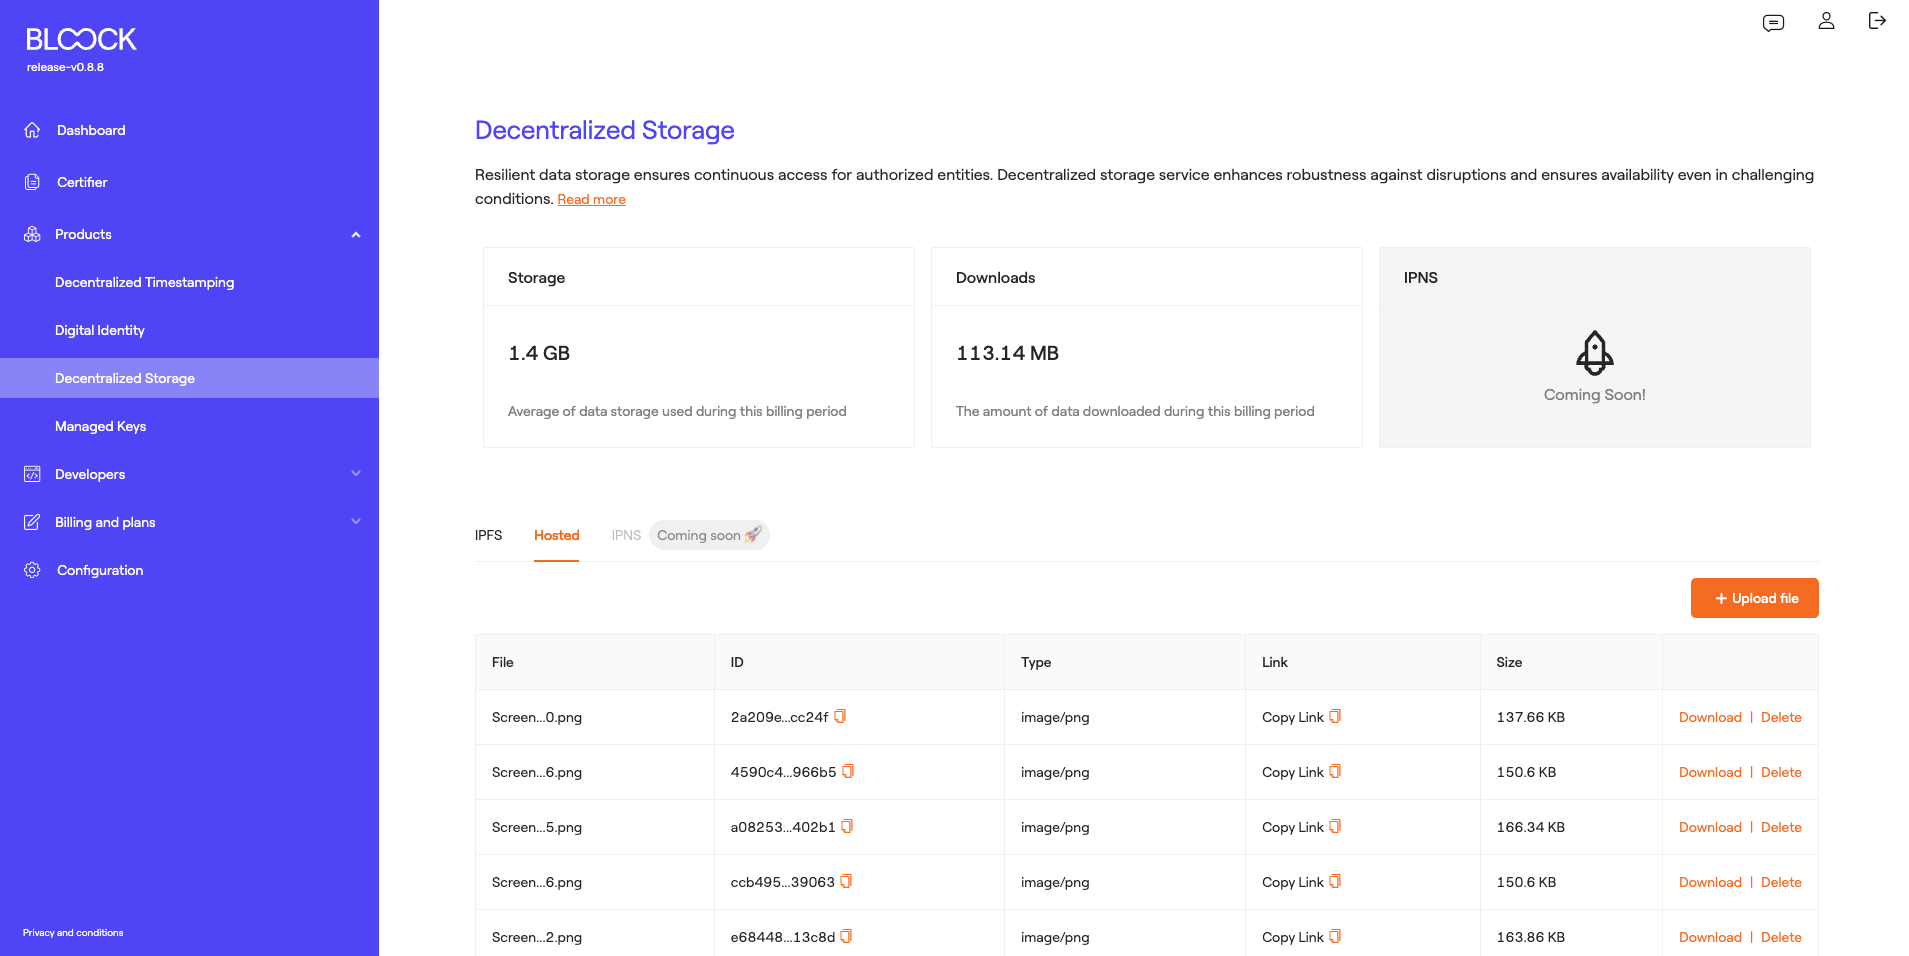
Centralized Hosting
The next tab displays files uploaded to BLOOCK's centralized hosting, where users can view information such as the file name, the file ID, the file type (mime), the file link, and the file size. Finally, users can download or delete the uploaded files.
Managed Keys
The Key Management Product ensures the security of private keys and certificates, safeguarding authentication credential safety. It enables precise access control and maintains a comprehensive audit trail for enhanced security. For a deeper understanding of this product, you can explore the Key Management section.
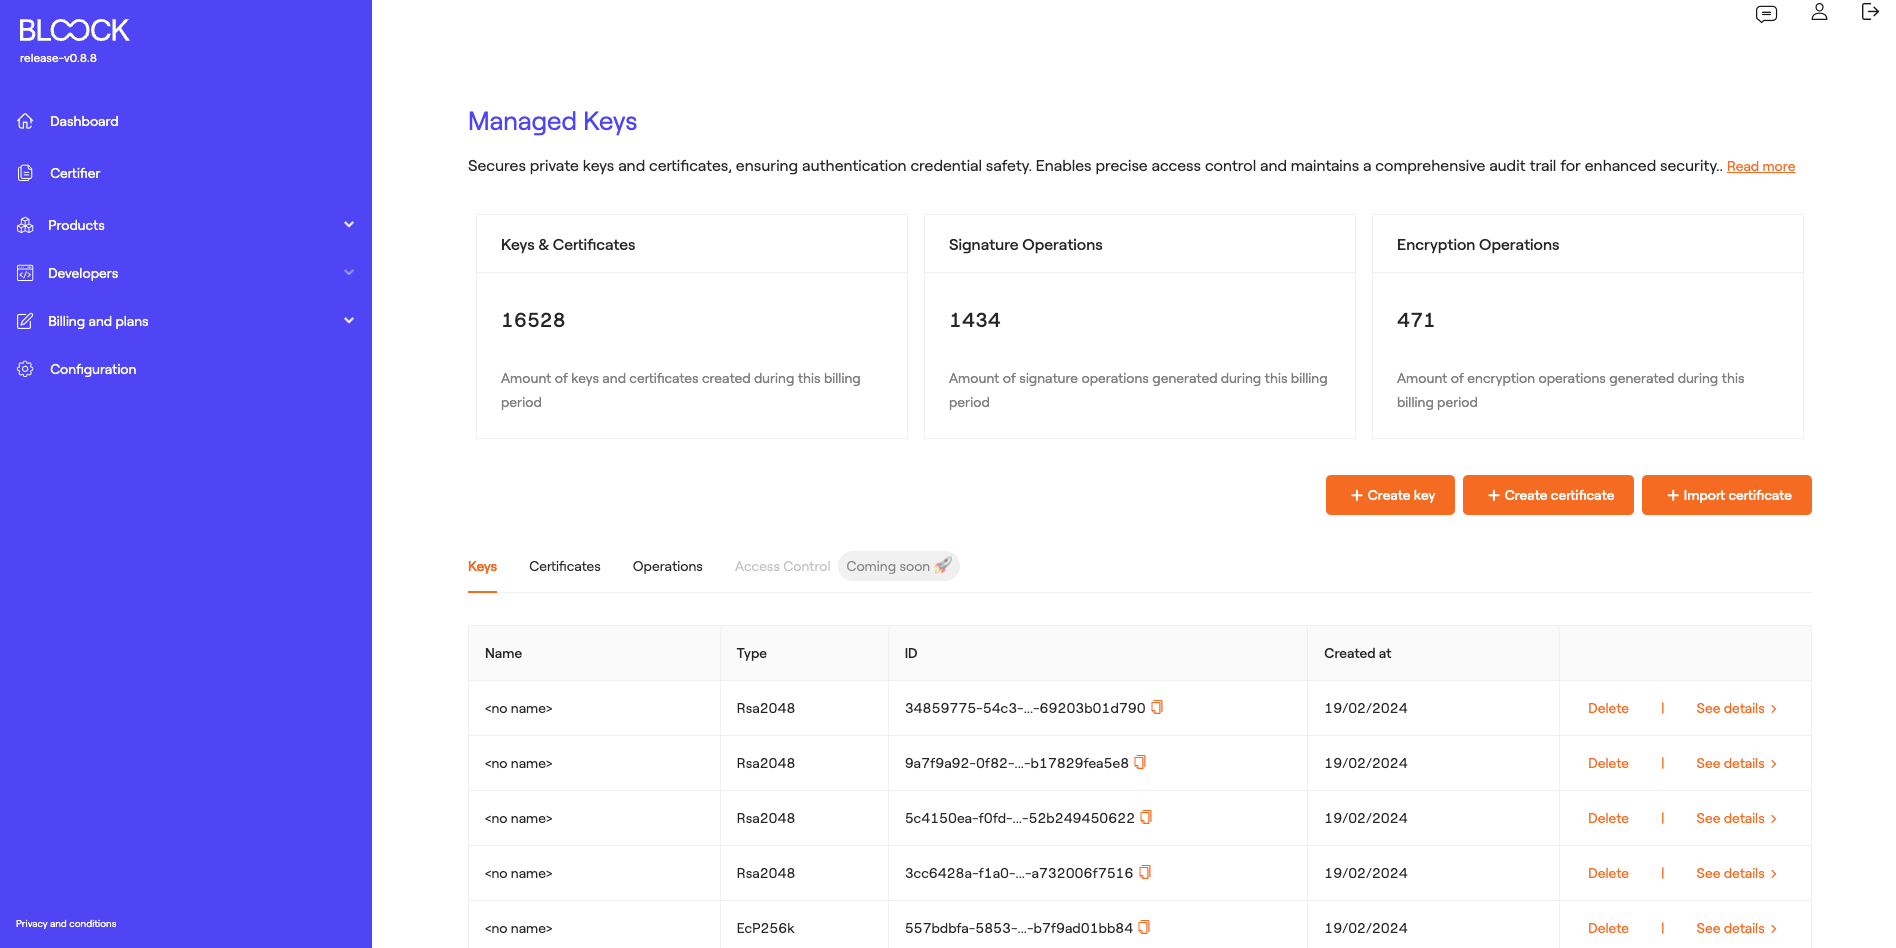
In this section of BLOOCK's management, users have access to general metrics regarding the usage of this product, such as the number of keys and certificates stored during this billing period, the number of signature operations performed, and the number of encryption operations carried out during this billing period. Additionally, users can find various functionalities, including:
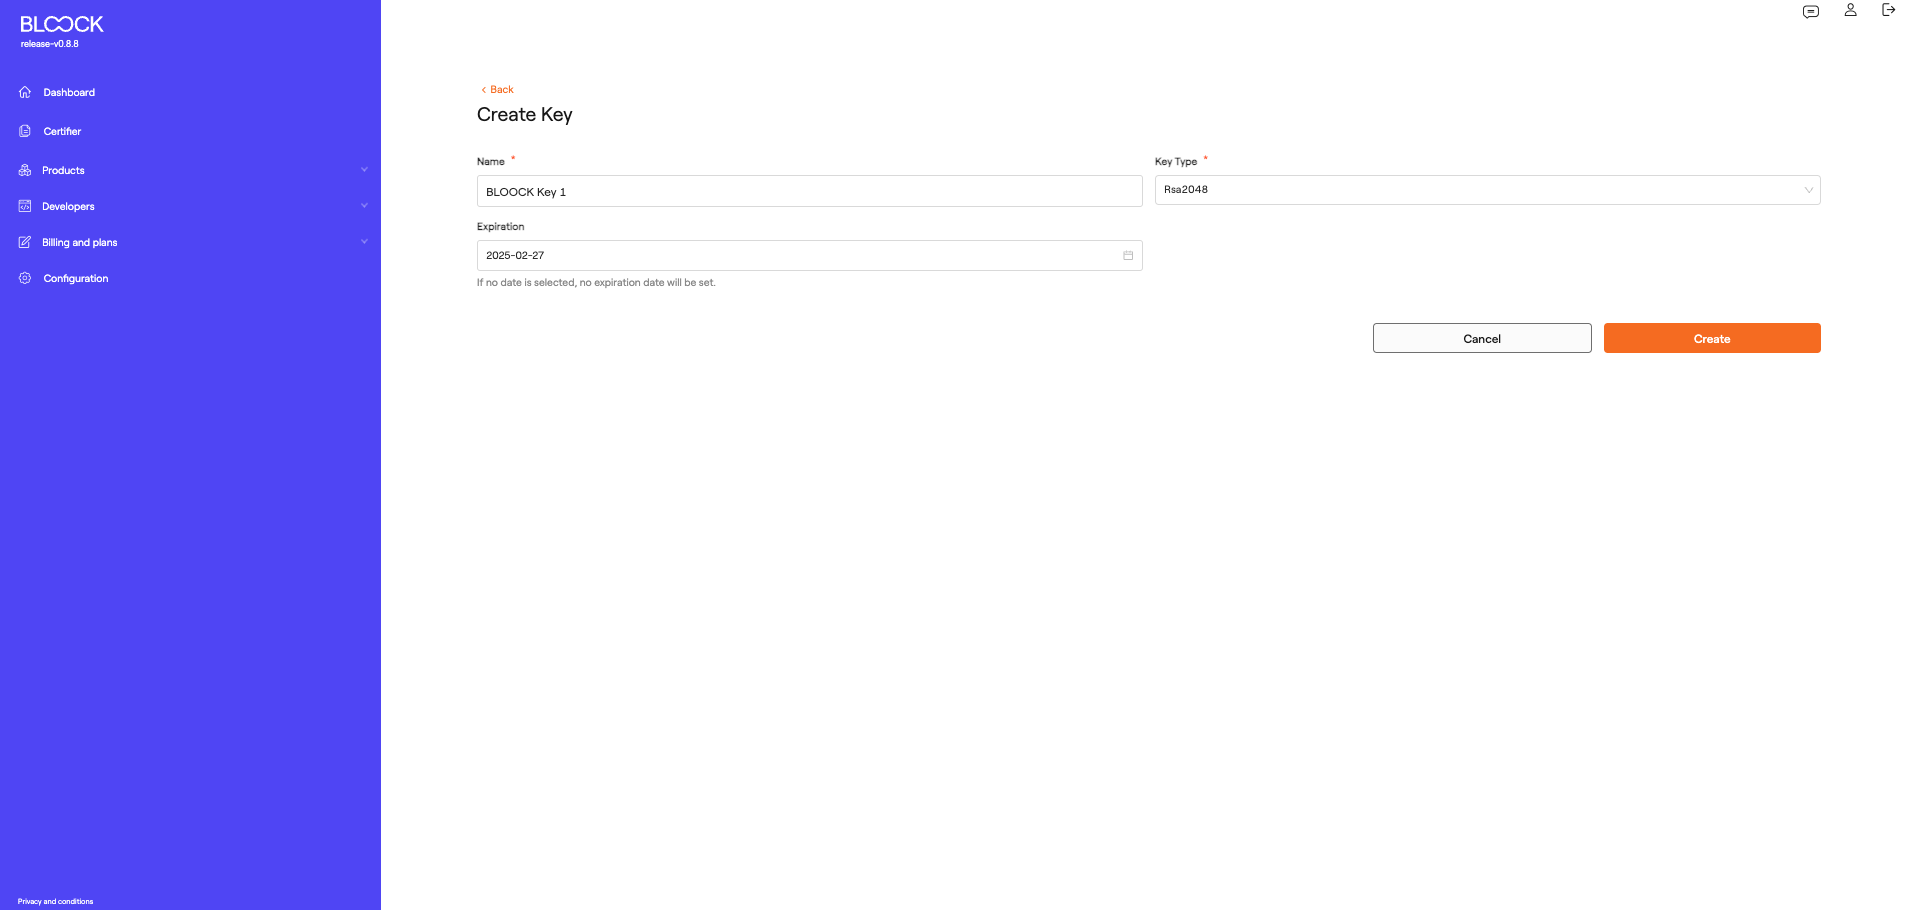
- Key Creation: In this form, users can create keys managed directly within the BLOOCK management system. Here, they should input the name, key type, and expiration date.
- Certificate Creation: In this form, users can select the type of certificate to create and specify its expiration date. Additionally, they can add the certificate's subject, including the Common Name, Organization, Organization Unit, City, State, and Country.
- Certificate Import: In this form, users can browse their files or drag and drop an existing certificate. These certificates should be in .pem, .p12, or .pfx format.
Keys
At the bottom of Key Management section, users can access the tab containing the keys, where they can view the name of the key, its type, the key ID, the creation date, and access detailed information about the keys and delete them.
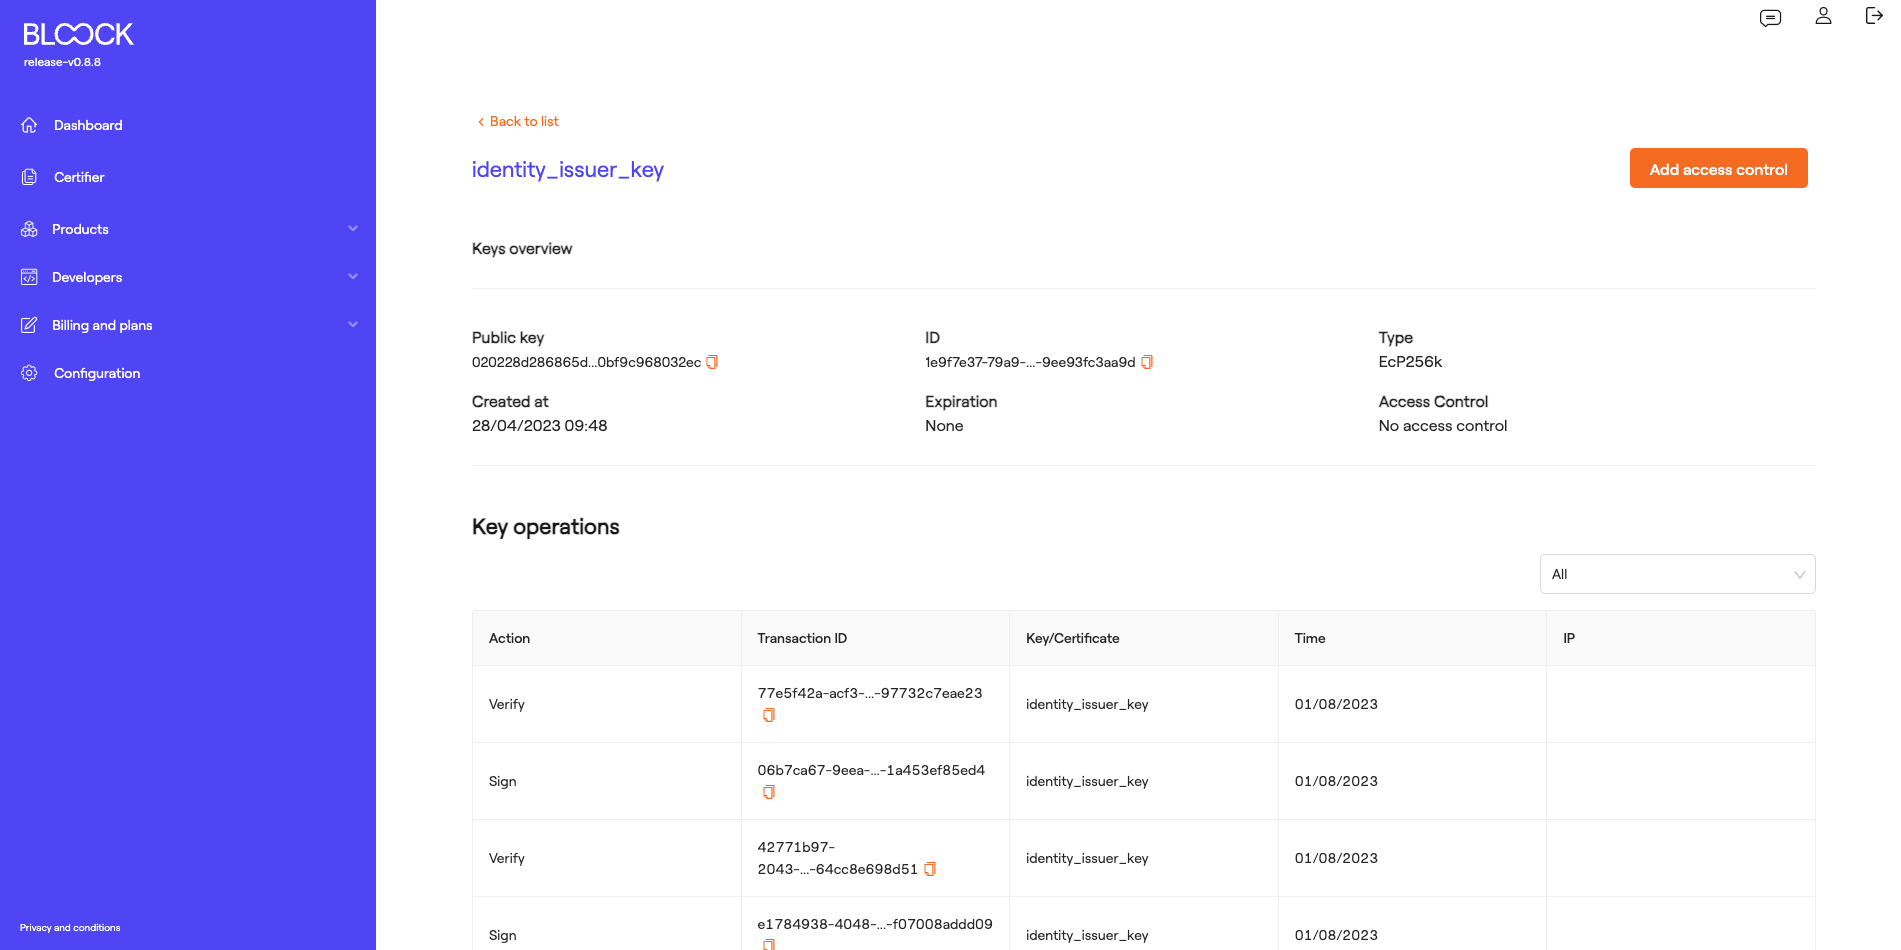
On the key details screen, users can view generic information about the keys, such as the ID, expiration date, type, and creation date. At the bottom, all operations performed with this key, such as Signing, Encryption, and Decryption, can be viewed.
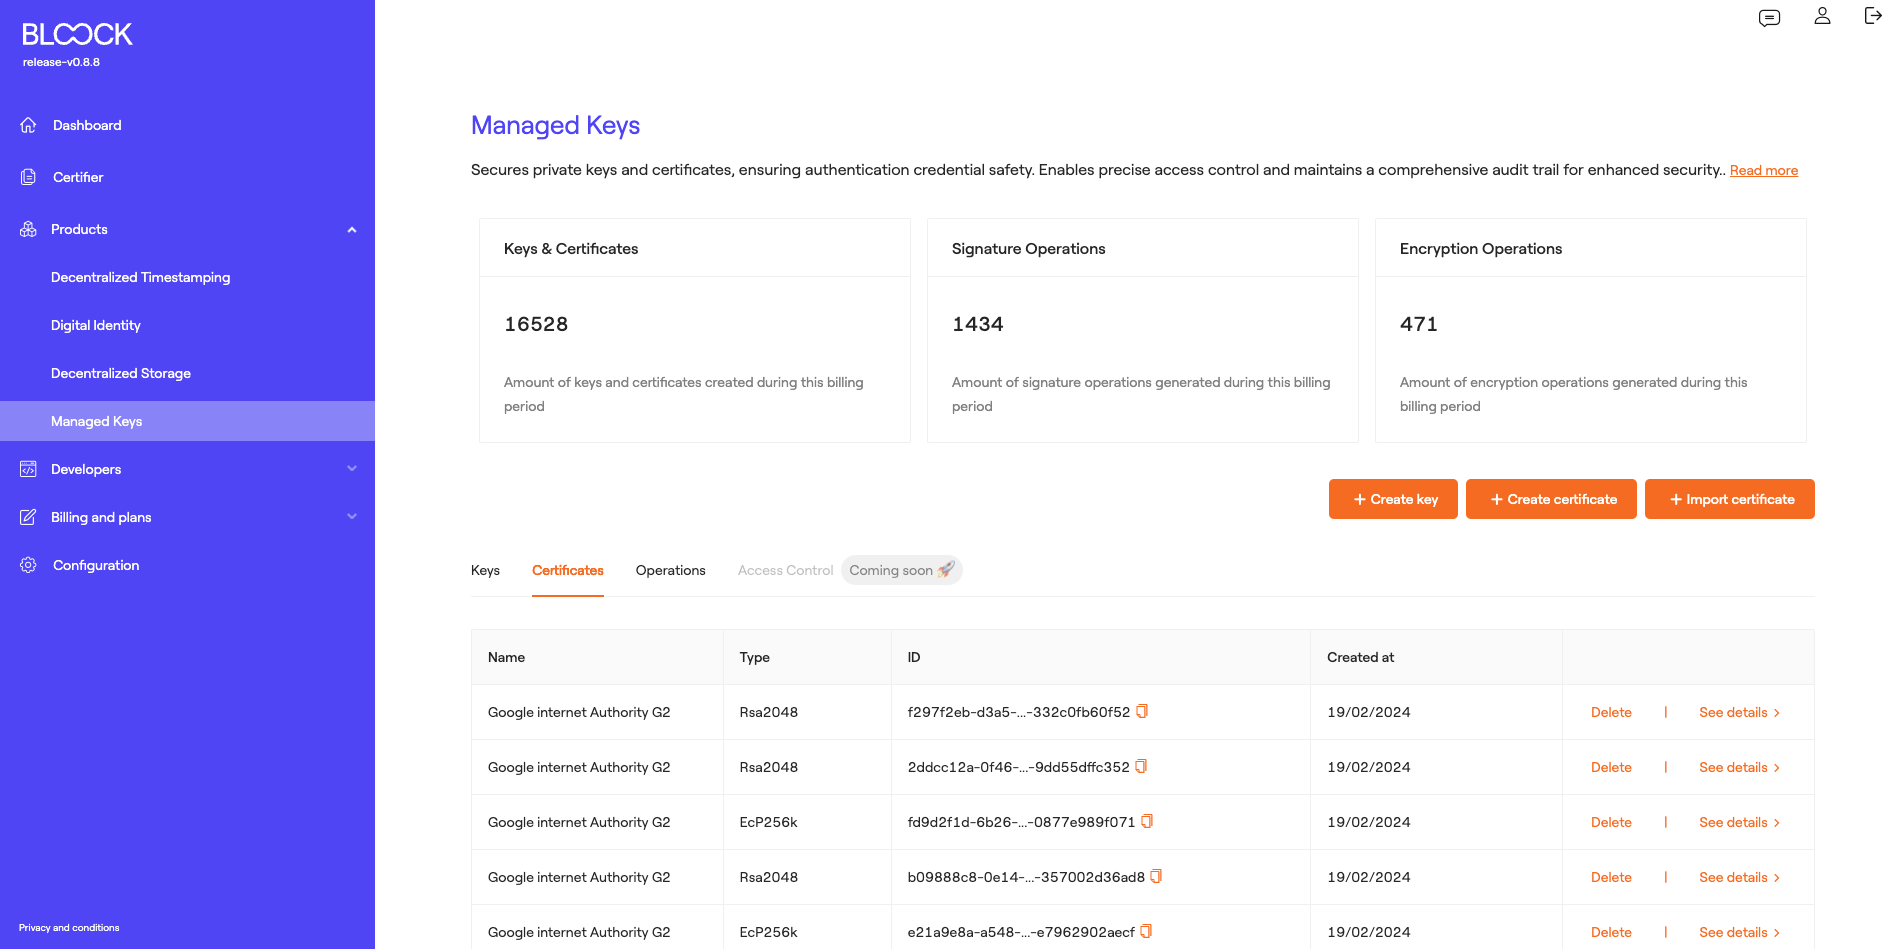
Certificates
In the next tab, users can see the generated certificates and their general information, such as the certificate name, type, ID, creation date, and they can access detailed information about the certificates and delete them.
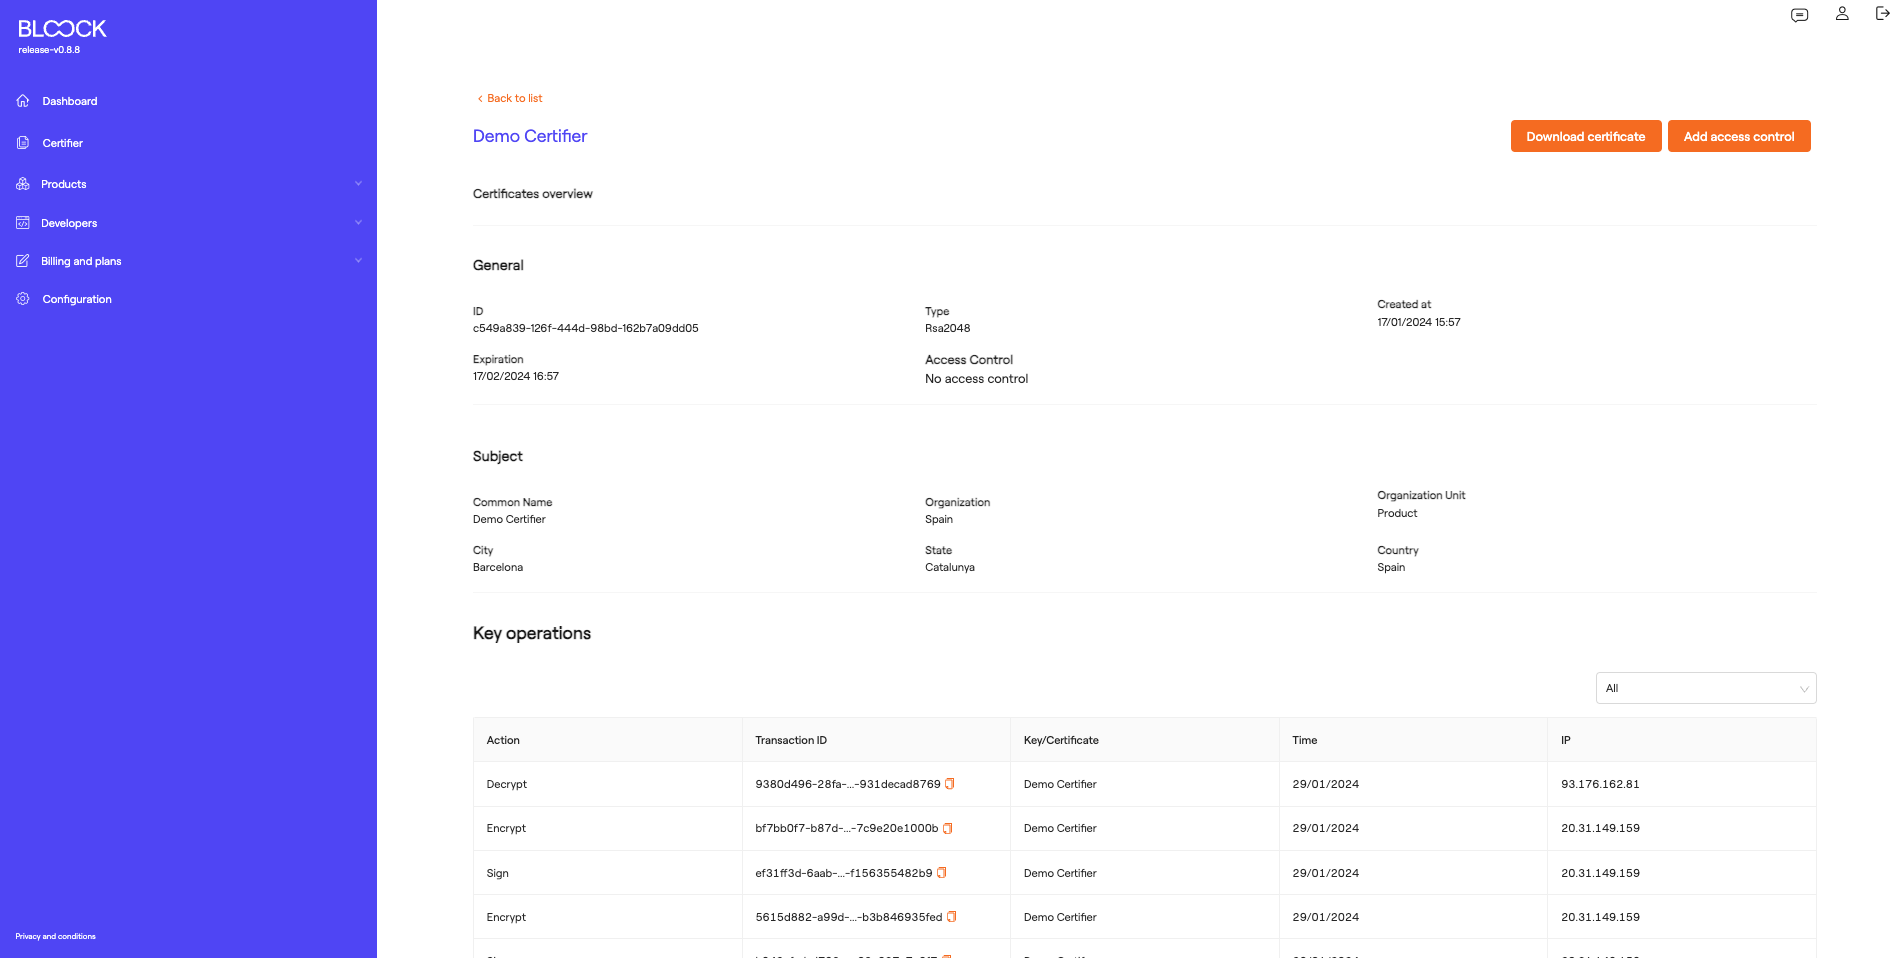
On the certificate details screen, users can view generic information about the certificates, such as the ID, expiration date, type, creation date, and the certificate's subject (Common Name, Organization, Organization Unit, City, State, and Country). At the bottom, all operations performed with this certificate, such as Signing, Encryption, and Decryption, can be viewed.
Access Control
BLOOCK allows adding access controls to manage keys and certificates. To learn more about how access controls work, please refer to this section.
Add Access Control
You can add an access control both at the time of key and certificate creation and through the "Key Details" section.
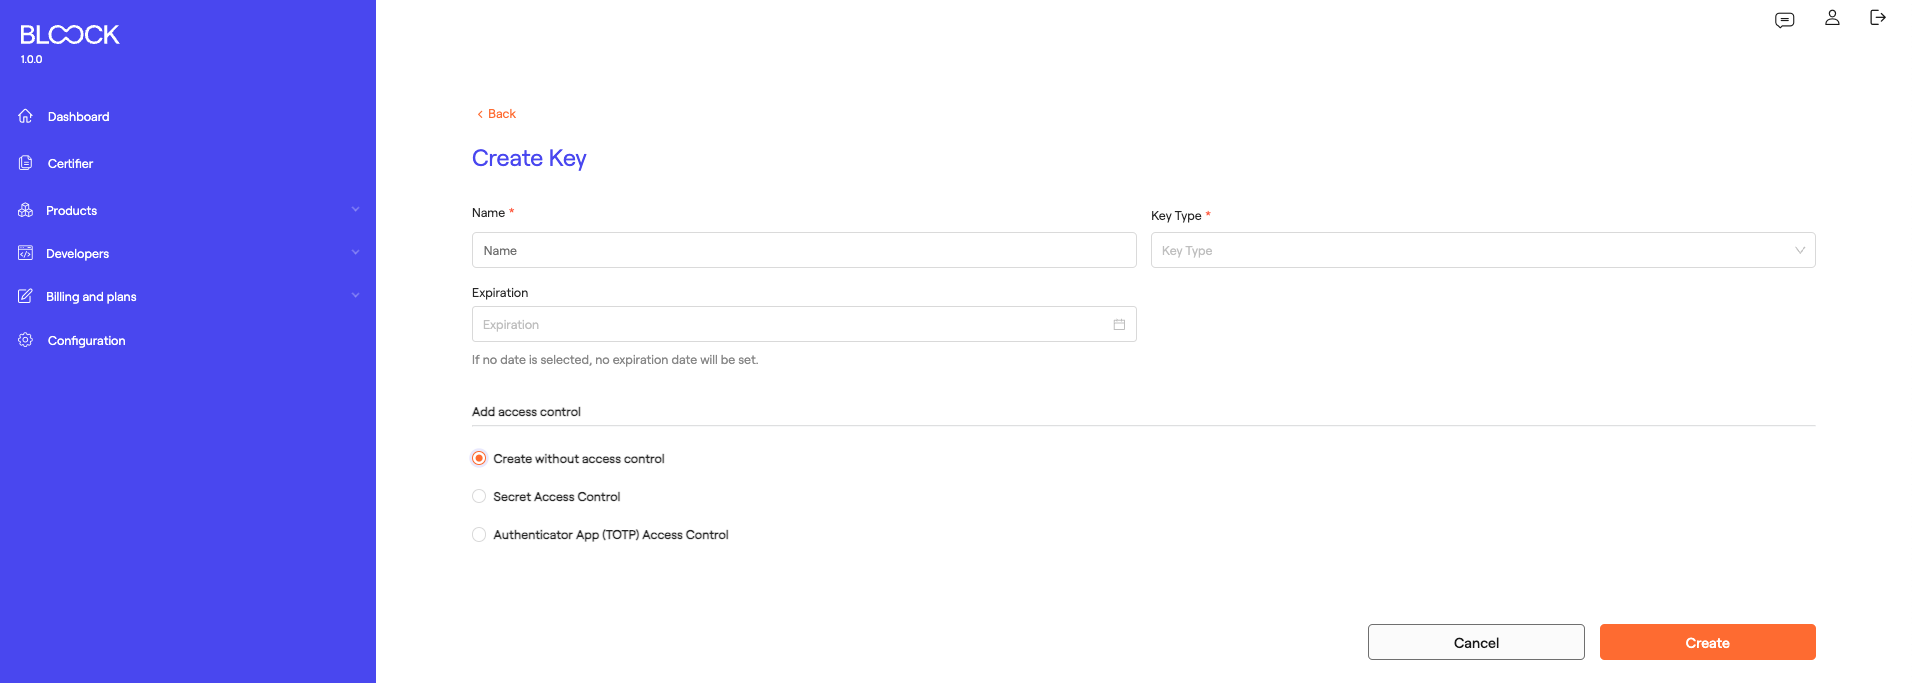
Key and certificate creation form:
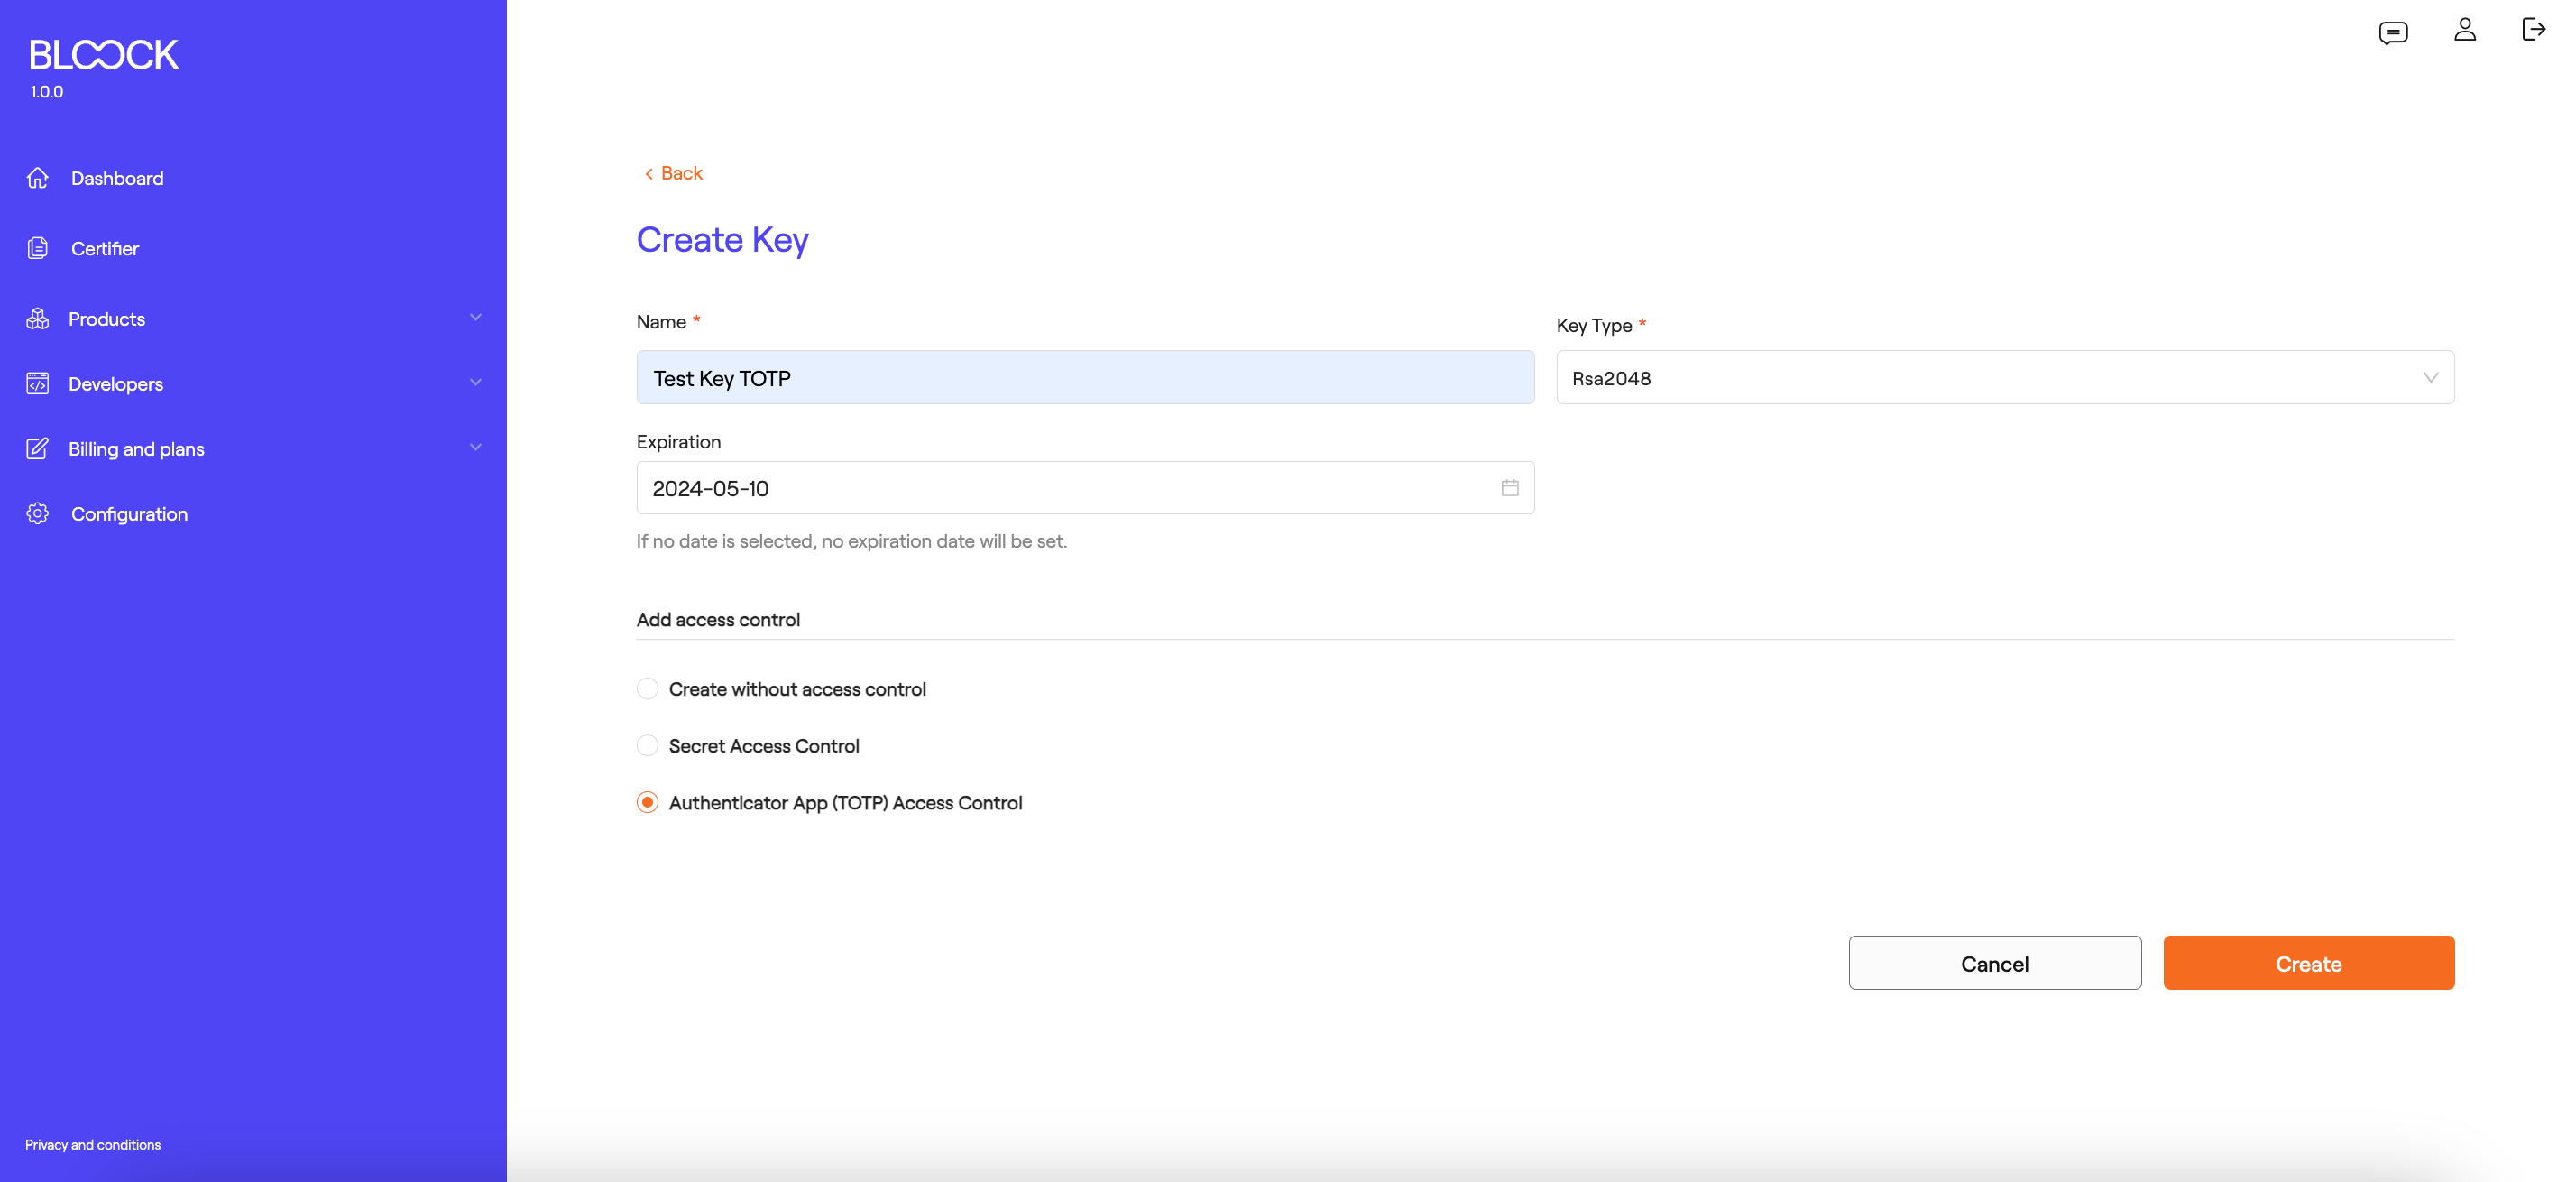
At the bottom of the creation form, there are different access control options. Currently, options include Time-Based One-Time Password (TOTP) or Secret-based Authentication:
- Using TOTP:
When selecting the TOTP option and confirming the creation process, a window will appear providing information for adding access control:
To utilize this functionality, you can use apps and browser extensions like 1Password, Google Authenticator, and Microsoft Authenticator, which generate one-time passwords used as a second factor to verify your access to this key.
Scan the generated QR code using any of the mentioned applications or manually enter the code provided at the bottom. Additionally, there are recovery codes in case the user loses access to the key.
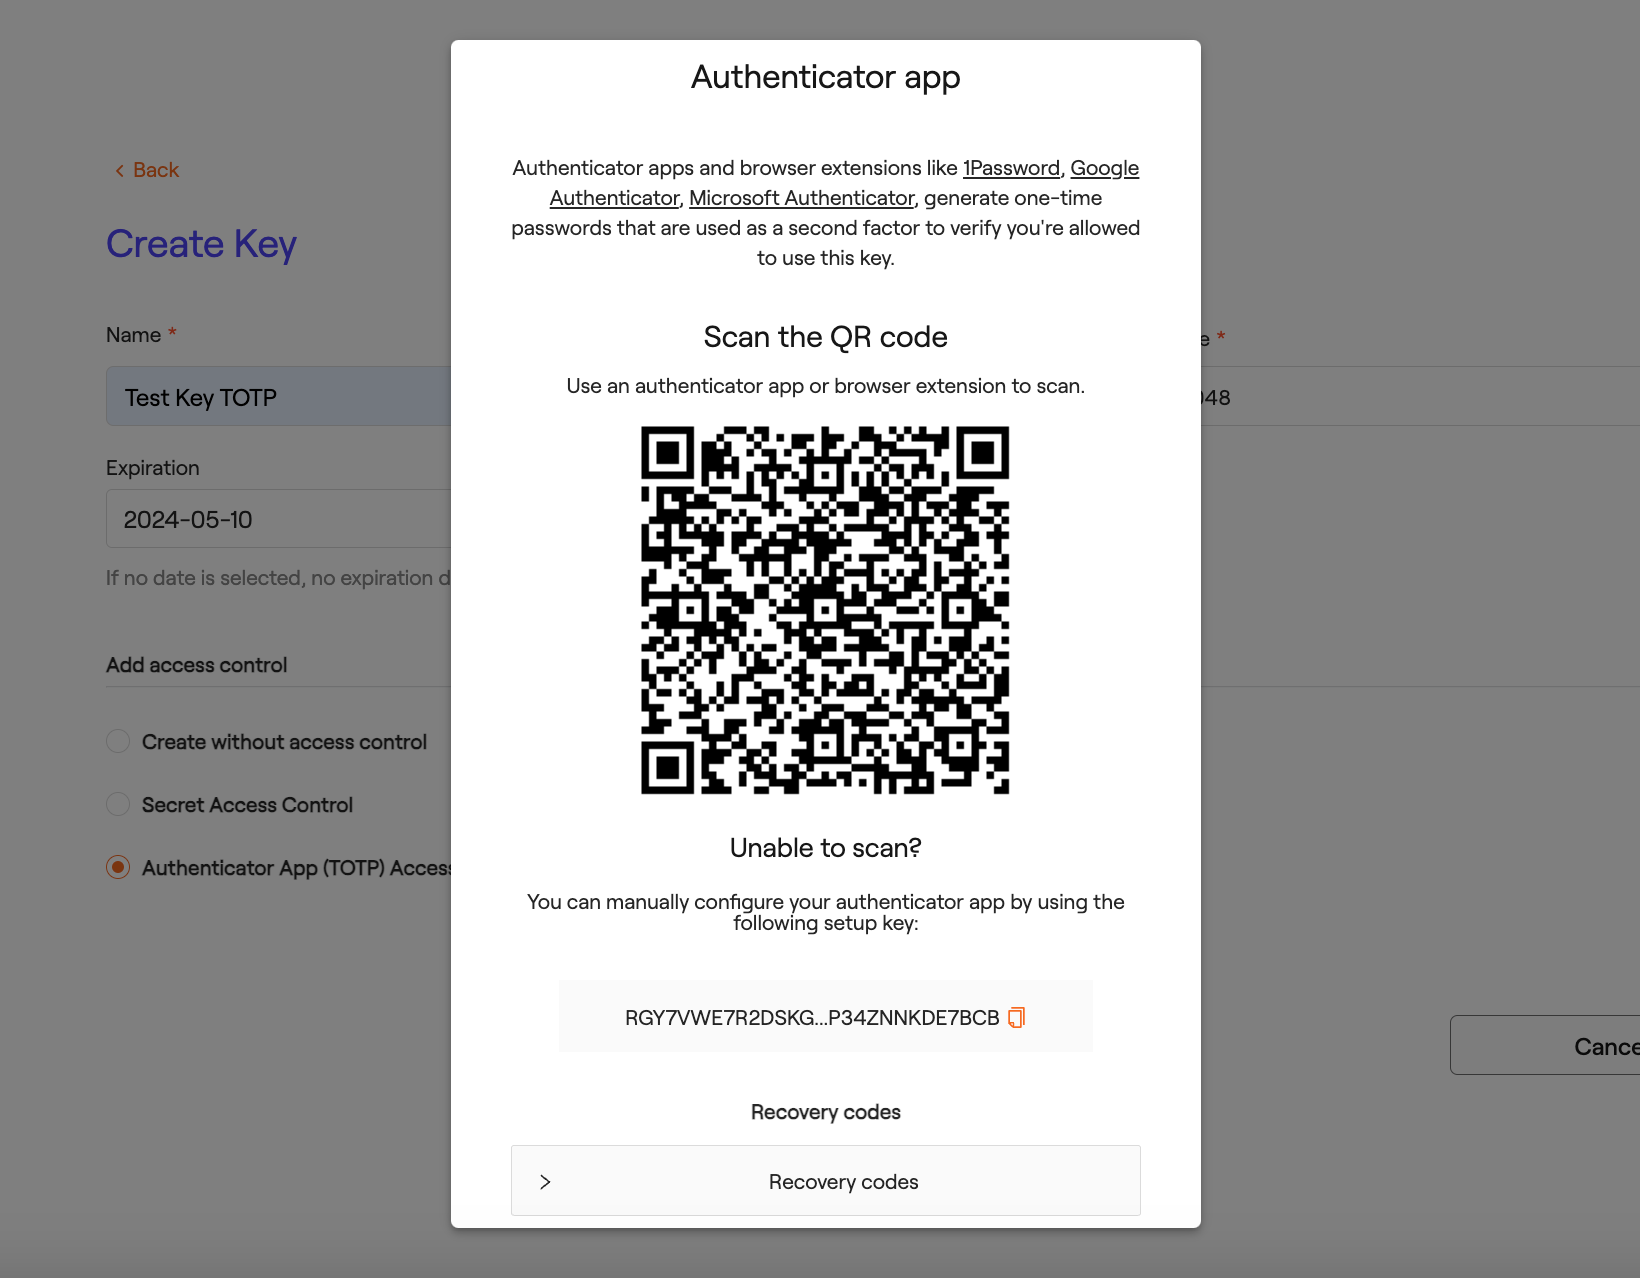
Note: It's important to save these recovery codes as BLOOCK does not store this information.
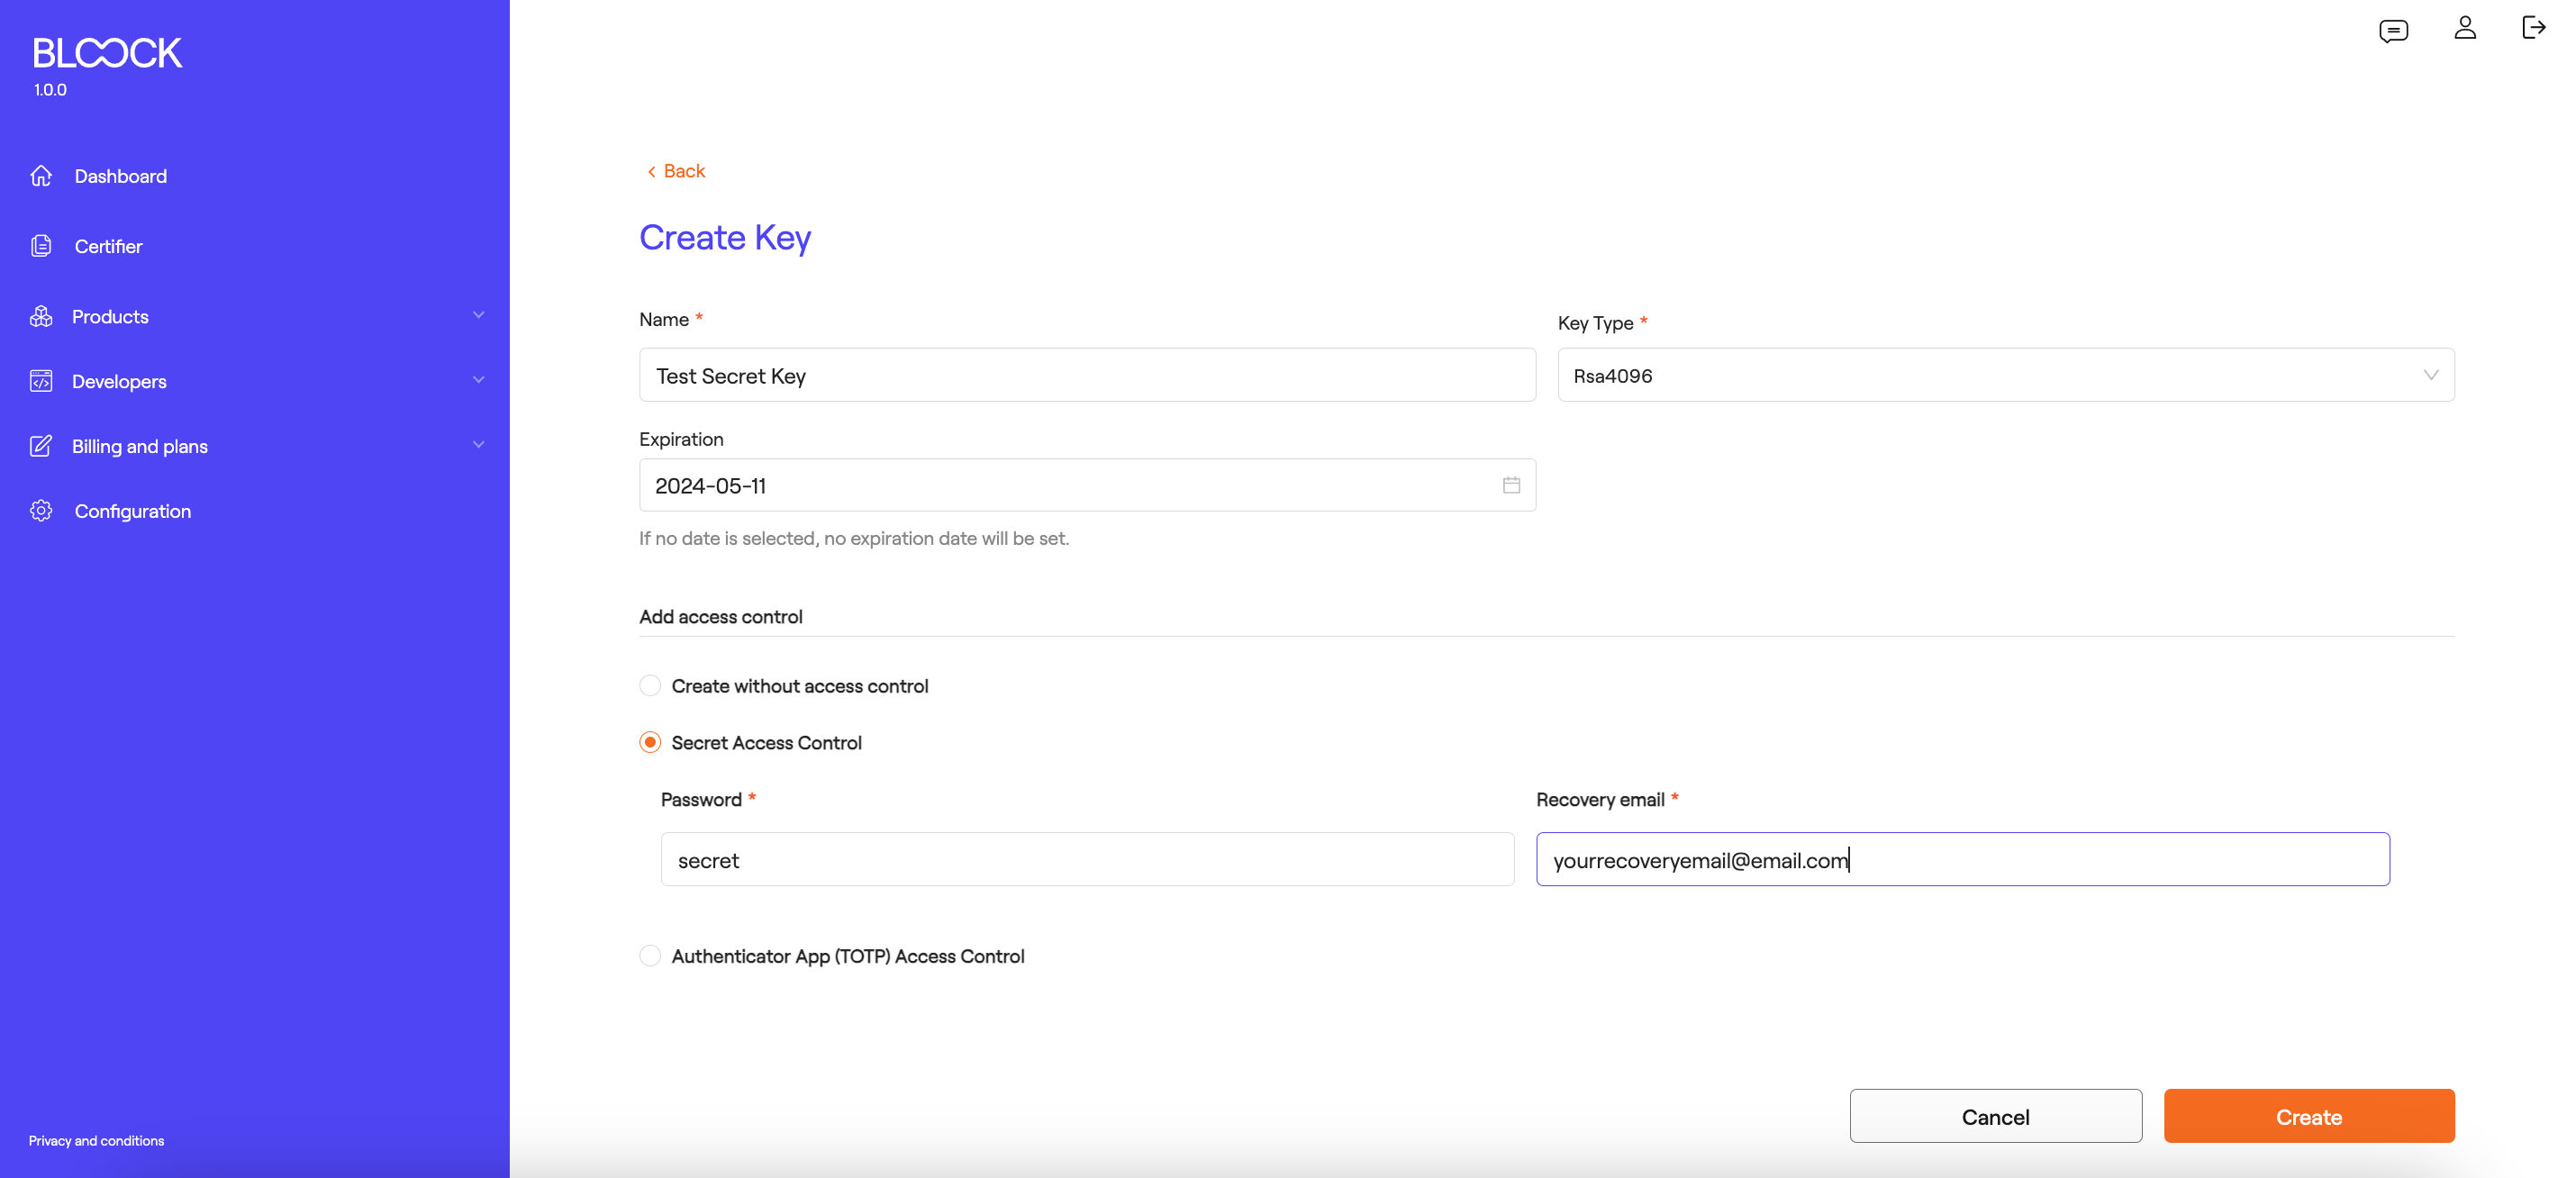
- Secret-based Authentication:
When selecting the Secret-based option, a form will appear with a secret field, which should be the code used for any operation with the access key and a field for a recovery email to retrieve the key if the user loses access to it.
Key and certificate details section:
In the top right corner of the key and certificate details page, you can find a dropdown menu to perform different actions, to add access control to this key, select the "+ Add access control" button.
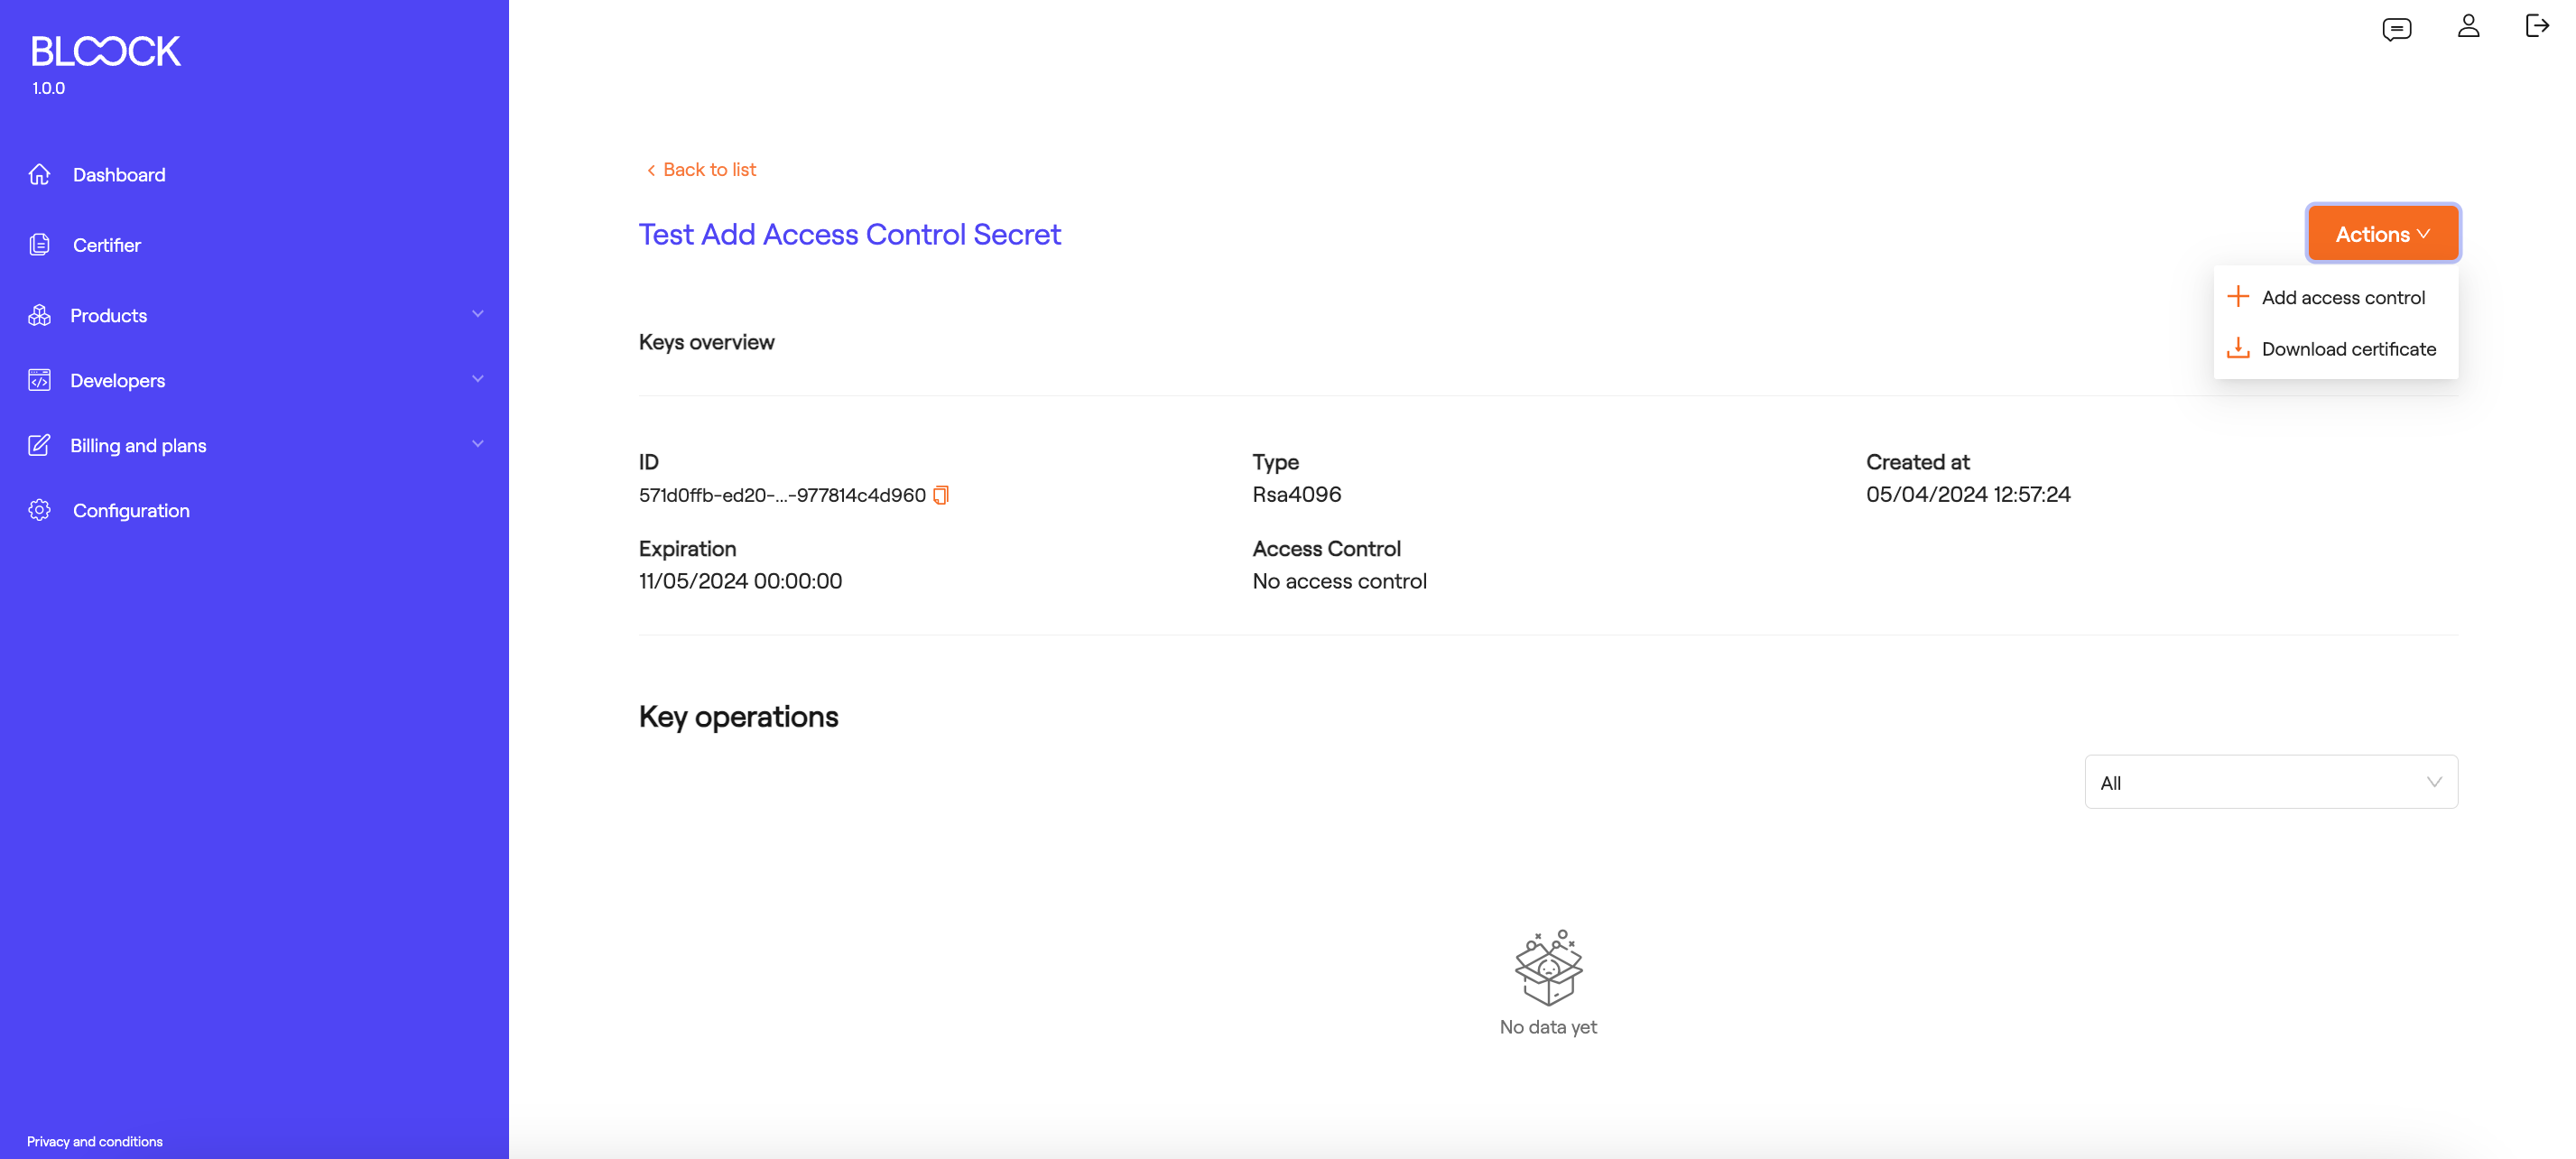
Once this functionality is selected, a dropdown will appear on the right side of the screen where you can choose the type of access control, either Secret or TOTP.
- Secret-based Authentication:
When selecting the Secret-based option, a form will appear with a secret field. This secret will work as the code used for any operation with the access key and a field for a recovery email to recover the key if you lose access to it.

- Using TOTP:
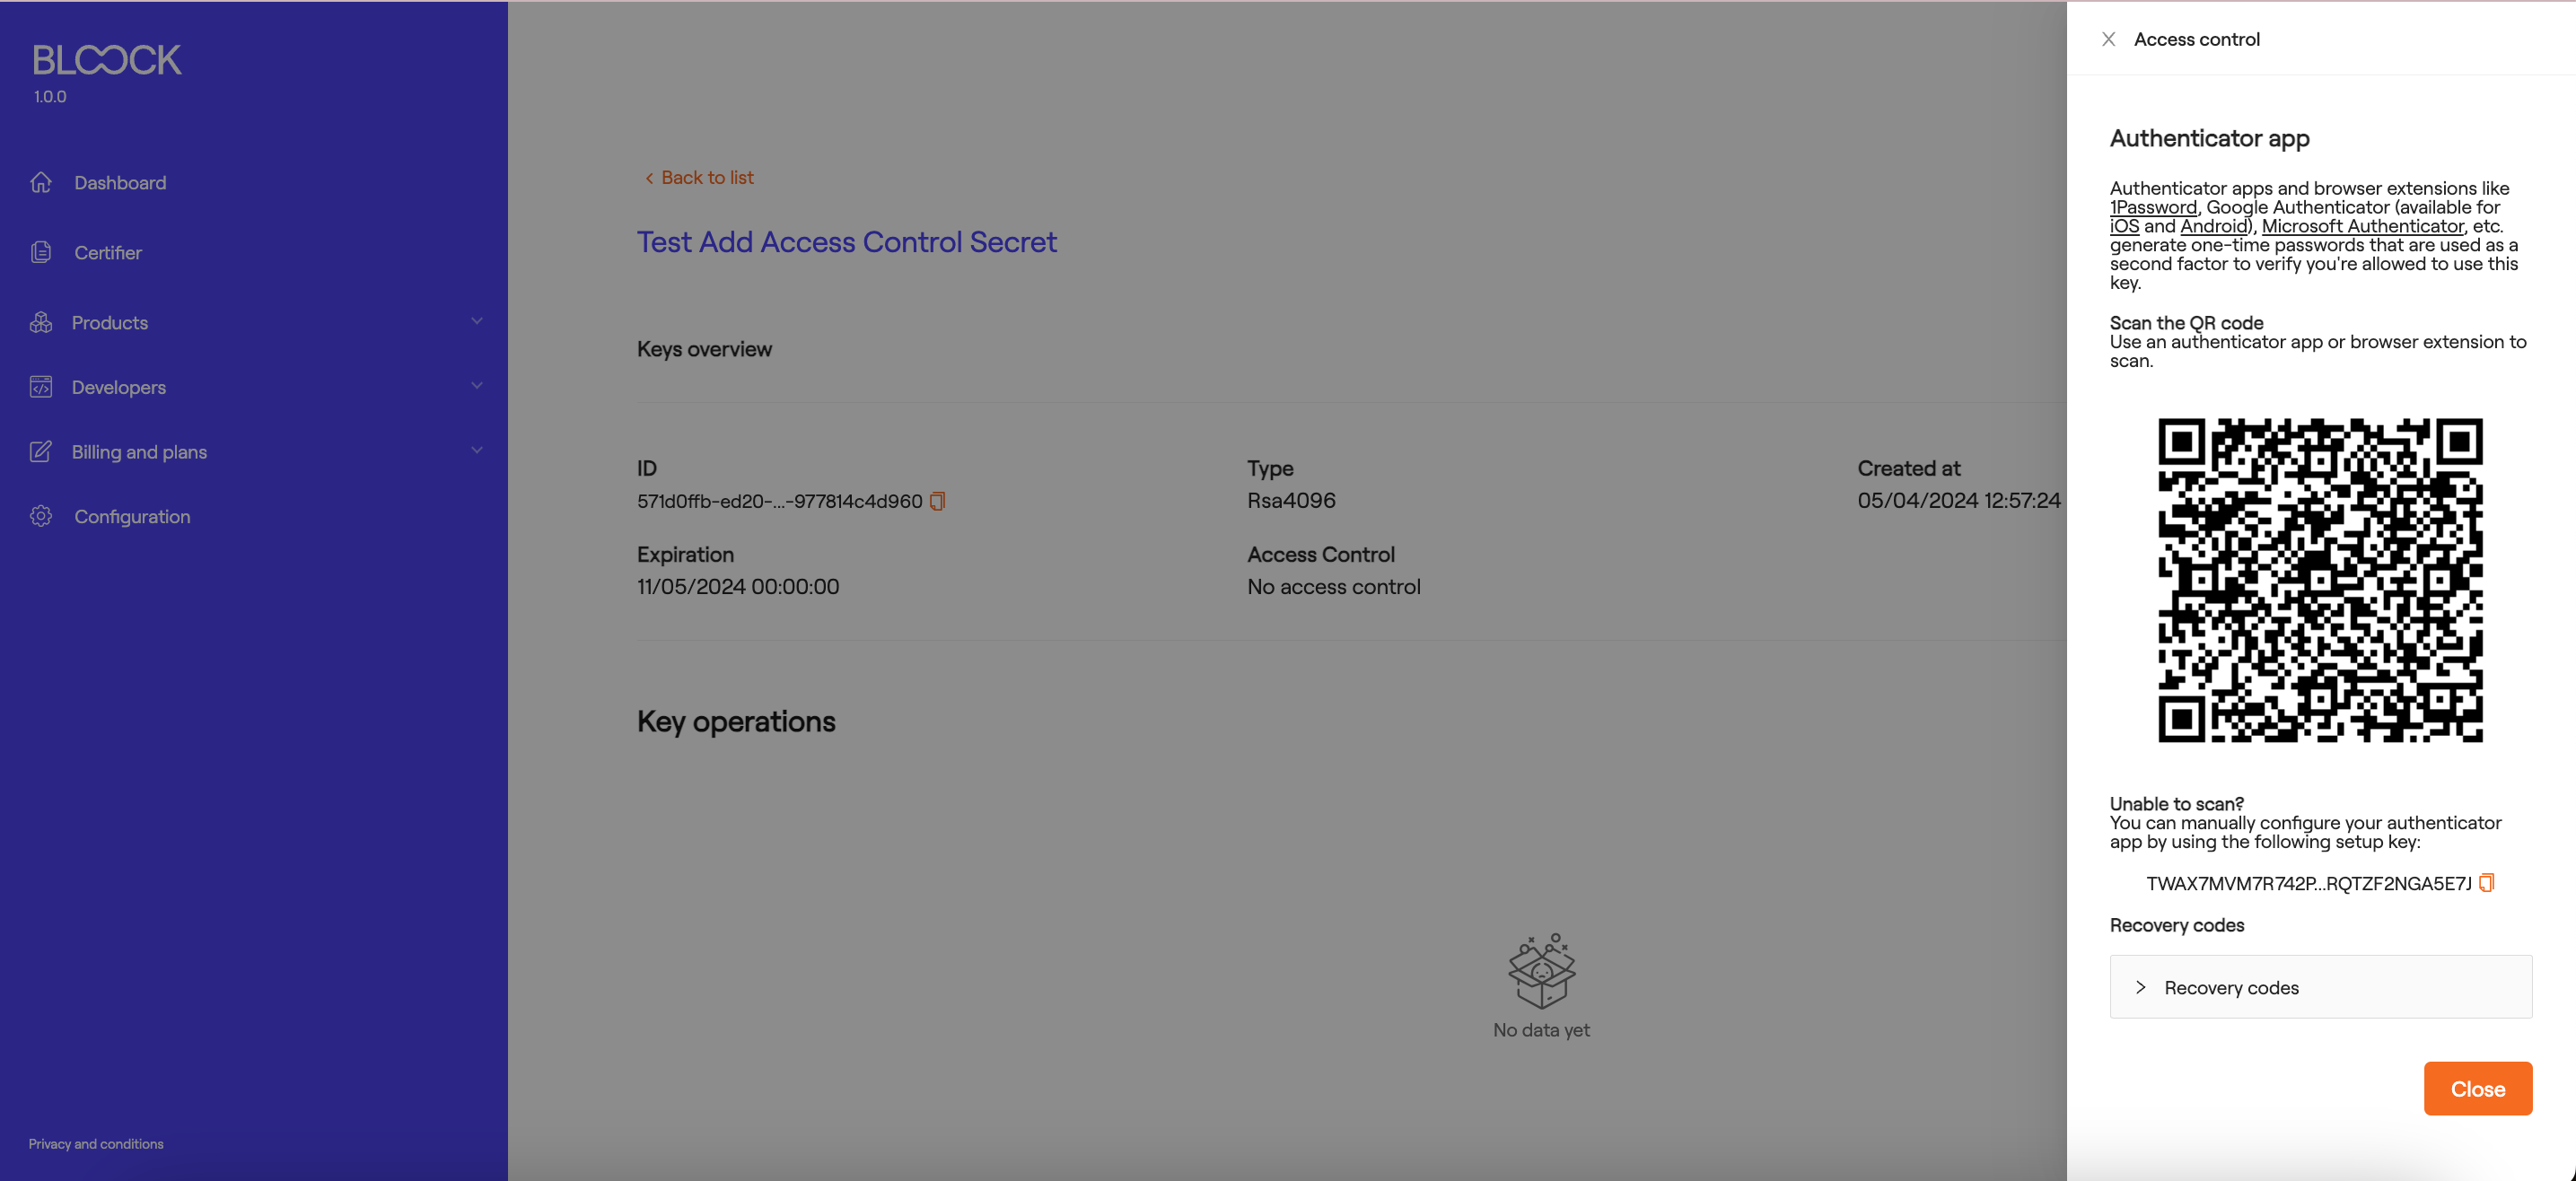
When selecting the TOTP option and confirming by clicking the "Next" button, information for operating with the key via access control will appear:
To utilize this functionality, you can use apps and browser extensions like 1Password, Google Authenticator, and Microsoft Authenticator, which generate one-time passwords that are used as a second factor to verify your access to this key.
Scan the generated QR code using any of the mentioned applications or manually enter the code provided at the bottom. Additionally, there are recovery codes in case the user loses access to the key.
Edit Access Control
If you wish to edit the access control of the key, select the "Edit Access Control" option from the dropdown menu on the key or certificate details screen. To proceed with the process, you will need to enter the "Secret" of the key if it is of the secret-based type.
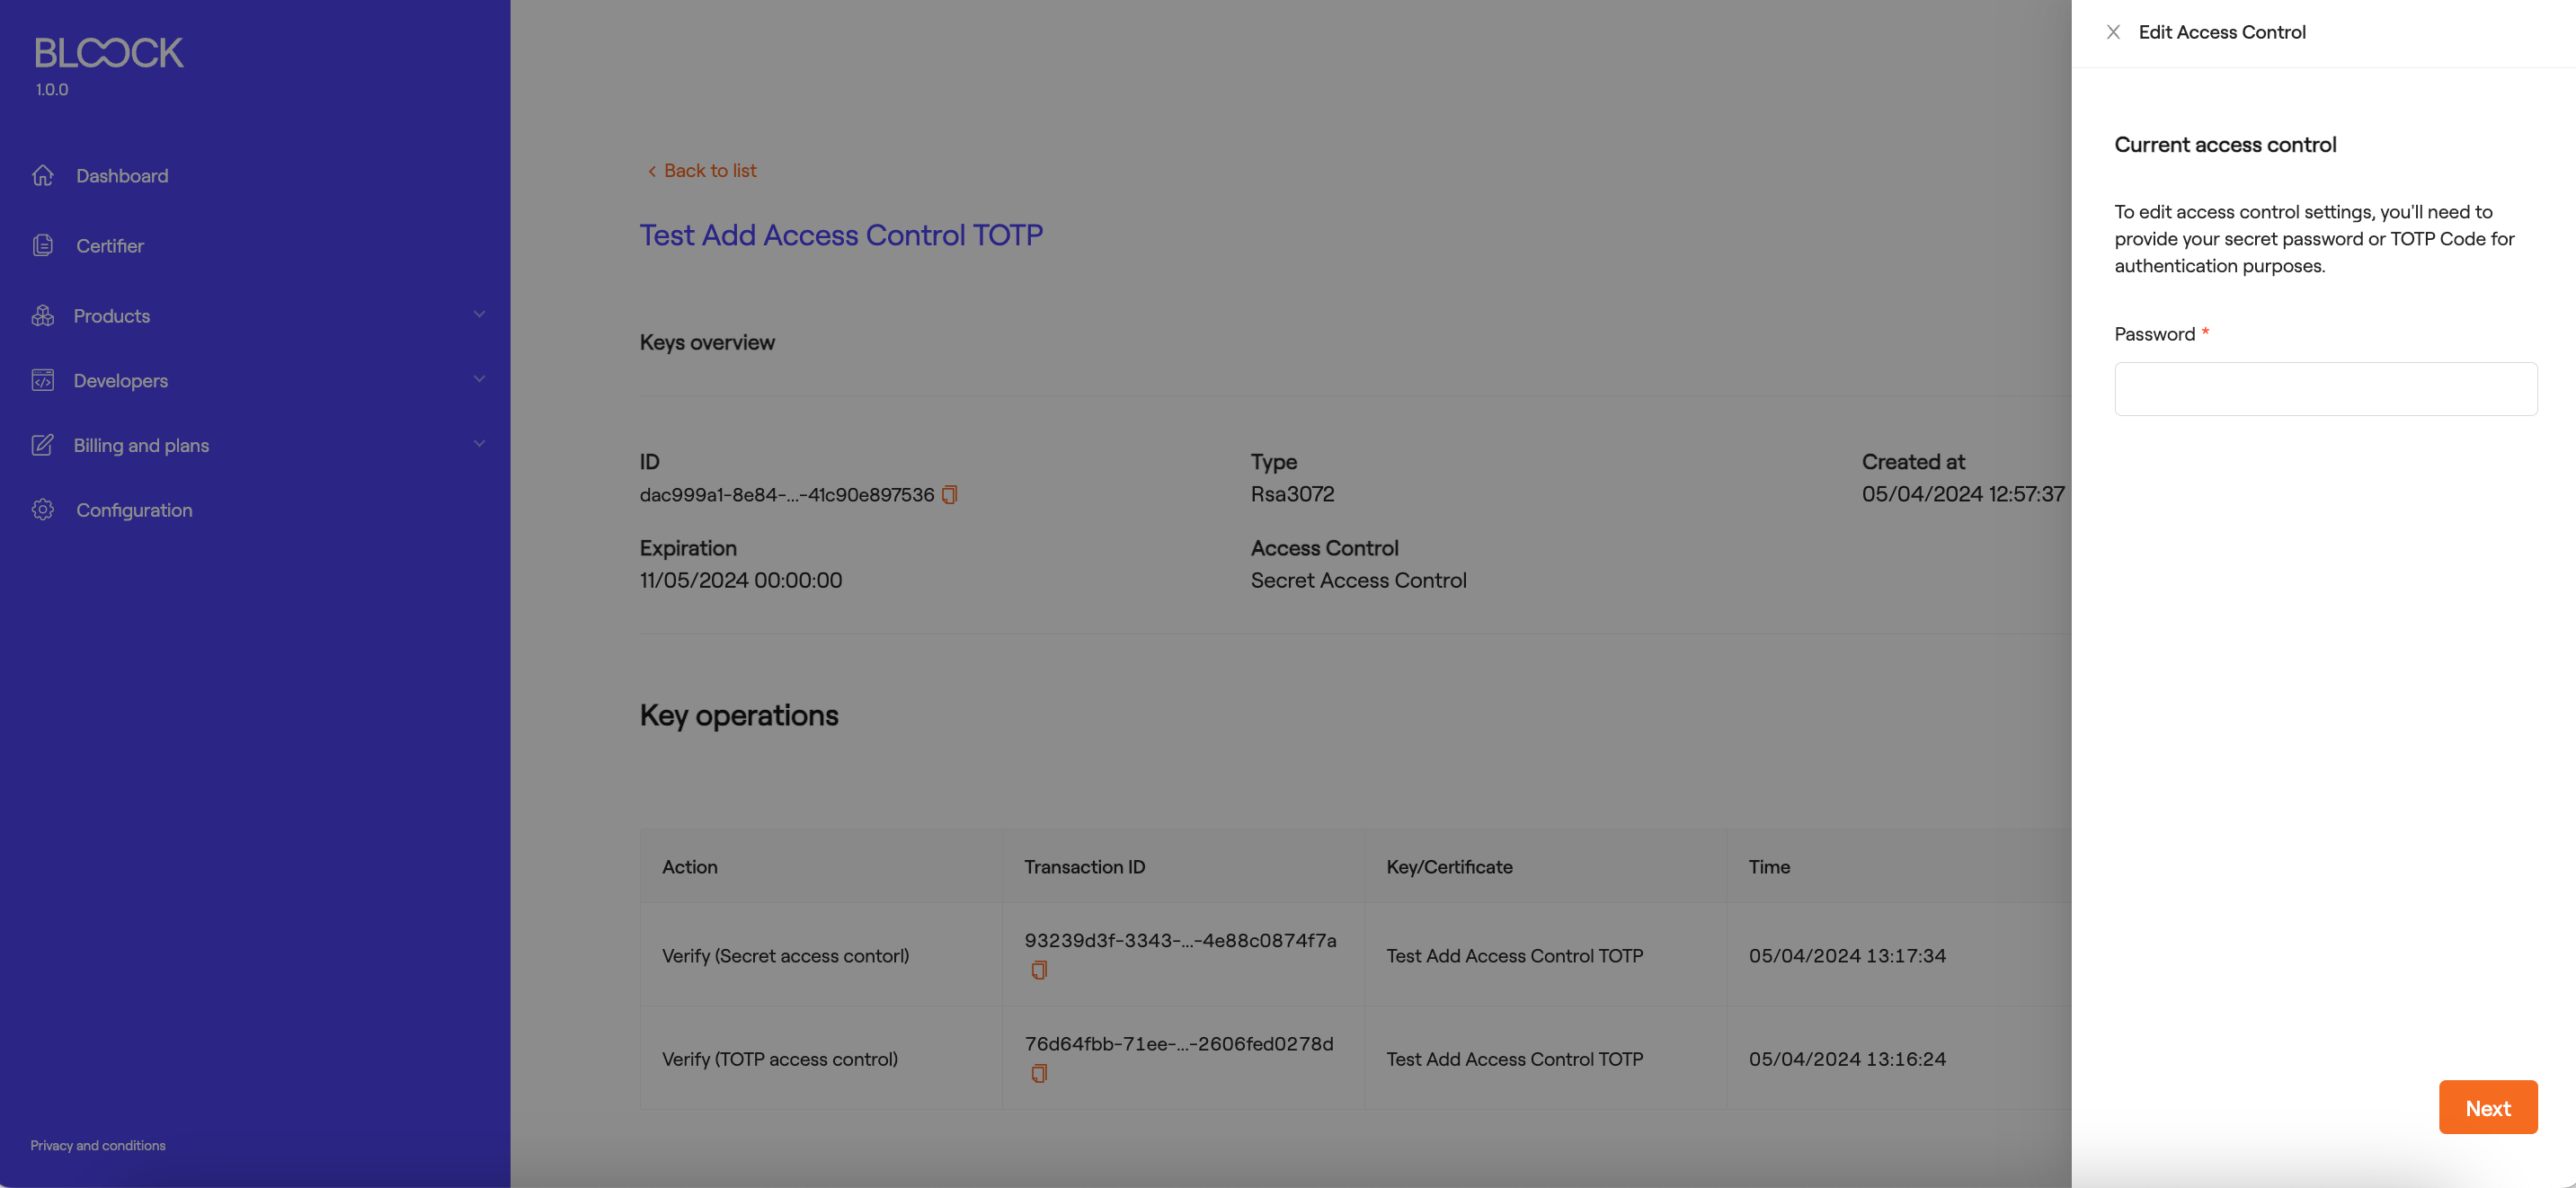
In the case of access control via TOTP, add the temporary code provided by the selected application.

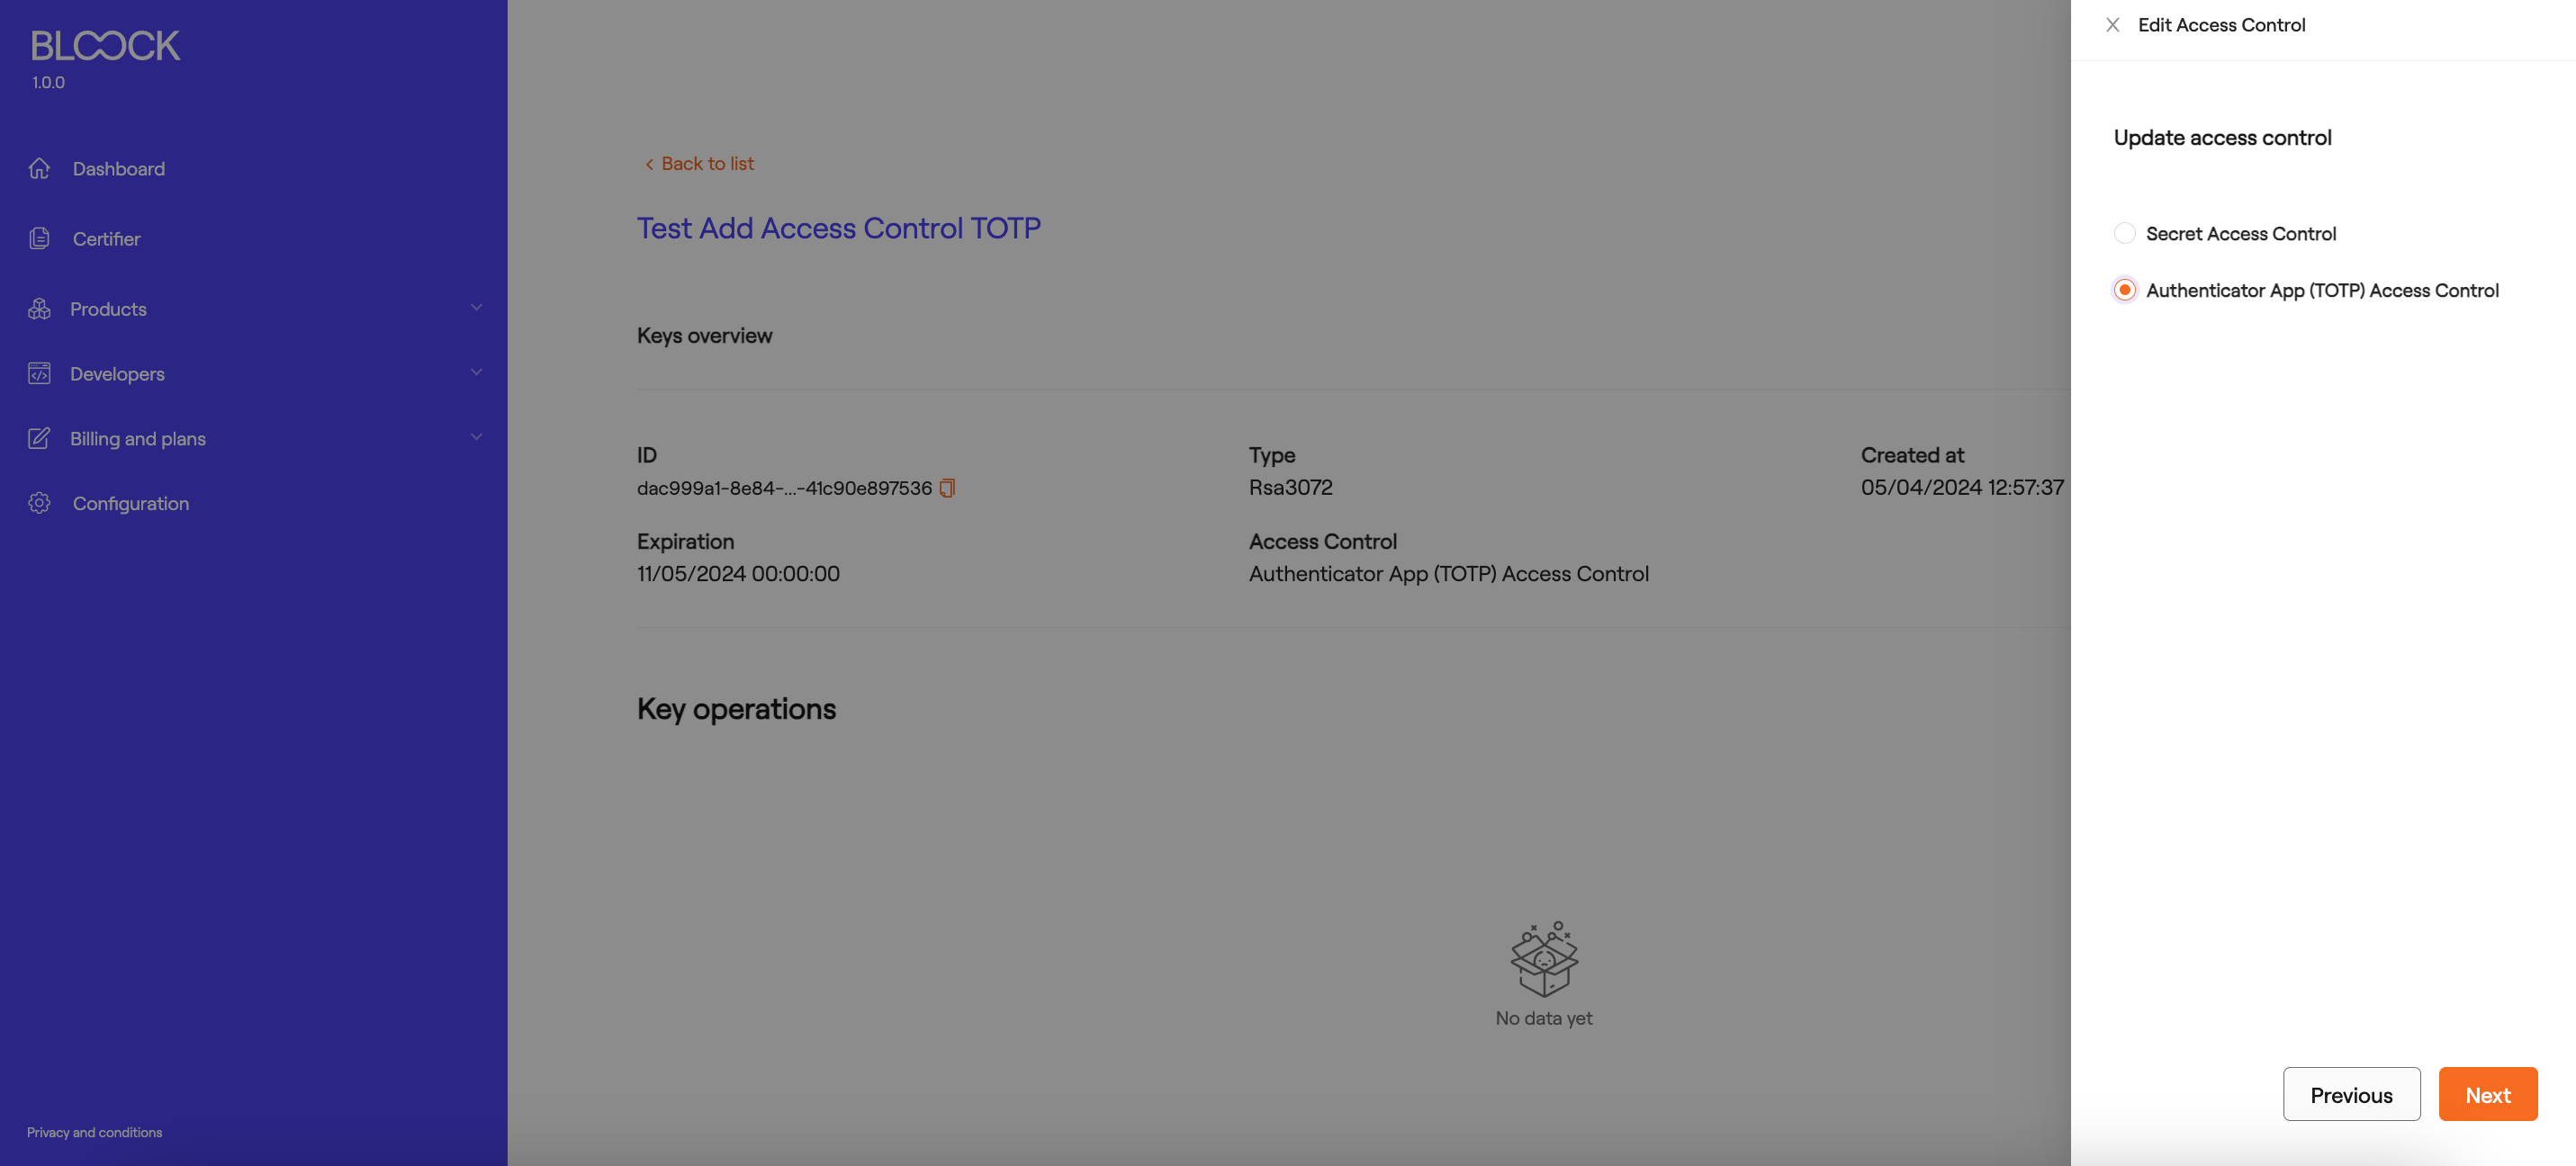
Next, you will select the new access control method, either secret or TOTP.

Reset Secret Password
If you want to change the secret of your key, you can select the "Reset Secret Password" option from the dropdown menu. Once you select this option, a window will appear for the change process, where you'll need to confirm that you want to proceed with this operation.
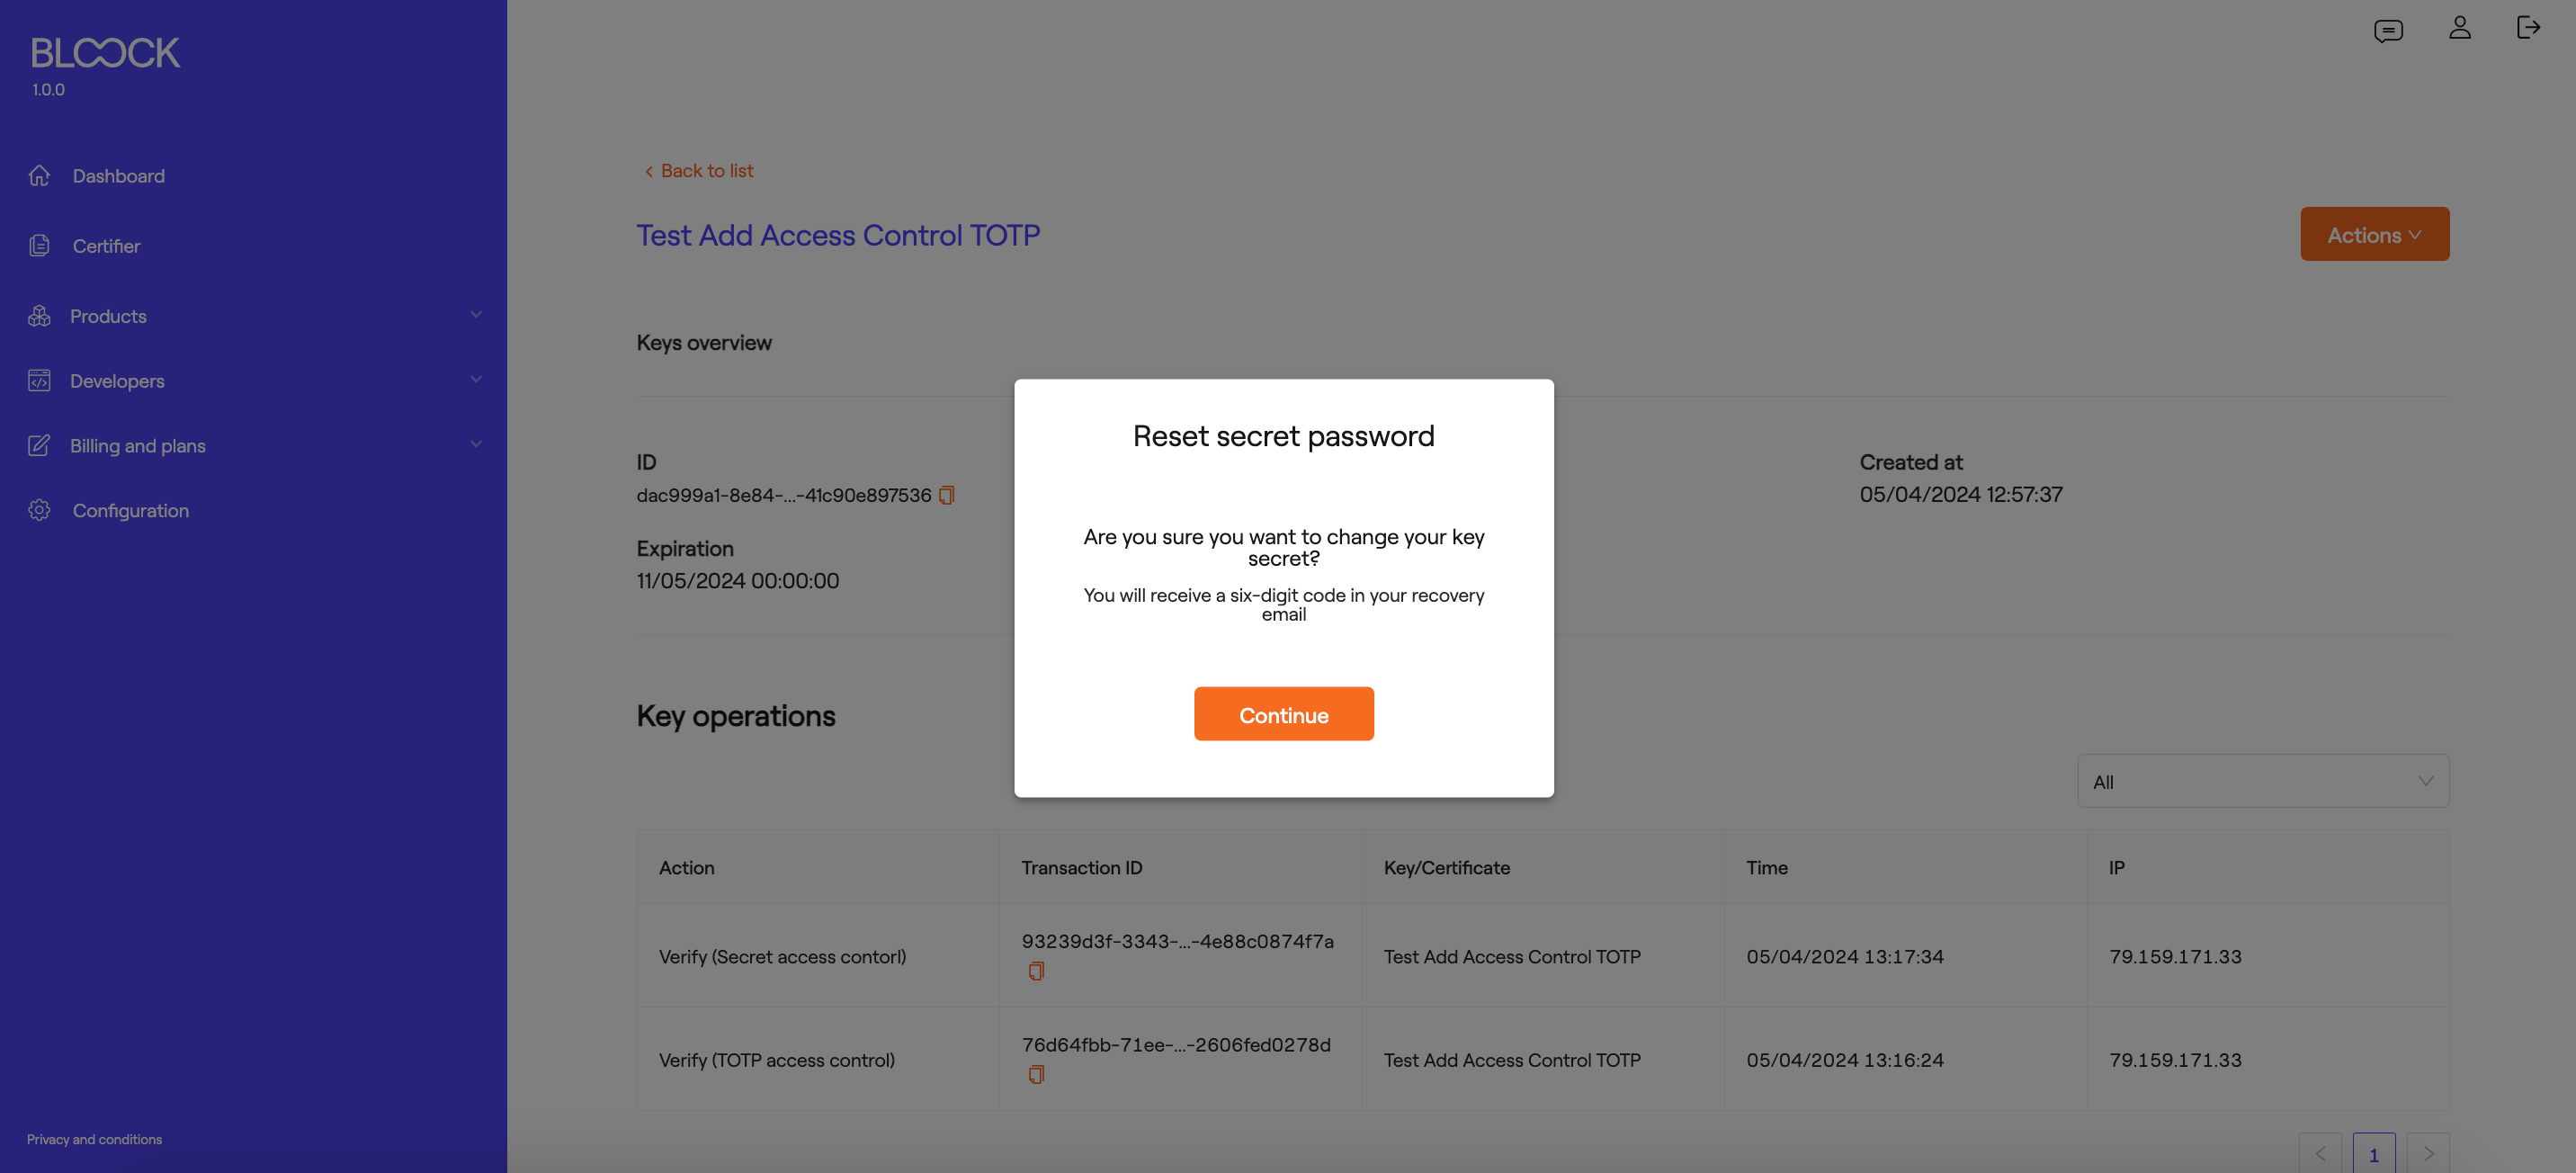
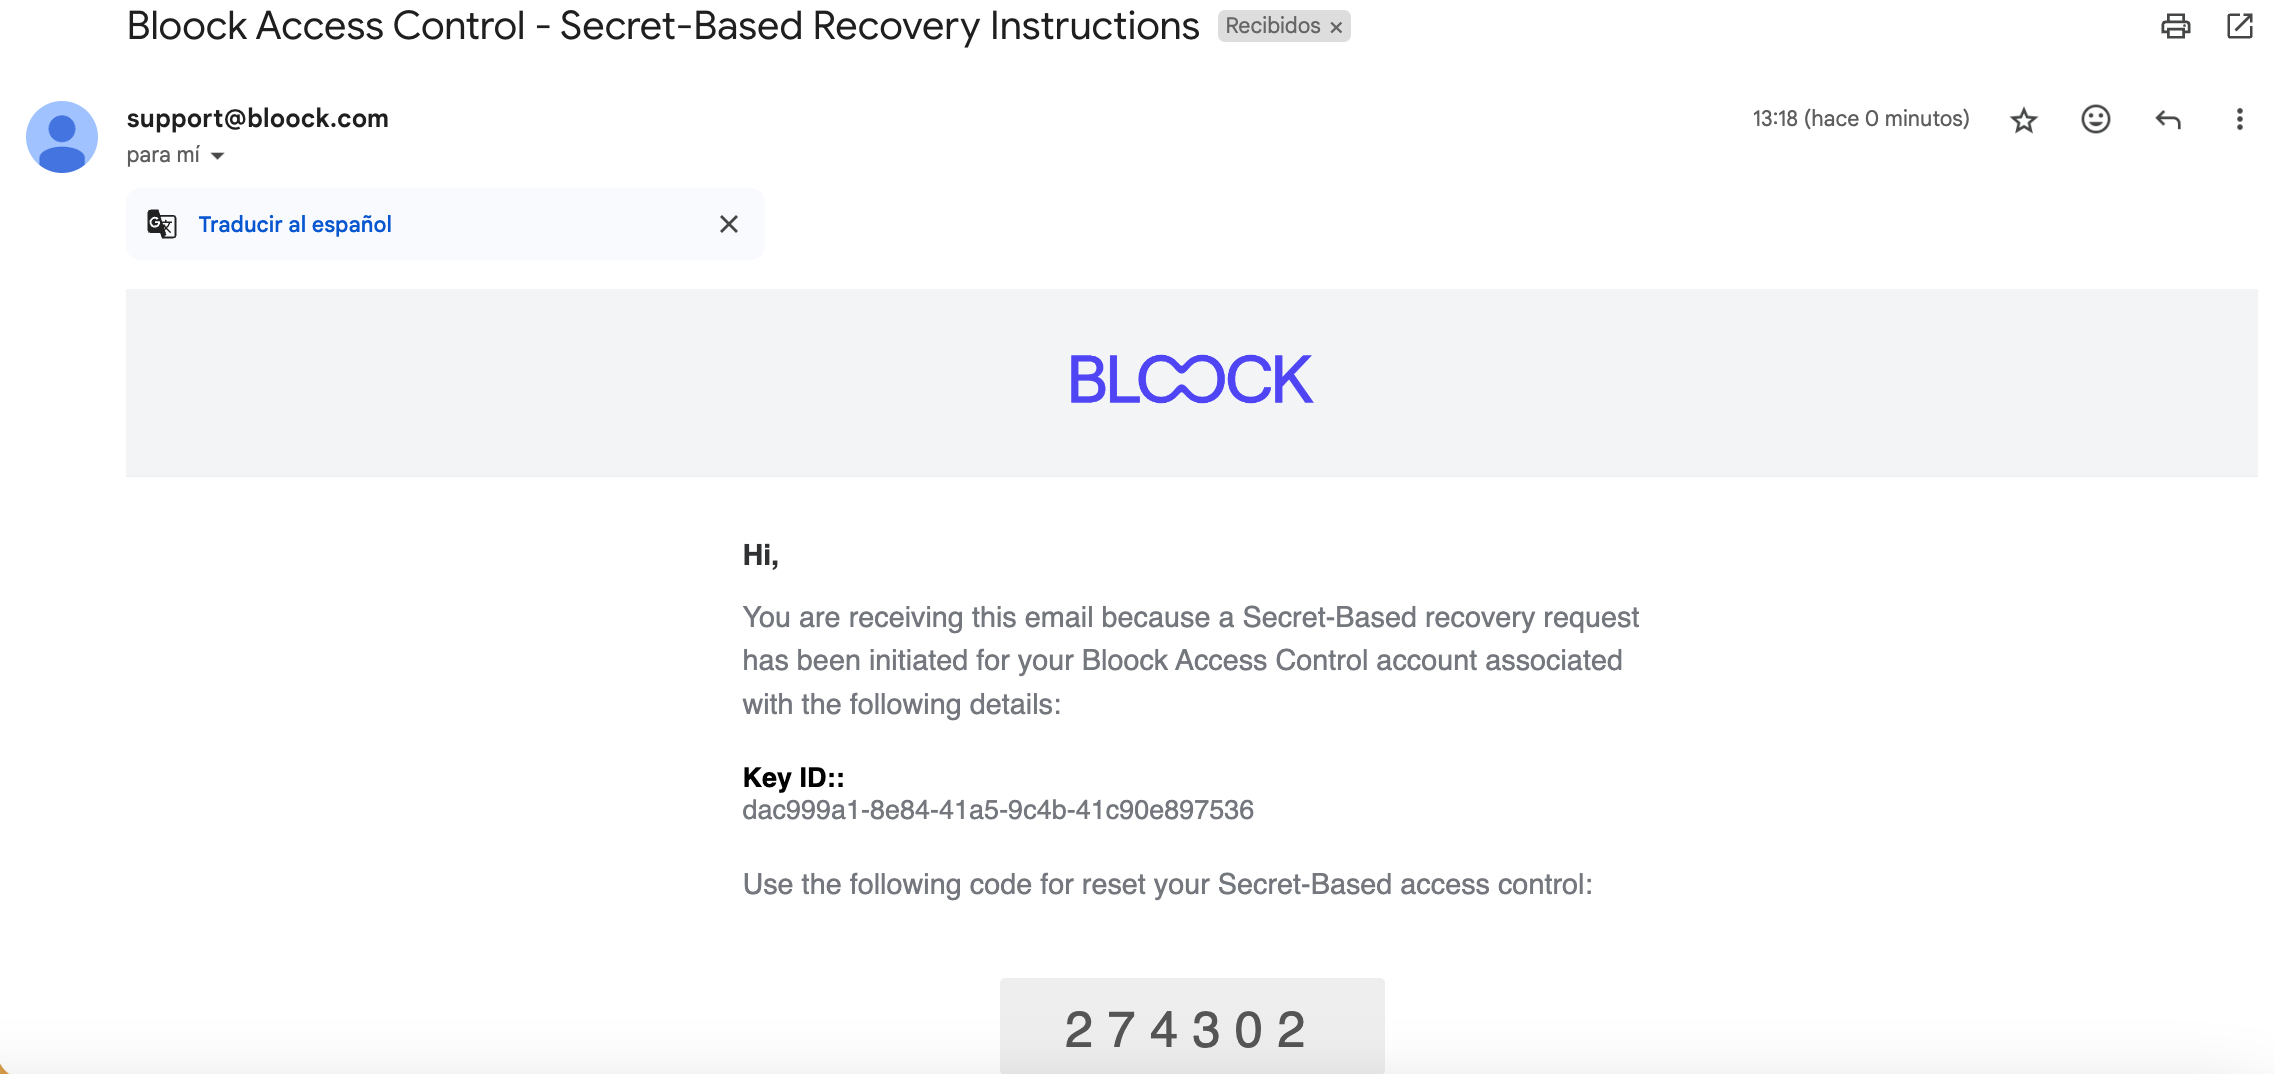
You will then receive a 6-digit code in your email to complete this operation.
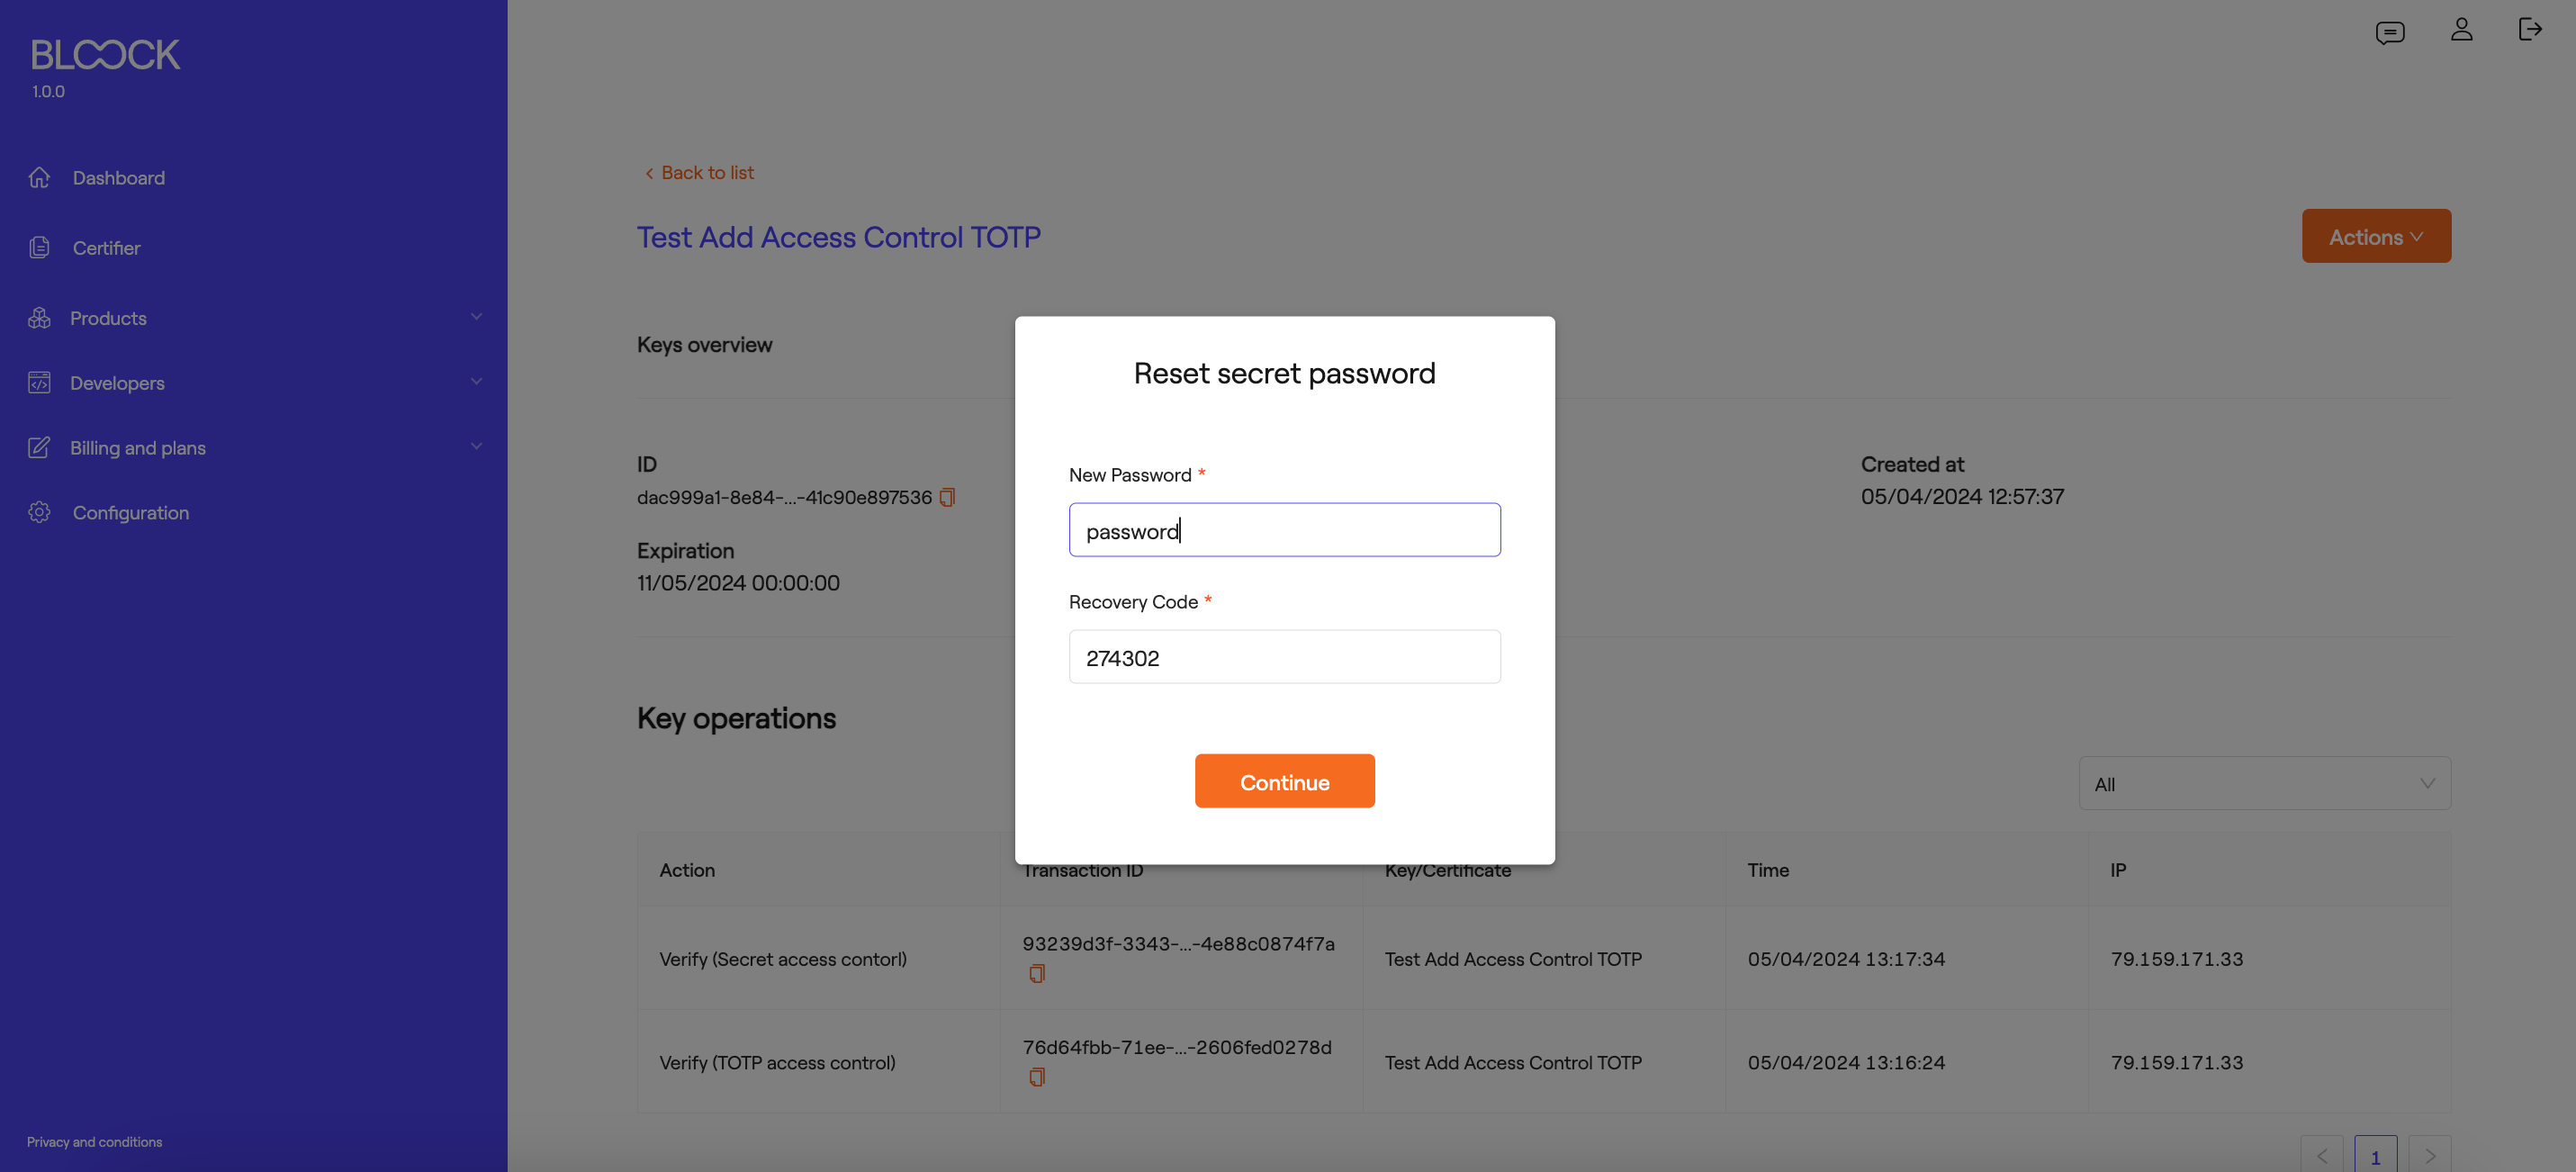
In the window's form, you'll find a field to input the new password and the received 6-digit code.
Operations
In the last tab of the Managed Keys section, we find the different signature operations carried out by the user in a general manner, along with information regarding them: The type of action (Signature, Verification, Encryption, and Decryption), the transaction ID, the name of the key or certificate used, the date of the operation, and the IP address where this operation took place.
