Certifier
You can learn more about Certifier here or watch a demonstration of its use through our YouTube channel.
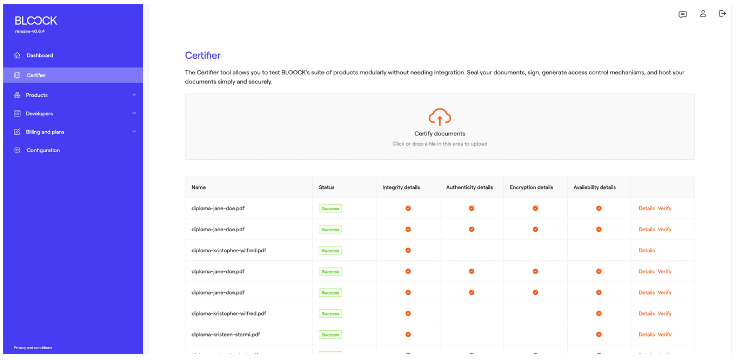
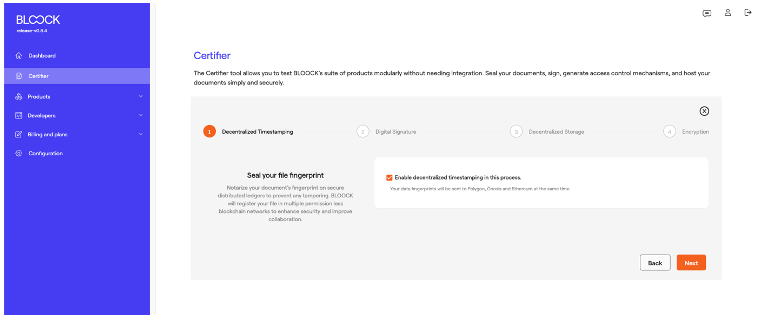
The Certifier tool allows you to test BLOOCK's suite of products without needing integration. Seal your documents, sign, generate access control mechanisms, and host your documents simply and securely.
This is the latest version of the Certifier tool, designed for visual testing. It allows users to upload files and perform modular testing across multiple BLOOCK products without the need for integration via SDK or API.
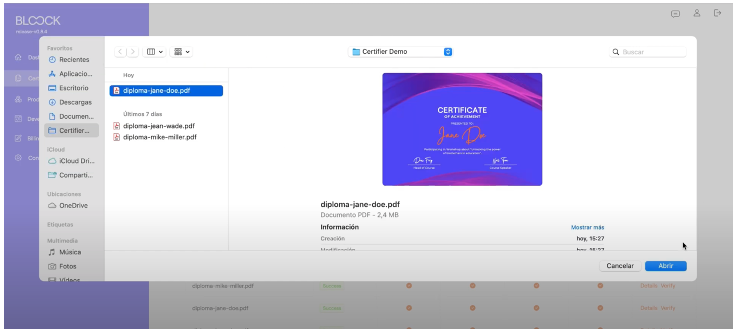
To get started, users can upload or drag one or multiple files to start the process.
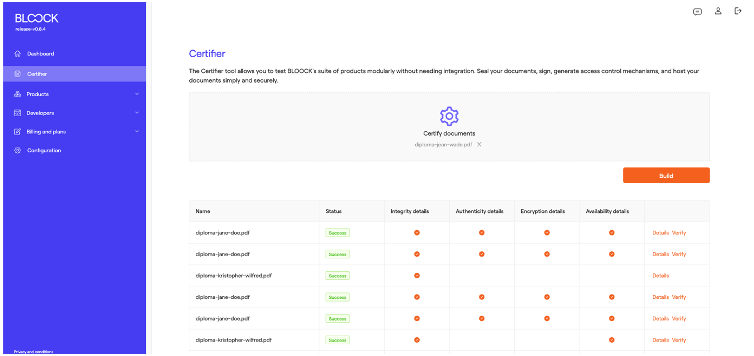
Once the file is selected, press the build button to continue the process.
Below is a form with several steps that allow users to customize different products to achieve the desired result.
In the first step of the process, users can select the checkbox to enable the Decentralized Timestamping product. Marking this checkbox ensures the integrity of the document, preventing subsequent modifications. This process involves registering the "hash" or cryptographic representation of the file on multiple blockchain networks—specifically on Polygon, Gnosis, and Ethereum. Press to next button to continue the form.
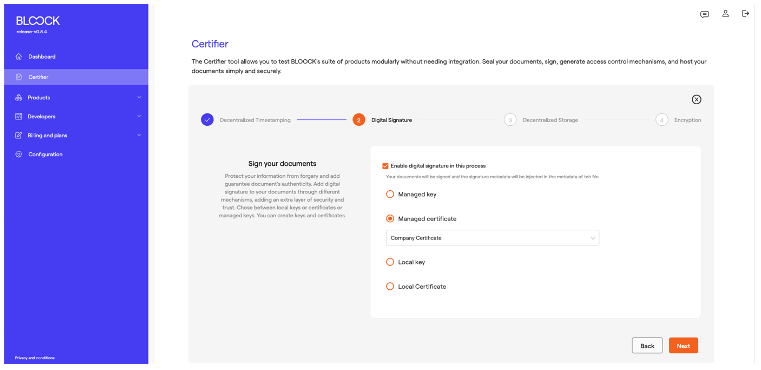
Moving on to the second step, users can enable Digital Signatures to ensure the authenticity of the files. If you want to sign the document, check the box. At this point, you must select if you want to sign with Managed key, Managed certificate, Local key or Local certificate.
In this case, the system inserts metadata into the file to validate the signature, resulting in a file different from the original. Users can utilize various mechanisms for signing in this process, either with managed or local keys and managed or local certificates. Keys or certificates can be created or imported from the "Managed keys" tab in the Products section of the dashboard.
In the third step of the process with Decentralized Storage, users can activate the option to save the files to ensure their availability. If this option is selected, the system can generate an automatic validation link.
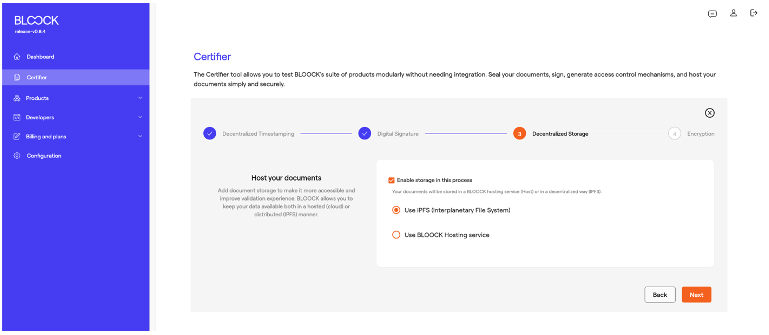
Two options are available: through distributed storage (in this case, IPFS), allowing high availability, and centralized hosting offered by BLOOCK
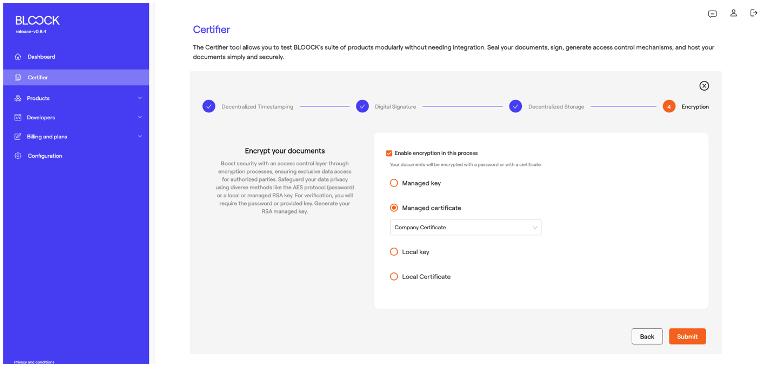
The final step of the process involves users controlling access through Encryption. This functionality adds a layer of privacy, allowing only users with the appropriate permissions to view the information of the encrypted document. At this point, you must select if you want to sign with Managed key, Managed certificate, Local key or Local certificate. This process uses the same mechanisms as those employed in digital signatures.
Once you've completed the necessary setup steps, you can finalize the process by following these straightforward instructions. The system will then proceed to process the selected documents.
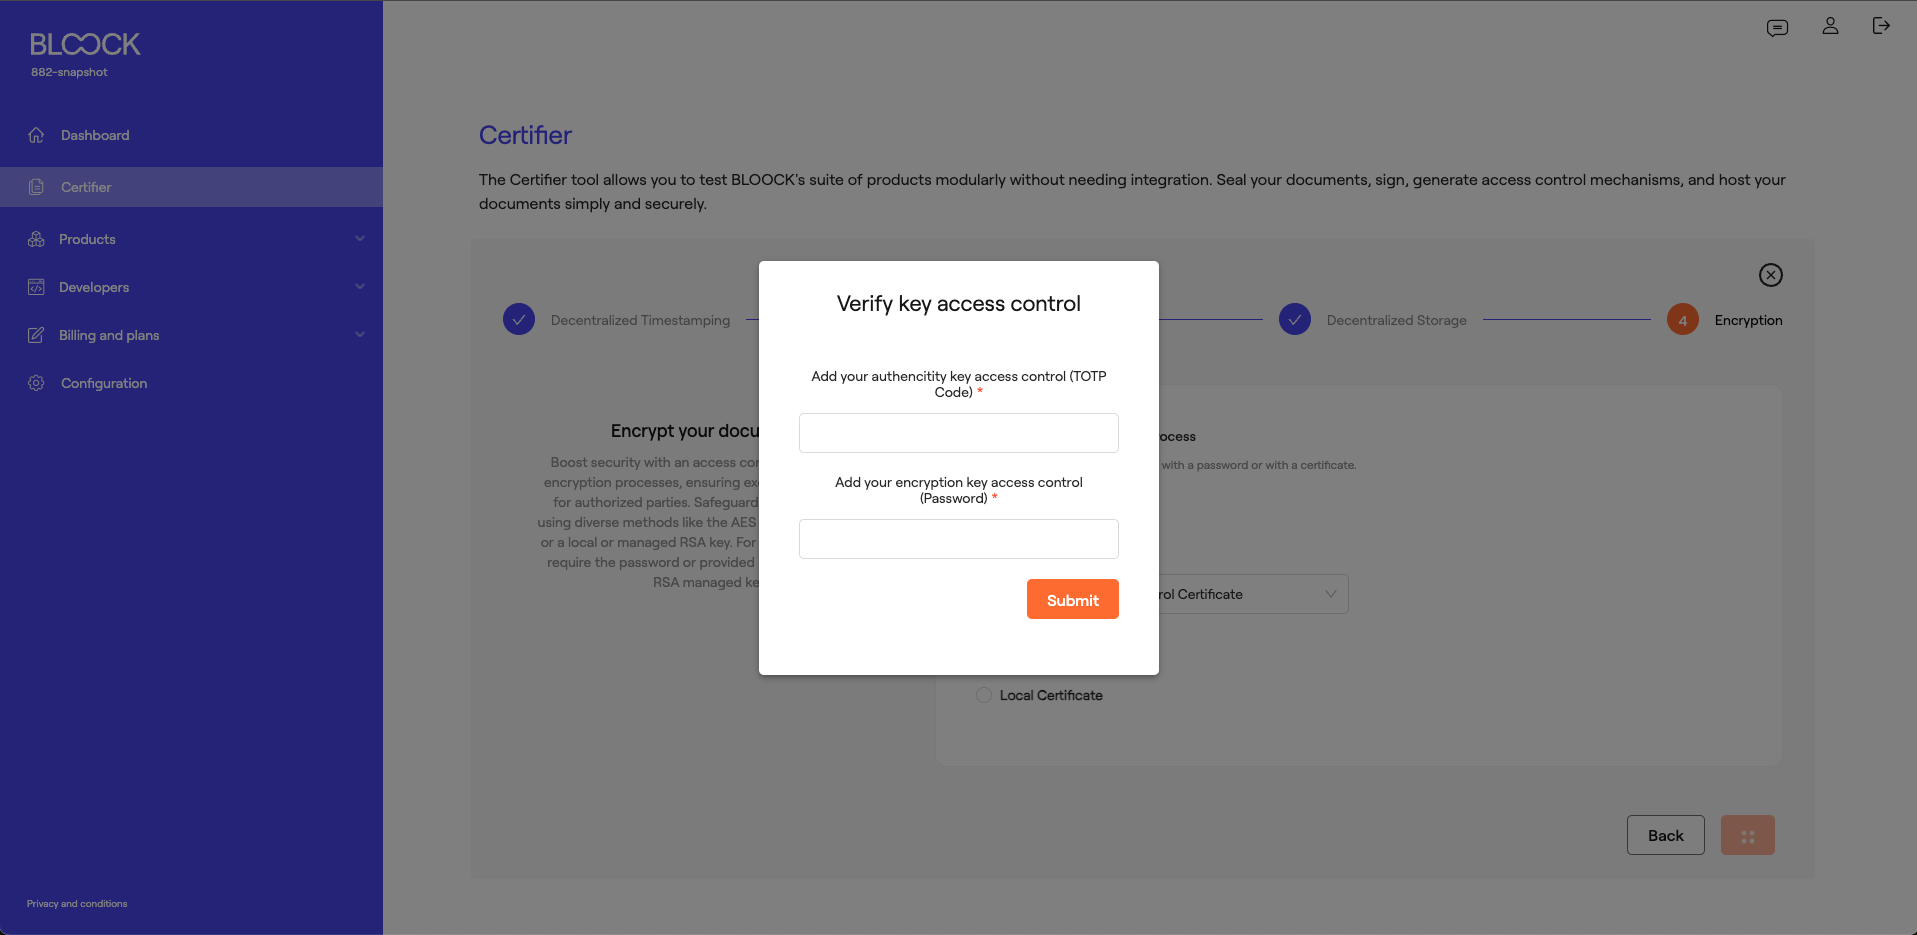
If the user signs and/or encrypts managed keys or certificates assigned access control, you should add the corresponding code after completing the process.
Depending on the products activated during the process and where a key with access control has been used, one or two fields will appear to complete: one for signing and the other for encryption.
If it's a key with access control via TOTP, the user should enter the temporary code displayed in the authentication app. The user should add the relevant password if access control is done through a Secret.
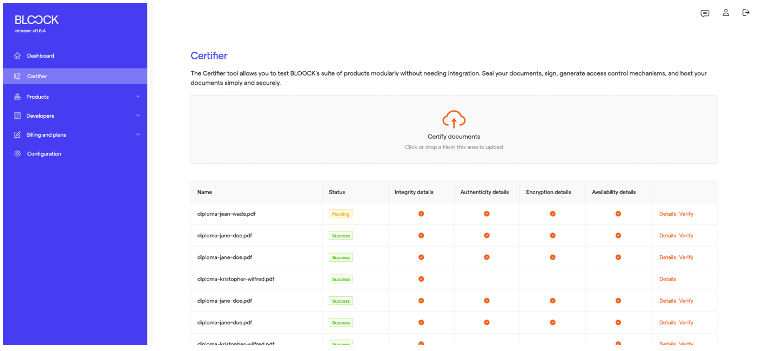
Files with a decentralized timestamp undergo a status transition from "pending" to "success" after being registered on the blockchain—an operation typically taking approximately one minute. Details screen and Verify link become available upon reaching the "success" status.
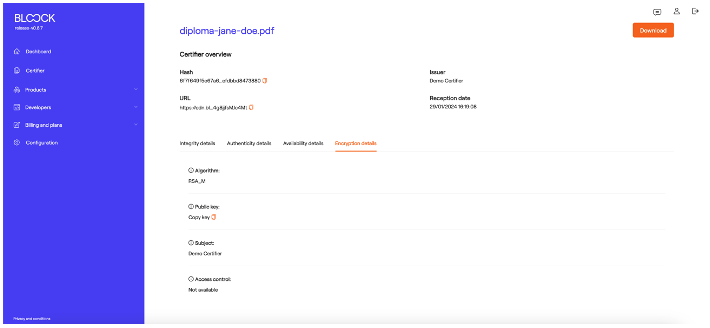
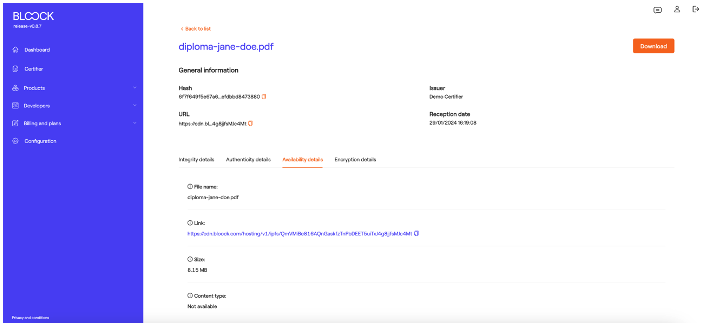
Select details and a page will open with general information. This screen has a download button and specific information about the entire process. Below the general information, users can see a tab with details about every product selected product.
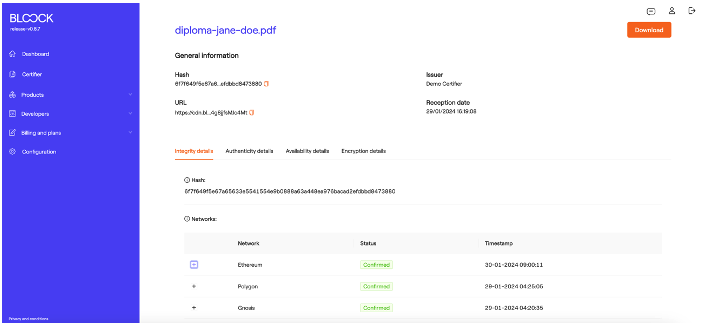
For instance, the "Integrity Details" tab furnishes information about hash and transactions on the networks, the timing of these transactions, and the link to the transaction viewer of that specific network.
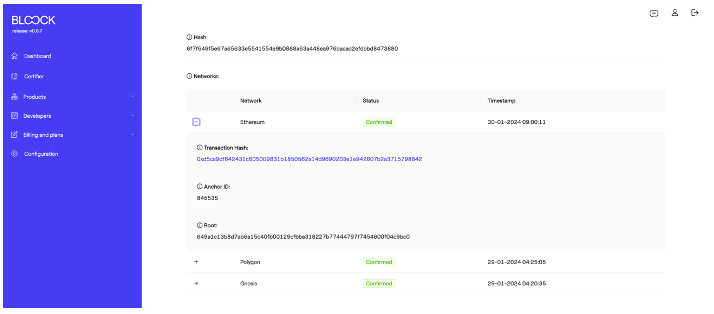
For example, in the Ethereum network with the confirmed state and timestamp, more detailed information such as the transaction hash, anchor ID, and root will appear.
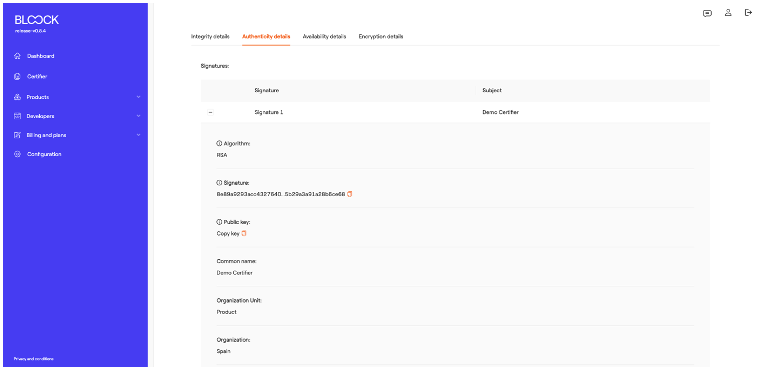
The "Authenticity Details" tab discloses the algorithm used in the digital signature process and specifics regarding the key or certificate utilized.
In the "Availability Details" tab, one can locate the link to the CDN, the file size, and other pertinent details.
The last one, the "Encryption Details" tab, gives information about the encryption method and the key or certificate used in the process.